Finished project : The Lou Box top by Sew Diy

inthefolds_louboxtop_1

Late last year, Beth from Sew DIY and I had the great idea of doing a little pattern swap. We had been swooning over each others patterns on Instagram, so thought it was about time we did something about it. 

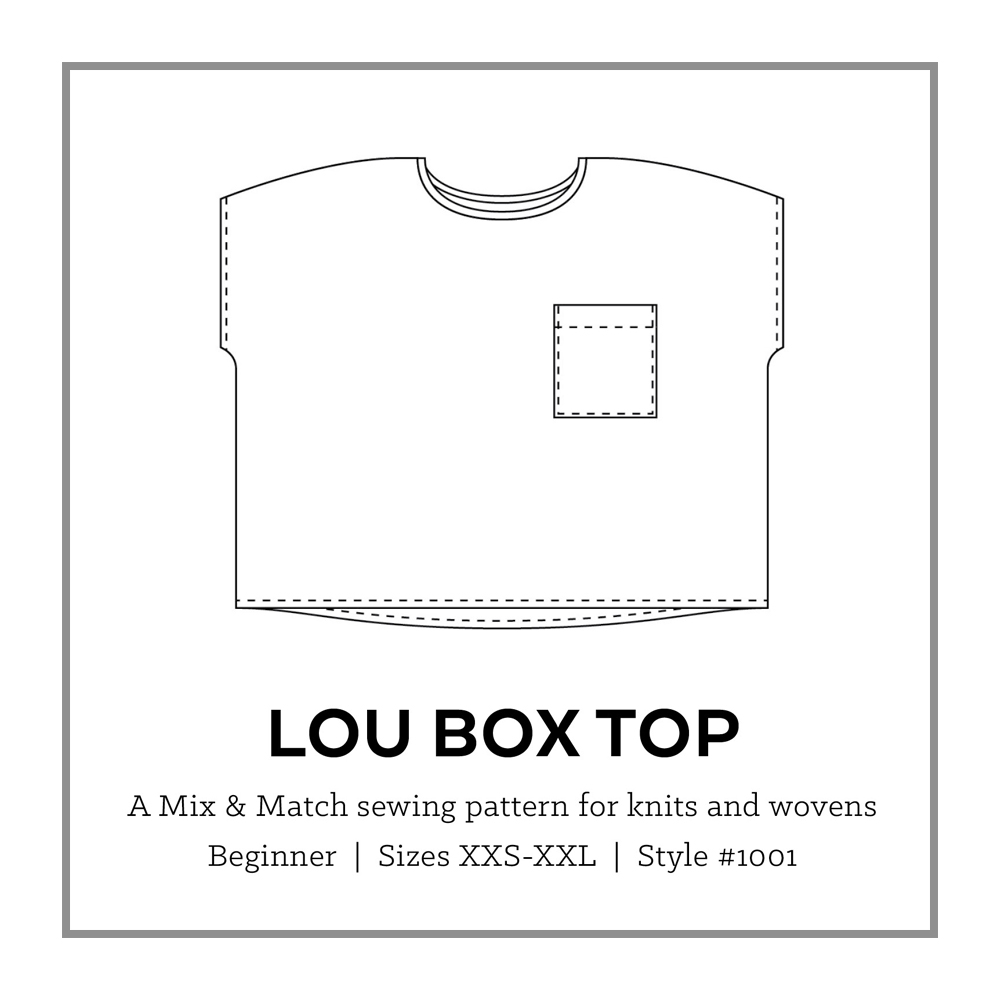
Beth has a couple of patterns to choose from in her shop, but after a little deliberation, I decided to go with the Lou Box Top as I noticed there was a bit of a gap in my wardrobe for nice easy basics that I can wear to work, and thought that I could use the Lou Box to fill the gap. 

I love to use stash fabric, whenever possible, so decided to use some left over cotton linen that I had bought from The Fabric Store for a dress I had made for a friend at the beginning of the summer. 

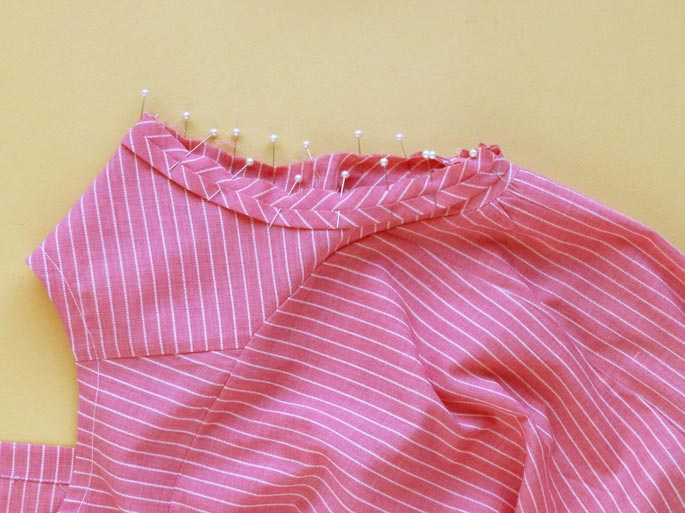
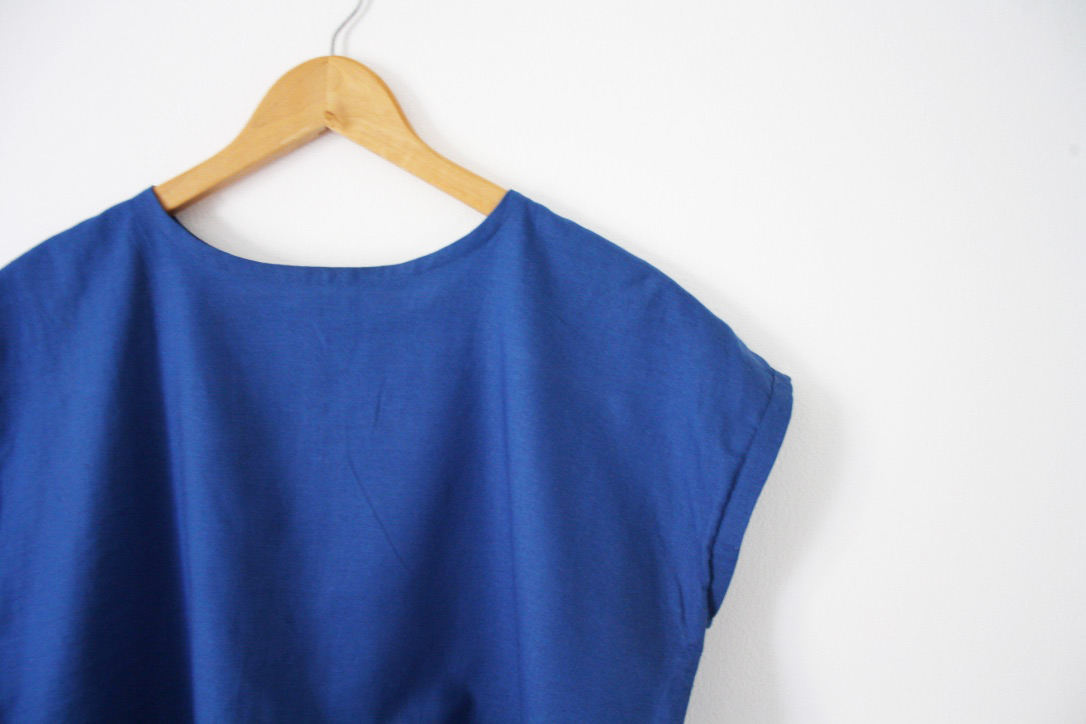
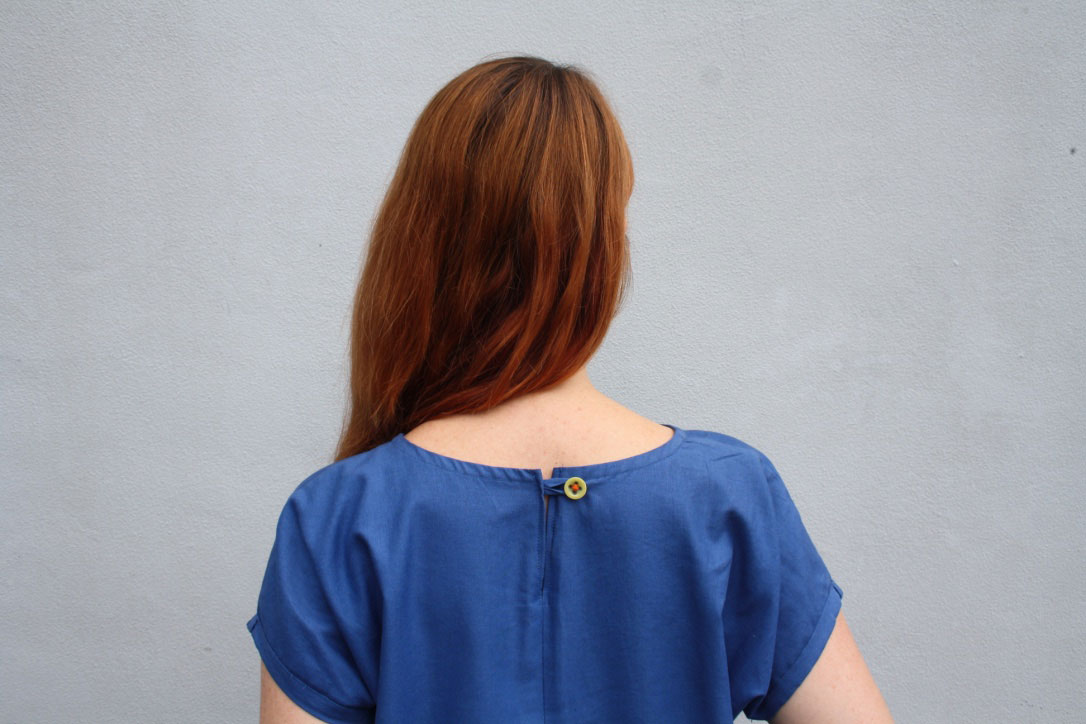
What I liked straight away about the Lou Box, when I opened the pattern file, was all the options. There are two neckline options (a crew neck and a scoop neck) and three hem options (straight, dip or curved) and can be made in woven or knit (or a combination of the two).

I couldn't make up my mind between the straight hem and the dipped hem, but thought I could go ahead and make the dipped hem, and if I didn't like it, I could just cut the hem straight once the top was assembled. I ended up printing and cutting all the options available in the pattern, so that I have them ready to go  for next time (and there will definitely be a next time).

inthefolds_louboxtop_2

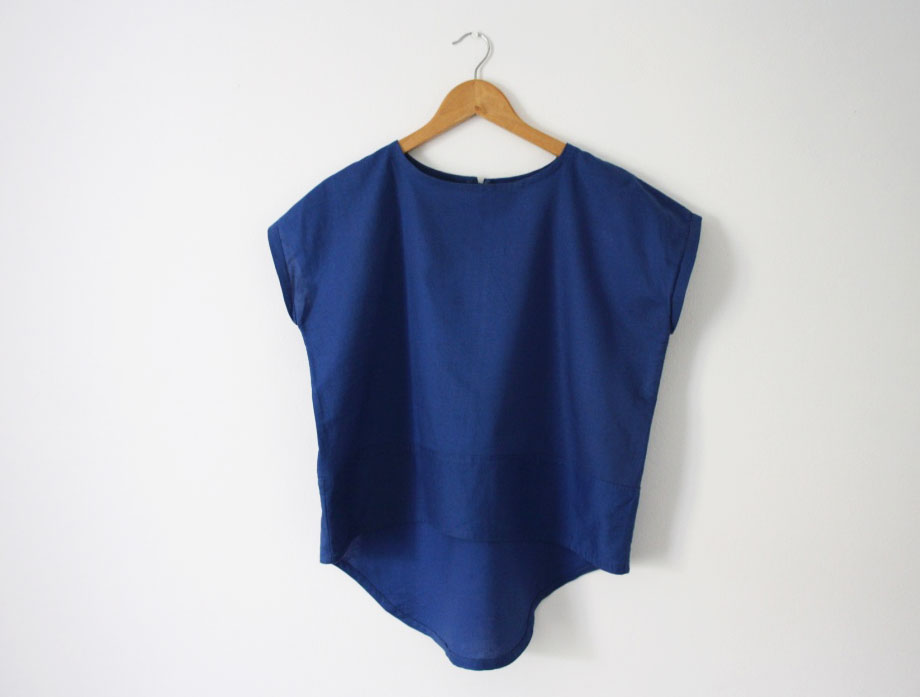
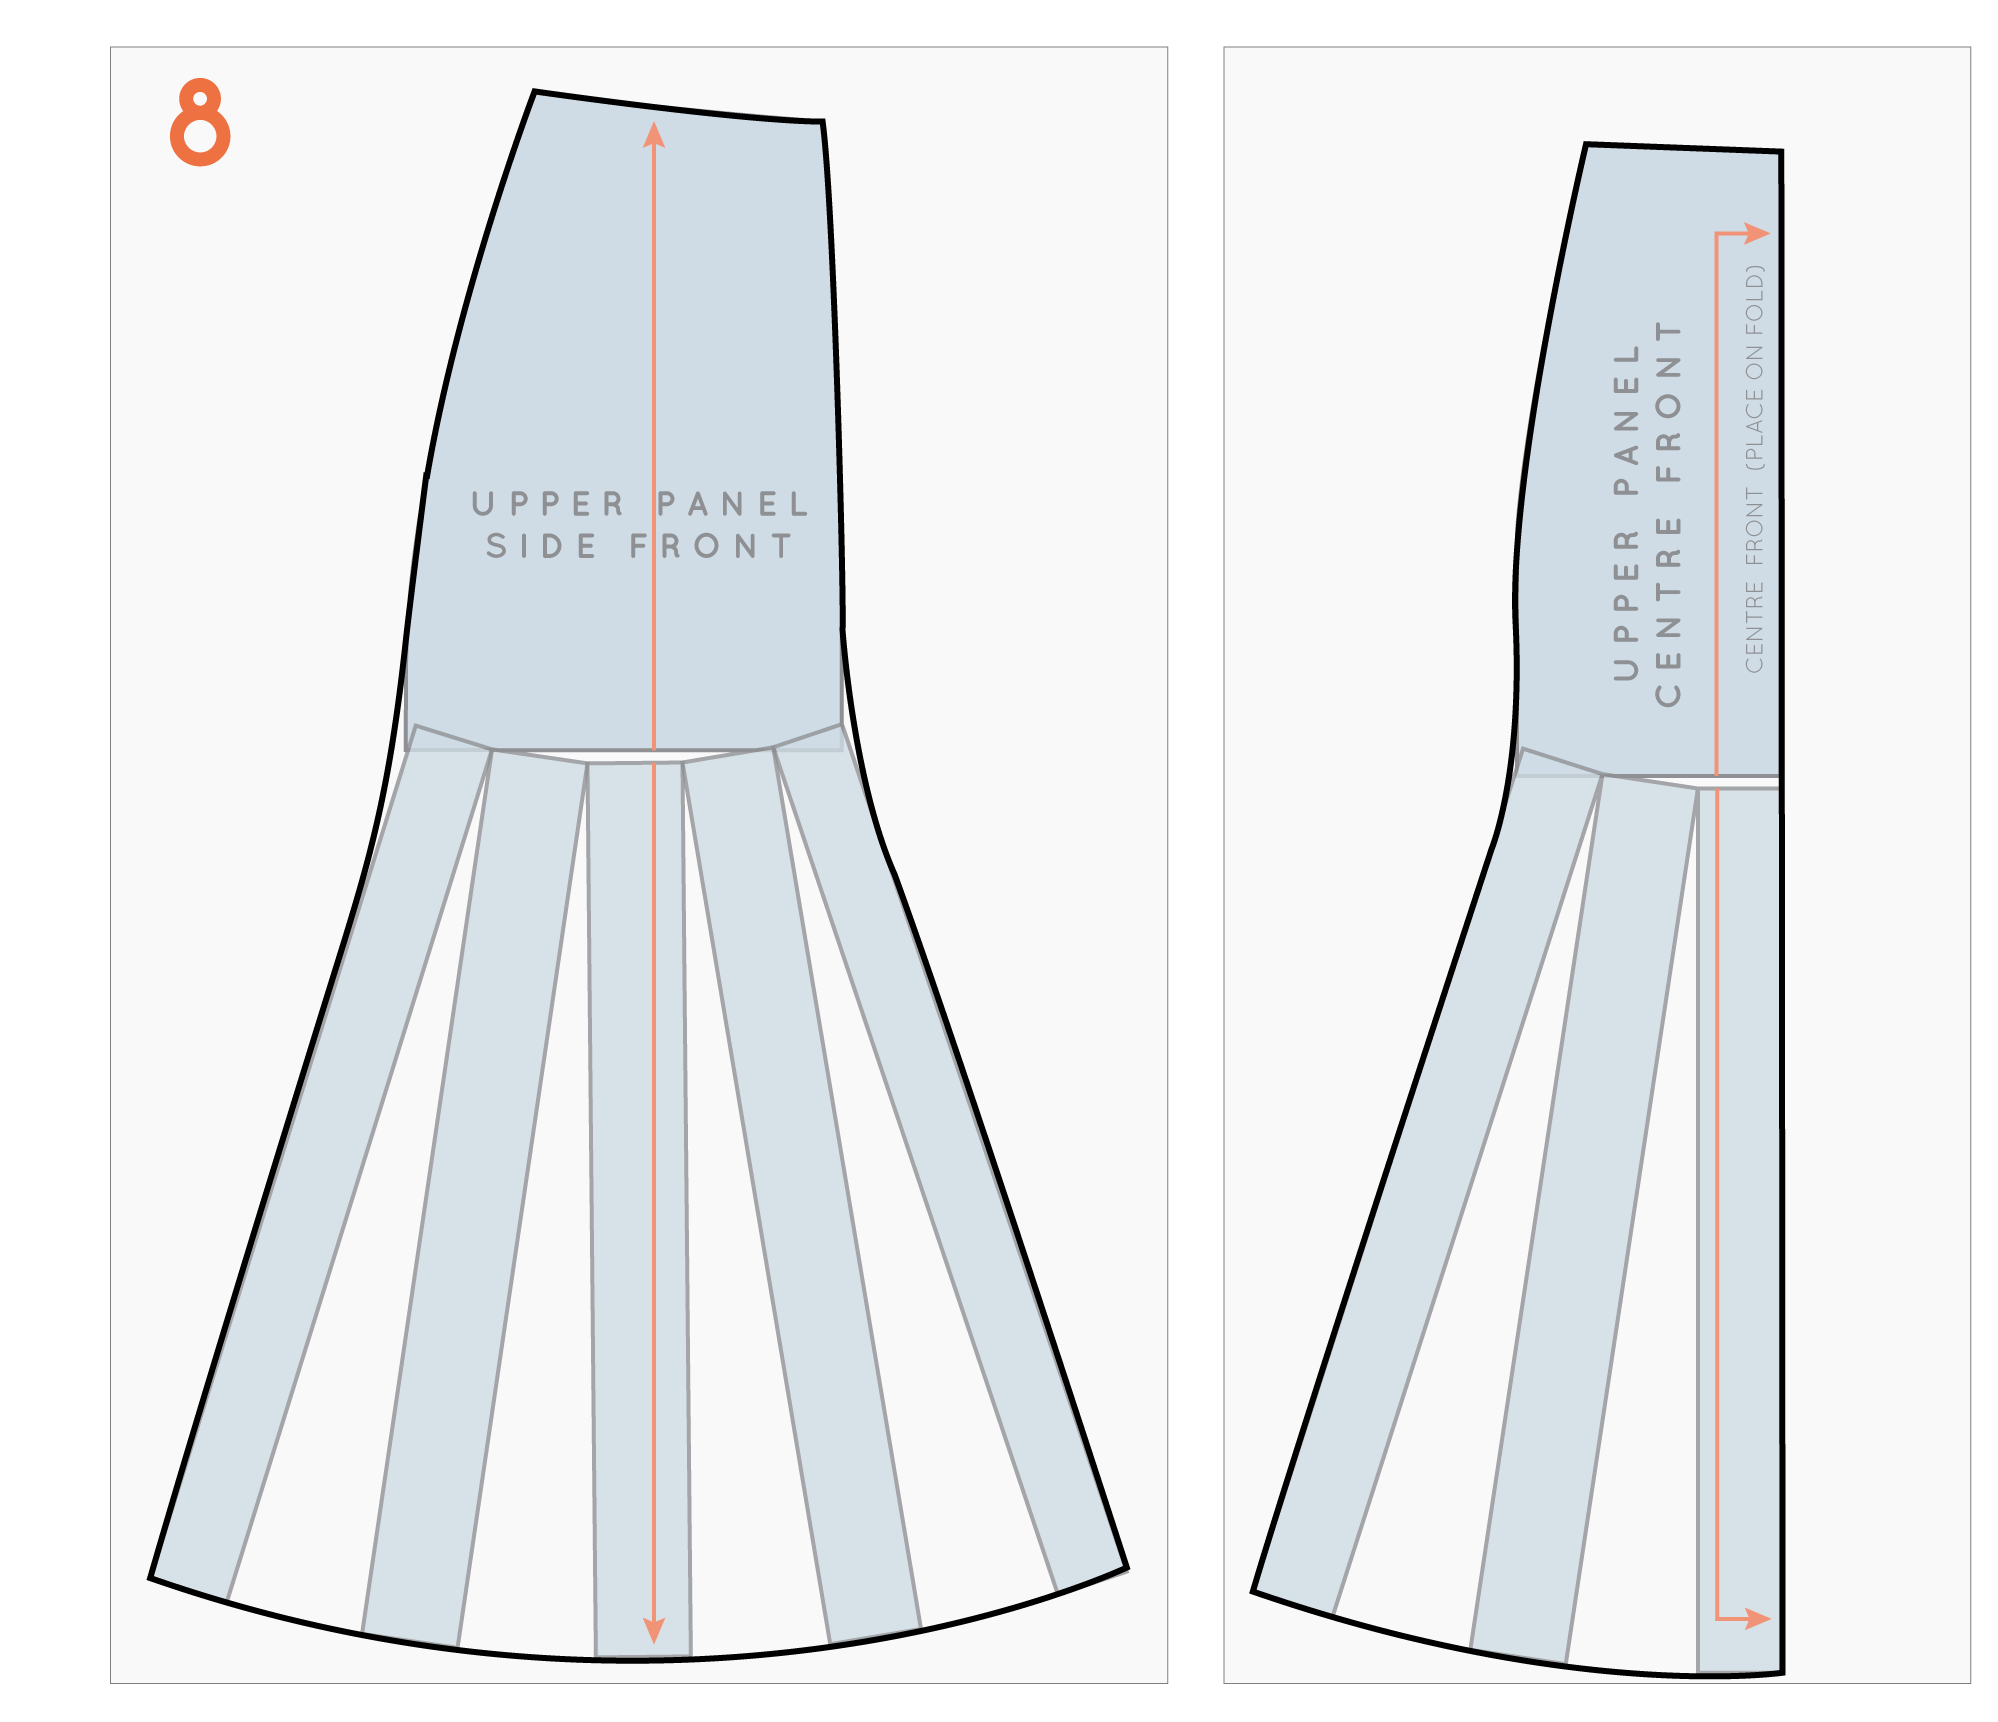
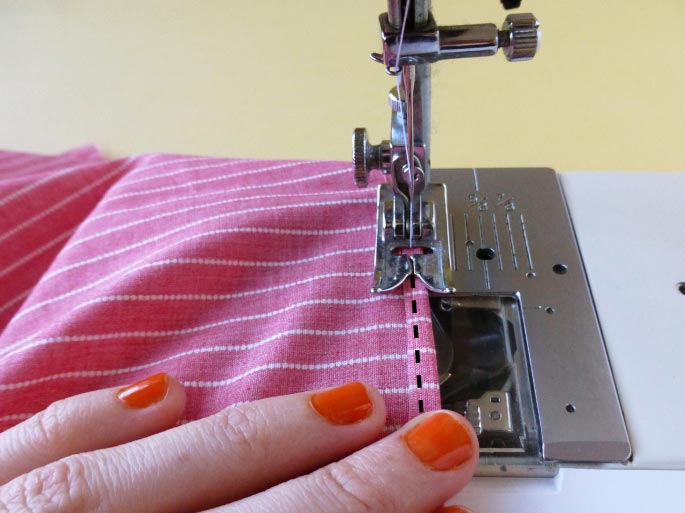
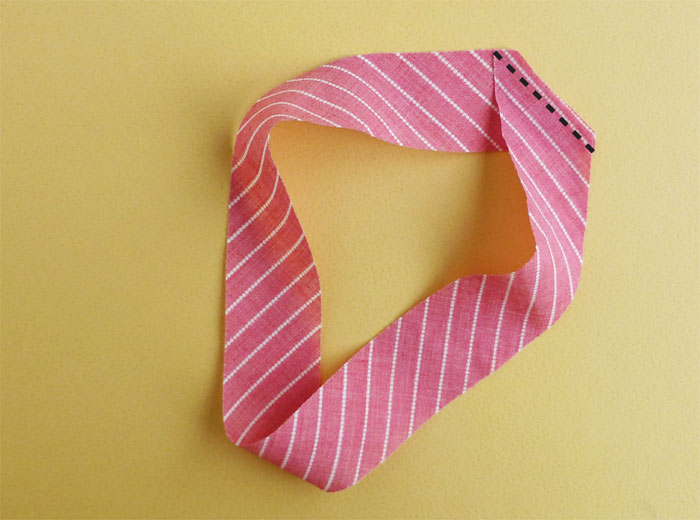
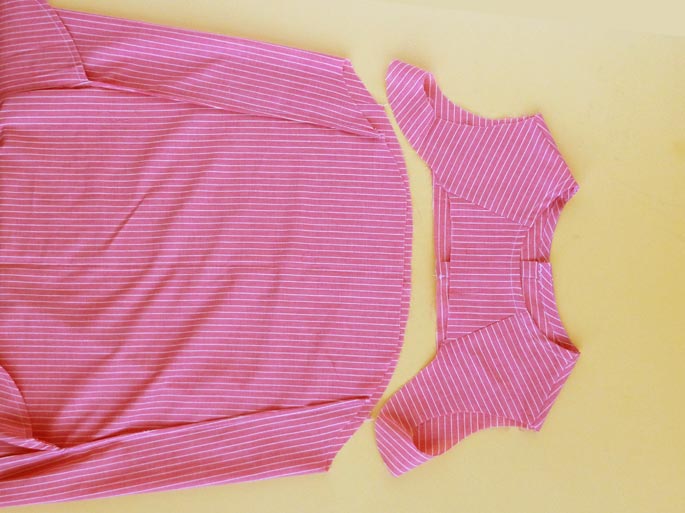
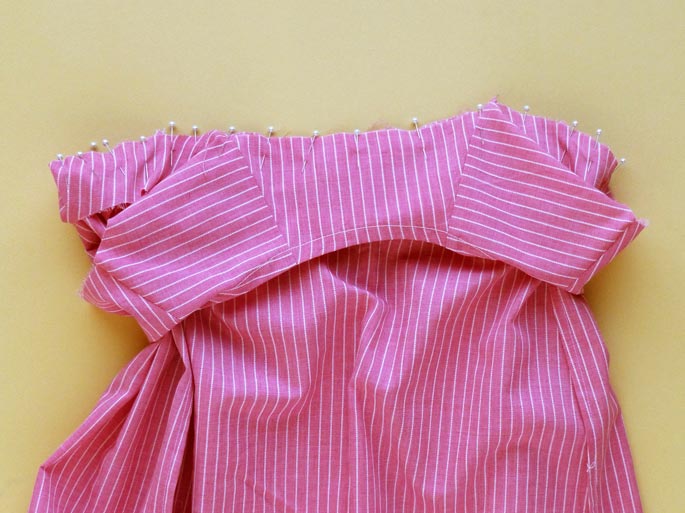
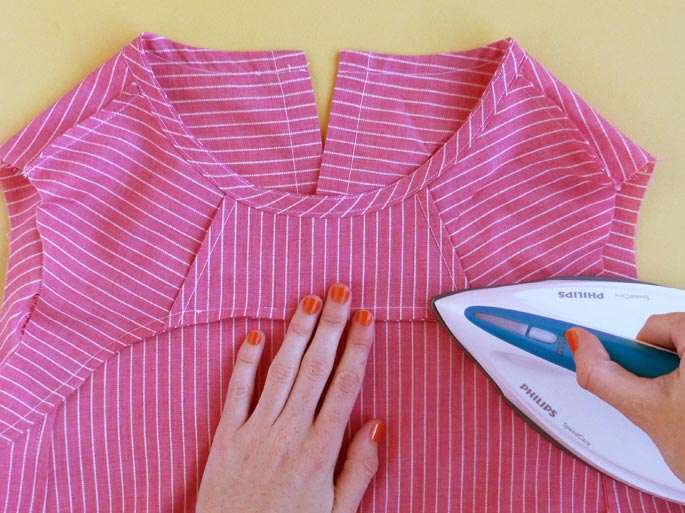
When I got to laying the pattern on the fabric, ready for cutting, I realised there wasn't going to be enough meterage. I already had my heart set on the fabric, so decided to add a horizontal panel line on both the front and back.

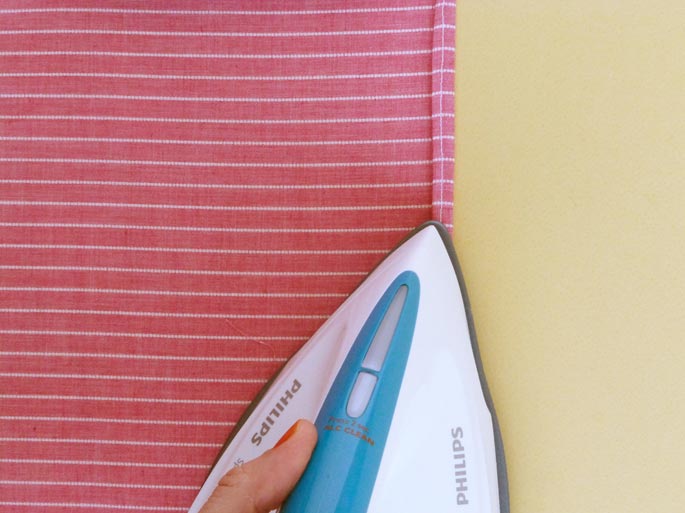
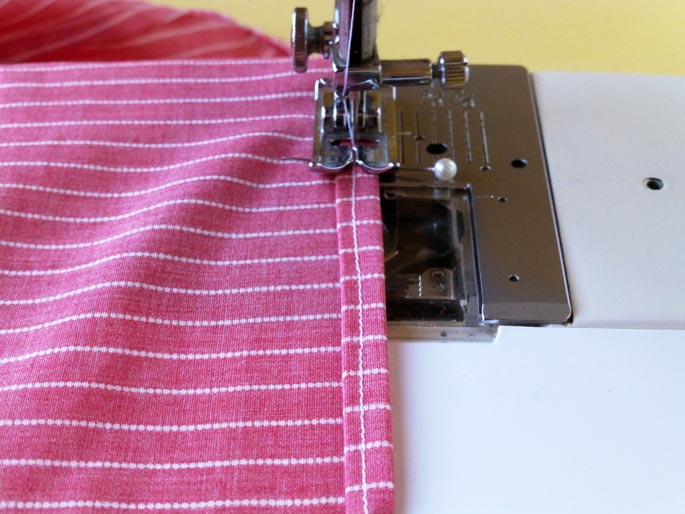
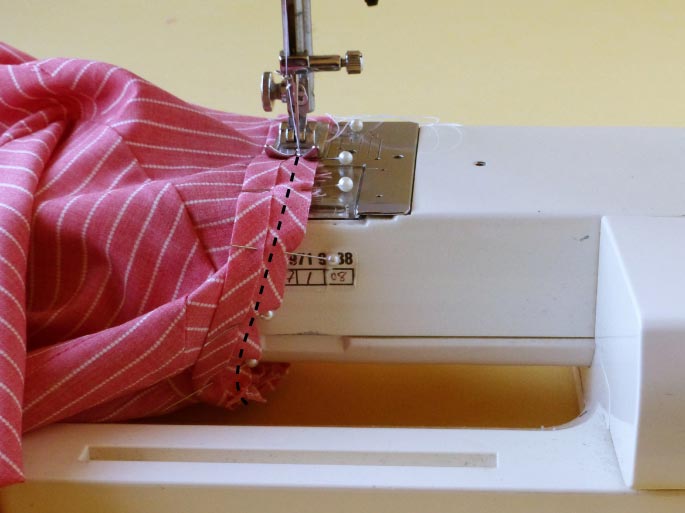
This was a super easy alteration to make as the pattern is actually made up of seperate panels, for each hemline option (the pattern pieces are just stuck together before the fabric is cut). So I just added seam allowance to the bottom of the body of the top and then seam allowance on the top of the hem panel.

inthefolds_louboxtop_3

I actually really like this detail, and am considering doing the same thing next time, but using contrasting fabrics. 

inthefolds_louboxtop_4

I also detoured from the instructions a little by turning the sleeve up to create a small cuff (rather than turning under, as the instructions suggested), to add another little detail. 

inthefolds_louboxtop_5
inthefolds_louboxtop_6

In terms of fabric, Beth suggests using 'Light-weight knit or woven fabric with lots of drape, such as crepe de chine, chiffon, georgette and jersey,' and I know my cotton linen choice is a little more on the structured side that these suggestions, so it's definitely a little boxier than some of the other versions I've seen. I was a little worried about my decision just to go with it, but now that its' finished, it's one of the things I like most about this top!

inthefolds_louboxtop_7

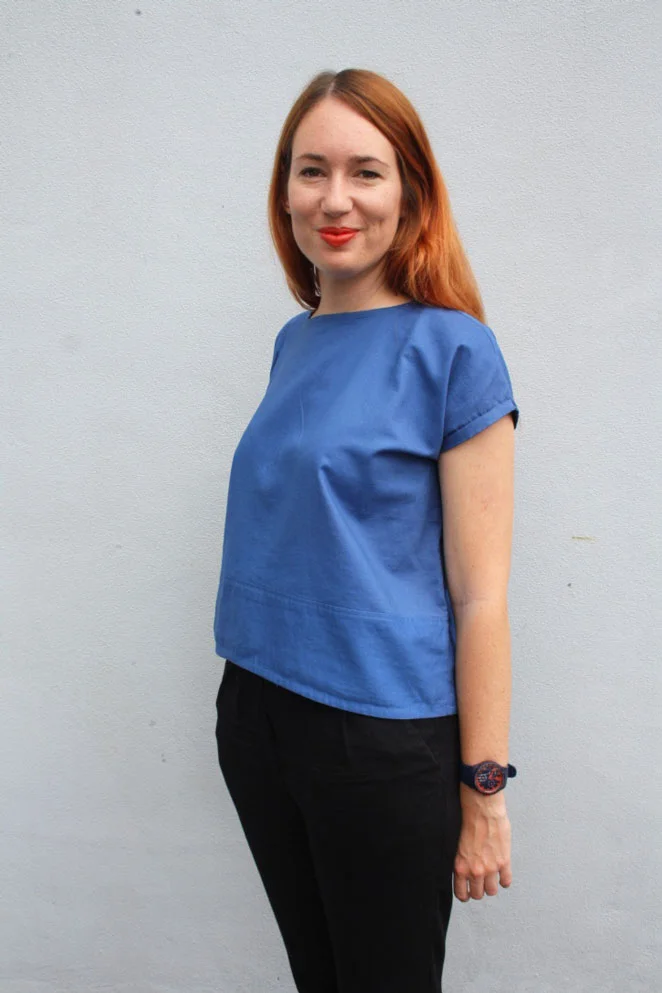
I feel really comfortable in it, and cannot believe how many times I've reached for it since I made it. It really has filled a gap in my wardrobe!

inthefolds_louboxtop_8

It was a super speedy make, which was a really nice change for me, because I have been working on samples for my next pattern, which generally take a while as I am really pedantic when I am sampling, so that nothing gets past without being resolved. Sewing someone else's pattern, gave me a chance to disconnect from work, and gave me a chance to really enjoy the process, without the stress that sits alongside working on one of my own patterns before it's released. It's also a good opportunity to see how other designers do things!

Well that's about all I can say about the Lou Box Top from Sew DIY. It's a perfect beginner pattern, but also a lovely speedy sew for the more experienced - providing lots of opportunity for variation. Thank you so much Beth for offering to trade patterns with me. I had a lot of fun!

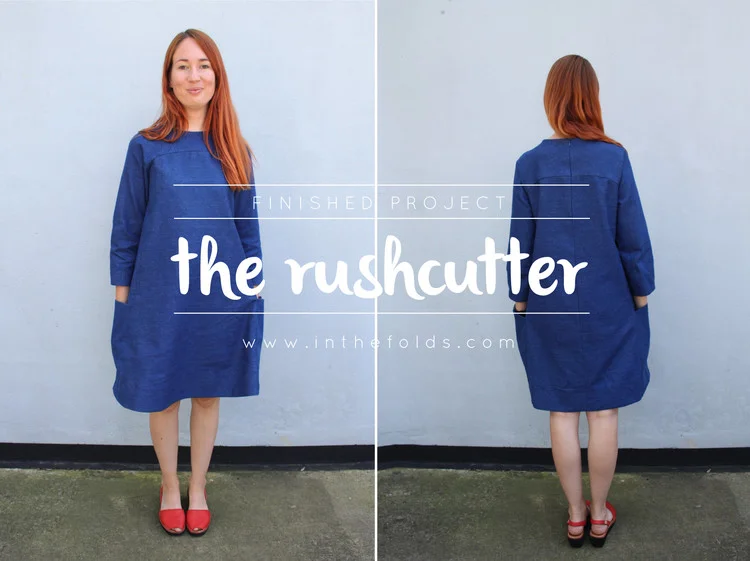
Beth made a really beautiful Ruschutter, so you should definitely go check out her post.


You may also like:

Talking about: Planning and goal setting

talking_about_planning_goals_inthefolds

If you have been following along with me lately you may remember that I have been talking about my desire to be little more open about the struggles as well as the little victories of my day-to-day life as a very new small business owner. Since getting all your lovely responses on the topic, I have been busting to get started, as I feel there is a huge amount of value in this exercise. For me, it will provide an opportunity to consolidate my thoughts and ideas on a topic, keeping a record of it for the future (when I will most probably read over it and cringe), and hopefully for you it will provide inspiration and food for thought - or hopefully, some encouragement for your journey. 


Planning + goal setting for 2016

As it's the very beginning of a new year (okay, okay, three weeks in... where did the time go?), I have been thinking a lot about planning and setting goals for 2016 - as I am sure many of you have been doing too. I think it's only natural to see the end of one year and the looming of another as a time to reflect and make some changes - in the hope of being happier, healthier, more productive etc. in the new year. But what I have finally accepted is that these changes will not happen over night and all big changes are about commitment, dedication and making these changes into a habit or ritual.


On my way to burn out

A little back story. If you saw me on December 22nd last year, you would have seen a pretty haggard excuse for a person. I was most probably hunched over my sewing machine or computer (or maybe even both by that stage ... There was a moment when I'd become so overwhelmed by my to-do list that I had my sewing machine set up in front of my computer, and would jump between the two) and had given up on wearing make-up or anything apart from jersey sacks, or even washing my hair. Not good. Obviously. On this particular day I spoke to a friend about how exhausted I was, how little time I had to do anything for myself (including exercise, grocery shopping, seeing friends or even washing said hair) and how burned out I was feeling. I loved my little business, but it was literally taking over my life. Yet I was persistent that I was just going to work through the holiday period, convincing myself (and no one else) that I would feel better in the new year if I just kept soldiering on and knocking things of my ever growing to-do list.

After I said it out loud, I realised how stupid it sounded. Did I think some magical New Years Fairy was going to come and sprinkle fairy dust on my head and I was going to wake up, somehow recovered from one of the biggest, scariest, craziest, most challenging years of my life, and be ready to do it all over again?

The answer is no.

No matter how much I love doing what I do every day, I have learned that, there are times that it is more beneficial to my business (and probably yours too) to step back and take a rest. This probably seems very obvious to a lot of you, but this was quite a realisation to me. Coming to the end of year, and reflecting on the awful state I was in, emotionally and physically, I realised that I was going to have to make some huge changes in my life if I wanted to create a business and a lifestyle that would be sustainable, and wouldn't have me totally washed up before I turn 28. And before any of these changes could take place, I needed to take a good long rest. I took a week off work, in which I spent my time catching up on sleep, friends and TV series. Utter bliss. Suddenly it didn't seem so daunting to wash my hair or write that email that I had been avoiding replying to. If you follow me on Instagram, you may even know that I even found the capacity to iron every garment in my wardrobe (yep. Seriously. And I mean EVERYTHING, as I had not ironed in six months!)

So after a much needed break, I was finally in a fit enough state to start looking forward again. Just in time for New Years eve!


New years resolutions

I always have new years resolutions, although for the life of me, I cannot remember one I have ever set, and therefore no idea if I have ever accomplished one of my goals. I guess I just thought everyone had flakey goals and setting them was more about having something to talk about over the new year period - and then forgetting them by the end of January. I must admit, this year was no different. I set some really flakey goals.

Sitting on the beach with an esky full of picnic food and drinks, a friend asked me what my resolutions were for 2016. I answered, 'To have a happier and healthier year than 2015." When I asked him what his resolution was, he told me he wanted to do an Iron Man. Bang. The moment when I realised how tangible his goal was compared to mine. At the end of 2016 he will know whether or not he has achieved his goal, with a straightforward yes or no. Me? Even if I remembered my Flaky Goal, how would I measure it? Do a happiness pie chart? A health graph? I don't think so. This is the moment I remembered what I had learned on the small business short course I did in 2015 and it was time to actually use it.


Goals need to be S.M.A.R.T

SMARTgoals_inthefolds

Goals need to be smart as well as S.M.A.R.T : Specific, Measurable, Actionable, Relevant and Timely. This means that instead of my Flaky Goal, 'I want to have a happier and healthier year,' I would need to consider a goal such as, 'I will schedule in at least one weekly dinner with a friend which will help me feel happier and more connected to those around me,' or 'I will go swimming twice a week to work on my fitness.' 


Breaking goals down

Although the S.M.A.R.T method does really help when creating the right goals (I now have a list of goals for 2016 that I will be able to reflect on at the end of the year - and they are written down this time so that I don't forget them!) I do find big goals to be very daunting. Particularly when it is really difficult to predict what will happen in the future - which is definitely the case when you have your own business.

This is when breaking down a goal into smaller pieces makes the world of difference. When I say I want to release a pattern by x date, I instantly get butterflies in my stomach, thinking about the sheer amount of work that needs to be put in to create a pattern. Suddenly the goal no longer feels achievable and I begin to stress, rather than just getting started. 

By simply breaking the goal down into steps, I have realised that the Big Scary Goal becomes much more tangible, and also allows me to work out where to start.

For example, for this goal of releasing a pattern, what is involved? First, I need to come up with the design, make the initial pattern, make a sample and fit the pattern on a fit model. I then need to continue sampling and fitting until I am happy with the pattern. Once that is done I need to scan the paper pattern into the computer and digitise it using Illustrator. When I have done that, I next need to grade the pattern to my size range, take photographs for the instructions, write the instructions and test the pattern. I need to consolidate the testing feedback, create the listing and then finally release the pattern.

Although there is a lot to do, suddenly it doesn't seem so daunting. With this list, I have a much better chance of scheduling the right amount of time for the project and setting an achievable deadline, and knowing exactly where I need to start. It also allows me to plan things in advance. I should be fitting by 'Week X', do I have a fit model organised? I should be ready to take photographs of the process by 'Week Y', do I have fabric on hand, or will I need to purchase something? Having things pencilled in, means I can avoid stressful last minute runs to the shops, and wasting days not knowing what to work on. 

I really like the Goal Pyramid by Matthew Michaelwicz, which provides a simple, yet very visual way of breaking down goals into smaller milestones. 


Celebrate the victories

By having smaller goals, that lead to a larger goal, there are many more chances to sit back and reflect. Am I on track? What do I need to do this week, or even just today, to achieve this goal? As well as a chance for little celebrations along the way.  I don't want to have to wait until the end of the year to give myself a pat on the back for all the hard work I have done - and this means stepping back and celebrating the small achievements that will contribute to the success in the big goal. My celebrations aren't anything extravagant, but they are a time in which I allow myself a chance to say 'Well done! Go you!' A moment to sit back and feel very proud of what I have achieved. For example, a couple of weeks ago, I sold my fiftieth Rushcutter dress, and to celebrate I danced on my bed (the 50th pattern was sold while I was asleep). It is a lonely business, having a small business, so instead of seeking a high-five or a pat on the back from others, I have really had to learn to celebrate my own achievements in my own little ways. 


To-do lists vs scheduling

As I mentioned, this time of year is a very obvious time to be having thoughts about goal setting and planning, which means I have been running into great pieces of advice, suggestions and blogs everywhere I turn. While somewhere in BlogLand, I came across a link to this article about millionaire's not using to-do lists, and it really encouraged a light bulb moment for me.

I have not been able to function for the last six months without my to-do list, but then, when it gets to the end of the day and I have once again not managed to get everything crossed off the list, I feel like crap. Like really crap. What I had been overlooking is that a to-do list has no concept of time or priority. Basically, I just write down everything I can think of in the order I think of them, and then work my way through (normally leaving the most painful and time consuming tasks till last) until it is time to leave work (or was time to leave work three hours ago). This advice, to schedule things in a planner is very obvious, but has already really changed the way I work through the day, and the way I feel at the end of it. By scheduling tasks into a planner that is broken up into the hours of the day, I suddenly need to be realisitic about the time a task will take, and therefore don't end up with a list of things that could never be completed in a single day.

I still have my to-do list (as it's a really great way to get everything out of my head to make room for others - as apparently we can only hold 4 things in our head at any one time!) but once I have written my list, it doesn't stop there. I take the list and work through it - scheduling in each task and allowing a realistic amount of time to complete it. If, for some reason, something doesn't get done on a particular day, I reschedule it. Allowing nothing to be left behind - and preventing those moments when I wake up in the middle of the night, realising I have forgotten to do something. This is a great episode of the Note to Self podcast, about the science behind getting organised, if you would like to hear more. 

I am currently trying out the Passion Planner, and so far it seems to be doing the trick. I love that it has a section for 'Today's Focus' as well as a 'Weekly Focus,' which is a constant reminder that I need to accomplish the small milestones in the hope of one day achieving the Big Scary Goal. A great reminder to just keep putting one foot in front of the other, and to night get caught up in the end game. 


The importance of rituals

I find setting goals as a great way to give me the motivation and focus I need to get through the day-to-day grind of running a business. But this year, particularly after reading this article from Seamwork Magazine, and then binge reading Sarah Starr's amazing blog. I have been thinking a lot more about the importance of rituals and how I can bring some new rituals into my routine. I am not talking about massive changes, just small things that will add to the overall experience.

One of the first things I thought about was how much time I have been spending on my phone, and how unhappy that makes me. Particularly in the evenings, I want to get better at putting my phone down and focusing on something outside of my work (as my phone is becoming more and more associated with work as this journey goes on - when an email comes through I think I have to deal with it then and there, whether I'm still in my towel after taking a shower, or already in bed), which has lead me to going to the library to borrow books and reading before I go to bed, instead of scrolling endlessly through my Instagram feed. I find this much more relaxing, as the online space tends to stimulate me much more than a book, and I end up flooding my brain with more and more ideas, instead of focusing on winding down.

Although not as enjoyable, I have created a ritual out of grocery shopping. By scheduling it in my planner at the same time each week, I no longer see it as a chore, or something that can be sacrificed if I am too busy. It needs to be done as it is important that I have access to quality food at home, so that when I'm tired or busy I don't end up skipping a meal or eating junk.


Accountability meetings

One final ritual that has become a highlight of my week, is my accountability meeting. When I first agreed to meet with two of the women I met on my short small business course, it just seemed like an interesting thing to try out. The shock of going from working amongst other people to working on my own day in and day out, had not yet hit, so the need for human interaction was not there. A month or so in, I realised how important it was for me to meet with these women each week. It gave me a chance to get out of the studio, see people and also truly connect to women who were on a very similar journey to me, feeling accountable to someone apart from myself.

I am so early on in this journey, but still looking back, I can see how naive I was to what it would really be like. I hadn't realised how much a journey like this is also a journey into who you are as a person, what you really want and the kind of life you are trying to create (but I will save all that for another day), and that it really helps to have understanding and supportive people around you - who you can share your doubts, fears and little victories with. Someone who knows you and your business is only a phone call away, and there is something in that which is very reassuring. And with the deadline of a meeting, there is a sense of needing to get things done on time. My meetings are very relaxed, which has been great, but I have been doing a little research this week on how we could go about creating a structure for our meetings (after half an hour free time to catch up, of course) so that is something I will continue thinking about this year. 


What about you?

As I think I have now made clear, I am no expert on this topic. It is just something I have been thinking a lot about, and reading a lot about, in the hopes that I will find a process that works for me - allowing me to get more done, with less stress.

I'd love to know how you manage your days, and if you think there's anything else I should be trying to make sure that 2016 is happier, and more productive, than 2015 (the Flaky Goal strikes again!)


You may also like:

How to draft box pleats - Part 2

how_to_draft_box_pleats_1

If you are a regular to this blog you will know that earlier in the week I published a tutorial about box pleats - specifically, how to insert box pleats into the centre front (or centre back) of a garment. I was planning to also show you how to put box pleats in other parts of a garment, but the post got a little long, so I thought I'd save it for today's post.

For this example, I will show you how to add two more pleats to the front of the skirt (either side of the centre front pleat), but you can use the same method to add as many box pleats as you like. 

What is a box pleat?

how_to_draft_box_pleats_2

Just in case you missed the last post, here is a box pleat and an inverted box pleat. They are essentially the same, just the way the fabric is folded is opposite in each case, creating a different aesthetic (an inverted box pleat is a box pleat turned right side down). 

Getting started

To start, take the pattern you plan to add a box pleat (or inverted box pleat) to. I decided to use the pattern I drafted during the process of the previous tutorial (an A-line skirt with centre front box pleat). Trace a copy of the pattern without seam allowance.

how_to_draft_box_pleats_3

2. Consider where you would like to add a pleat. Make sure it is not too close to the side seam, otherwise there will not be room for the volume of the pleat when it is folded in place. In this case, I am only adding one additional pleat, but you may want to add more. Draw a line through the pattern, where you plan to place your pleat (or pleats). 

how_to_draft_box_pleats_4

2. Cut along the line - separating the pattern into two pieces (or more, if you plan to have multiple pleats). Label the pattern pieces if it is likely that you could get them mixed up.

Pleat width

how_to_draft_box_pleats_5

Now, you will need to have a think about the size of your pleat. This is totally up to you. If you are struggling to work out the width of your pleat, have a play around with some fabric (or even a piece of paper), folding different sized pleats to get an idea of how it will look. Make sure you check that there is room for a pleat this width, in relation to the centre front / back and side seams.

Create the pleat

how_to_draft_box_pleats_6

3. When you have decided on the finished width of your pleat, spread the two parts of the pattern piece apart, until the opening is double the width of the finished pleat. For example, if my finished pleat will be 5cm, I need to create a 10cm opening between the two parts of the pattern. Fill the gap with a piece of pattern paper and tape or glue in place.

how_to_draft_box_pleats_7

4. Mark a line that runs through the centre of the opening. This will become the centre of the pleat.

how_to_draft_box_pleats_8

5. Fold along both edges of the opening (bring the line towards you when folding).

how_to_draft_box_pleats_9

6. Fold in each section of the skirt pattern, lining up each fold line with the centre line of the pleat. 

Transfer waistline + hem shaping

how_to_draft_box_pleats_10

7. Just like with a dart, when you fold a pleat on a curved edge, you will need to adjust the edge of the pleat, so that when it is folded it will sit flush with the waistline.

With the pleat still folded (you may want to use a weight to hold the pleat in place), take a tracing wheel and trace along the waistline, transferring the shape of the waistline onto the folded paper underneath. Repeat for the hemline.

how_to_draft_box_pleats_11

8. Unfold the pleat, take a ruler and pencil, and join the dots created by the tracing wheel to create a smooth curve. 

Add notches

how_to_draft_box_pleats_12

9. Add notches to either side of the pleat, as well as the centre point of the pleat. 

Add markings to the pleat

how_to_draft_box_pleats_13

10. You now need to use arrows to indicate which direction the pleat needs to be folded. An arrow can be drawn from each outside notch towards the centre of the pleat. For an inverted pleat, when it comes to folding it in the fabric, the folds will need to come towards you, meeting at the centre point on the right side of the garment. For a box pleat, it will need to be the opposite - the folds come together at the centre on the wrong side of the garment.

Stitching the pleat

how_to_draft_box_pleats_14

Now have a think about whether you would like to stitch the pleats in place. This will depend on your fabric choice and the style of your skirt (or garment). You could consider leaving the pleats free, stitching down a few centimetres to give the pleat a little more structure, or stitch down 15cm (6 inches) or so, to really give some structure to your pleat. 

Mark a drill hole

If you would like to add some structure with some stitching, it is a good idea to mark a drill hole on your pattern, marking the end point of your line of stitching.

how_to_draft_box_pleats_15

11. Measuring down from the waistline, at the centre of the pleat, mark a drill hole the distance down you would like to stitch your pleat. 

12. To complete the pattern, add seam allowance and pattern markings


You may also like:

How to draft box pleats

drafting_box_pleats_1

My transition back into work mode, after a much needed break, has been a little slower than anticipated. I have been concentrating on many things already this year - filling in my calendar and working out a plan of attack for 2016, catching up on emails that came through over the holiday period, and madly sampling a couple of new patterns. But.. when it comes to my blog, I have been procrastinating! Today though, I had it in my diary that I would focus on getting back onto blog content, and although it is a little painful (as I seem to have forgotten a few things over the break... What's that font called again? What line weight do I normally do my illustrations in? So it is taking me afr longer than usual to even get started) here I am, getting the blog back on track, as I have a HUGE amount of content planned for you this year, so I better get on with it, before it suddenly becomes February! 

drafting_box_pleats_2

So, without further ado, I am going to get into the first pattern making tutorial of 2016! As you may know, if you have been following along, towards the end of year I was working on a blog series about drafting skirt patterns. I still have a few more tutorials related to skirts that I think you might like, so that's what I'll be focussing on for the moment. As I've said before, if you are new to pattern making and just wanting to dip your toe in, skirts are the place to start! They can be as simple as you choose to make them, and the fitting of a skirt is much easier than the bodice or trouser block, giving you a chance to learn some pattern making fundamentals before dealing with the ups and downs of fitting.  

Pleats

Adding pleats is a really simple adjustment that can be made to a pattern that can totally transform the look of a garment. There are many different types of pleats:- box pleats, knife pleats, accordion pleats (the fabric needs to be pleated with heat), top stitched pleats and kick pleats. Pleats can be inserted in tops, dresses, trousers and sleeve heads, but today I will be showing you how to add a box pleat to a skirt. 

Box pleats

drafting_box_pleats_3

In this tutorial, I will show you how to create a box pleat and an inverted box pleat. The drafting process is the same, the only difference is the direction the pleat is folded when you are sewing.

Getting started

drafting_box_pleats_4

1. To start, take the skirt pattern you would like to add a pleat to. I chose to use the basic A-line skirt block (that I have made a tutorial for here). You could choose a self drafted pattern, or even consider adding pleats to a pattern you have in your stash.

2. Take a seperate piece of pattern paper, and trace a copy of the skirt without seam allowance. Give yourself some extra space alongside the centre front as this is where you will be adding the pleat. 

drafting_box_pleats_5

Now, you will need to have a think about the size of your pleat. This is totally up to you. If you are struggling to work out the width of your pleat, have a play around with some fabric (or even a piece of paper), folding different sized pleats to get an idea of how it will look. 

Creating the pleat

drafting_box_pleats_6

3. When you have worked out the width you would like the pleat to be, divide that figure by two (as we are working only on half of the pattern - the piece will be cut on the fold, to create a full front piece). Now draw a rectangle half the width of the pleat (the figure you just found), and the length of the centre front. For example, if I would like to create a 12cm pleat, I will add a rectangle to the centre front that is 6cm wide.

4. Now draw a second rectangle the same length and width as the first. 

drafting_box_pleats_7

The centre front (fold 2) and the line between the two rectangles (fold 1) will become the fold lines for the pleat.

Fold the pleat

drafting_box_pleats_8

5. Fold along Fold 1, folding the first rectangle towards the body of the skirt.

6. Now fold along the centre front (Fold 2), folding the pleat so that it sits flat behind the body of the skirt. 

Transfer waistline shaping

drafting_box_pleats_9

Just like with a dart, when you fold a pleat on a curved edge, you will need to adjust the edge of the pleat, so that when it is folded it will sit flush with the waistline.

To do this:

7. With the pleat still folded, take a tracing wheel and trace along the waistline, transferring the shape of the waistline onto the folded paper underneath. Repeat for the hemline.

8. Unfold the pleat, take a ruler and pencil, and join the dots created by the tracing wheel into a smooth curve. 

Mark the pleat

drafting_box_pleats_10

9. You now need to use an arrow to indicate which direction the pleat needs to be folded. For an inverted box pleat, the centre front needs to be folded towards the centre of the pattern. Indicate the direction of the fold with an arrow. At this point you can also add the grainline and note to 'Place on fold.'

drafting_box_pleats_11

10. For a standard box pleat, the centre of the pattern needs to be folded towards the centre front. Indicate the direction of the fold with an arrow. At this point you can also add the grainline and note to 'Place on fold.'

Stitching the pleat

drafting_box_pleats_12

Now have a think about whether you would like to stitch the pleats in place. This will depend on your fabric choice and the style of your skirt (or garment). You could consider leaving the pleats free, stitching down a few centimetres to give the pleat a little more structure, or stitch down 15cm (6 inches) or so, to really give some structure to your pleat. 

Mark a drill hole

If you would like to add some structure with some stitching, it is a good idea to mark a drill hole on your pattern, marking the end point of your line of stitching.

drafting_box_pleats_13

11. Measuring down from the waistline on the centre front, mark a drill hole the distance down you would like to stitch your pleat. 

ADD PATTERN MARKINGS

8.gif

12. To complete the pattern, add seam allowance and pattern markings


You may also like:

Talking about : Transparency - The Response

Happy New Year! I hope you had a lovely holiday period and had a chance to relax. I had a lovely Christmas with my family, and then enjoyed some much needed down time. Lots of reading and movie watching! Now it's back to the studio to get the ball rolling for 2016, which I find very exciting, as I have a lot planned for this year. 

In one of my last posts of the year, I discussed my desire to be more transparent in my business - showing more of what goes on behind the scenes, in the hope of potentially enlightening or inspiring others who are interested in this journey. I asked what you thought, and was so pleased with the response! 

Here are some of the responses, which I thought I would include as they may help you too, if you are on a similar journey, or a thinking about similar things to me! 

quote_1.gif

I think these will become great go-to quotes if I am ever in doubt!

Wishing you a very Merry Christmas

This is just a very quick post to say Merry Christmas! I hope your day is filled with lots of love and laughs (and hopefully some tasty treats too).

To wish everyone a happy holiday, and to say thank you for your support this year, I am offering you 15% off The Rushcutter sewing pattern. All you need to do is enter the discount code 'HAPPYHOLIDAYS15' by Saturday January 2, 2016 to secure the discount. Enjoy!

The blog will be a little quiet for the next week or so, while I enjoy a little time off. There is plenty more coming next year, so please watch this space! Until then, there should be enough sewing and pattern making goodness to keep you busy over the holidays!


I would love to hear about the projects you've got planned for the holidays? I am hoping to get some selfish sewing done, but am not making any promises as I really do need to catch up on some sleep, after this very busy year!


You may also like:

Talking about : Transparency

My working pace has slowed down as the end of the year fast approaches, and the pace of my personal life has increased as I madly get prepared for Christmas (I left it to the last minute as usual). So there will be no new tutorials until the new year. I wanted to take this opportunity to post about something a little different today, giving you a little peak at what is going on behind the scenes at In the Folds (and chat about the potential of hearing a little bit more in the future).

I am spending a lot of time at the moment thinking about transparency, and it's place in business. Specifically, its place in my business. When I had the crazy (but great) idea to go into business, transparency was something I really wanted ingrained in my practice. Transparency about my thoughts, values and processes (and maybe even more).

Though, that is much easier said than done. Six months into my business venture, and I have revealed very little about what really goes on on a daily basis (okay, there was the time I told you I was eating rice cakes for dinner on instagram). There has been no sign of the struggles (and there have been many), the thought processes or even the small wins (and thankfully there have been a few of those too) that have come along the way. 

So that is what I'd like to talk about today - transparency, why I think it's important, why I haven't been very transparent (yet) and who inspires me in this particularly conversation. 

What do I mean by 'transparency'?

When I use the term 'transparency,' I am referring to a business model in which I would be open about what is going on at In the Folds HQ, in terms of processes, practices, thoughts (and maybe even finances), in the hope that my journey could help or inspire others who are on a similar journey (or those that would like to be on a similar journey, or are just interested in other peoples stories).

Why I haven't been transparent (yet)?

I guess there is a few reasons why I haven't been as open or transparent as I initially planned:

1. Number one has to be fear. When my business was an imaginary thing, the idea of opening it up to the world for judgement and scrutiny seemed totally fine. Now that it is a thing (albeit a very small thing), exposing myself on that level terrifies me a little (okay, okay, it terrifies me a lot).

2. Time is another huge reason why I have avoided a more transparent business model. I have not had the time to think about how I would like to do it, let alone actually do it. 

3. And the last thing that has been on my mind, when debating this concept internally, is concern that it will have a negative impact on my business. Will people judge me negatively if they know what my business looks like on the inside (as surprise surprise, my world doesn't really resemble the lovely shininess of my Instagram feed)? This is not to say that my business has any dirty little secrets! Just the reality that social media feeds are curated, and life is not! Which is something we all obviously know, but it is really easy to fall in love with the fantasy.

Why I would like to be more transparent

So now that I have highlighted the cons of introducing more transparency to my business, let's talk about the pros, and why it is on my mind at the moment. 

I just love businesses that are transparent about their processes. And I have learned so much from other entrepreneurs and small business owners opening their doors. I feel it is important to share some of that love and add something to the collective learning pool and conversation. 

I am constantly energised and inspired by other peoples stories, and it is often what keeps me going, particularly at the times when I am feeling low, or totally alone on this crazy journey. It is on my mind at the moment, as fantastic examples just keep on popping up around me.

Who inspires me?

Bjork + Lindsay Ostrom - Pinch of Yum / Food Blogger Pro

Although many businesses are now embracing transparency - which is absolutely fantastic, the first business that really stood out for me in this area is Pinch of Yum. If you know of this blog, you will know that it has absolutely nothing to do with sewing. It is a cooking blog. But the way they share (Lindsay and her husband, Bjork) the ins and outs of their business is truly inspiring. They publish a monthly income report, which details the ins and outgoings of the business, but it is not a way to show how successful they are (although they are very successful) but a tangible way to see where their income and traffic comes from, and how they have managed to grow these numbers, since the very early days. I was first introduced to the blog when I heard Bjork interviewed on the 'While She Naps' podcast by Abby Glassenberg, and was instantly mesmerised by his openness and frankness about growing a business. I was also very interested in his idea of '1% to infinity,' which has definitely become my business motto since hearing it mentioned. It was such a relief to hear someone say that the steps you take don't have to be massive, for you to see progress over time. Just keep moving forward each day, even if you are only improving by 1% each day, over time the improvement grows exponentially. That to me, makes perfect sense, and is something very tangible I can use to keep my business growing. Bjork also has his own podcast now, which although mainly focuses on guests from the realm of food, I find very interesting and relevant to my life as a small business owner in the online world.

Heather Lou - Closet Case Files - 'Make Boss' series

In the sewing world, there are some bloggers who show snippets of what goes on behind the scenes. I love the 'Make Boss' series by Heather Lou of Closet Case Files. These days I have very little time to read blogs, but I must say that I always take the time to read these posts when they pop up in my Bloglovin' feed. And I literally inhale them, and find so much of the information relevant to my journey. I loved this recent post, when Heather Lou discussed all the thought (and work, of course) that went into designing the cover art of her newly released paper patterns. This is true testament to how much thought goes into decisions like this. 

Start Up podcast by Gimlet Media

Over the last couple of weeks I have become totally addicted to the Start Up podcast. I have no idea how I didn't know of this podcasts existence (because I am an avid listener of the other Gimlet Media podcasts), but somehow I missed the memo. When it was mentioned twice in one day, by two different people, I knew it was time to play catch up. And boy, did I play catch up. I finished the first season in two days. And in another two, I was totally up-to-date. Which is sad, because I was absolutely loving binging on this incredible podcast.

Okay, back to the point (I am beginning to sound like a groupie), listening to a first hand account of starting a business, was absolutely fantastic. Hearing that many of the feelings I have had, were consistent with others, made me feel a little less alone in this venture. Obviously there are many differences between starting a huge podcasting company or an online dating company, and me, starting a business from my teeny tiny studio, but I was also surprised by how many similarities there are.

Reyna Lay Designs Podcast

I also stumbled upon the Reyna Lay Designs podcast recently (what can I say, I am a podcast addict) and was so heartened to hear her interview with Elisalex from By Hand London. She was so candid and honest, really laying out the struggles of what it is like to be an independent pattern designer. I had been following Elisalex on Intagram and on the By Hand London blog, but this interview just revealed much more of the story. There are many more great interviews in the archives, but this is the one that stood out for me.


These are a few things I have been following for a while, but transparency has once again come to the forefront of mind lately for a number of reasons.

Why now?

So why, after six months of business am I talking about this now? Firstly, 2015 is coming to an end, so with that I am consolidating my thoughts about the year. What worked? What didn't? What needs improvement? And also start thinking about 2016 and what my goals are for the new year.

I think 2015 was about me just getting this business started and releasing my first pattern. Hopefully 2016 is about building on that foundation, but also bringing much more into the mix, and creating the kind of business that I dream of.

Over to you lovely people!

So, what I am wondering dear readers, are you interested in knowing what goes on back here behind the sewing machine and the screen? Or are you thinking as you read this, 'No, no, no, I just want tutorials!' (which is totally fine) I am still not sure exactly how I would like it to look, but before I put pen to paper, I'd love to know if anyone is even interested in listening?


Checking patterns : Curved seams

checking_patterns_curved_seams_1

Hello there, I hope you are having a lovely lead up to the Christmas period, and life isn't too stressful getting organised for the silly season (my techniques is to totally ignore it, and seems to be doing the trick!).

 Image posted with permission from Yoshimi -http://yoshimitheflyingsquirrel.blogspot.com.au/2011/03/mermaid.html

Yesterday, I showed you how to draft a fit and flare skirt. Before going ahead and cutting out your skirt pattern though, there is one thing you must do... Check your patterns! For some reason this lesson took a little while to sink into my brain (although my pattern making teachers at university said it constantly) and I would just want to jump into the cutting and sewing. I paid for this mistake a number of times, so now I check my patterns religiously.

Why check patterns?

So here I am, now sounding like my nagging pattern making teachers! It is really important that you ALWAYS check that your patterns fit together correctly before going on ahead and cutting your fabric. It may seem a bit tedious checking each seam, but taking a few minutes to check your patterns at this stage can save you cutting out incorrect patterns and wasting precious time and fabric later on . It is really easy to do, and will only add a couple of minutes to your pattern making process (and could potentially save you loads of time in the long run).

When it comes to curves, the process for checking patterns is slightly different to when you check a straight seam.

To check straight seams, you simply have to place one stitch line on top of the other, and ensure they are the same length, and the transition between pieces is smooth (this is a very simple explanation, and I promise to give a more detailed explanation in the future).

checking_patterns_curved_seams_2

Today though, I want to talk about curved seams, as the fit and flare skirt that we drafted yesterday is made up of panels with curved seams. 

Identify the seams you are checking

checking_patterns_curved_seams_3

Take the patterns you are checking and focus on the curved seams, and how they fit together.

Measure or match?

I know that some people like to measure their curves (with a flexible ruler or tape measure), but I prefer to match the two pieces together as if they are being sewn. This way you can get a really good idea of how they fit together, and if any adjustments need to be made to the shape of the seam. 

Match the pattern pieces together

checking_patterns_curved_seams_4

1. Match the seams together, as if you were sewing them (one on top of the other). You may need to flip one upside-down (which is the case in the example) to line them up correctly.

If you are checking patterns that do not have seam allowance you can simply match the edges. If your patterns have seam allowance, make sure you are matching the stitching lines and not the edge of the patterns (this is when transparent pattern paper is very handy).

2. I like to notch my pattern at the same time that I check them. When the pieces are lined up correctly, mark a notch. Before moving on, transfer it onto the pattern underneath - a tracing wheel is a good way to do this. Curved seams can be difficult to sew - if you mark notches at regular intervals, you will make it easier for yourself later on.

checking_patterns_curved_seams_5

3. You will need to pivot the pattern, so that you can continue matching the seams. Take a stiletto/awl (or a sharp pencil or pin) and insert it at the point where the seams diverge. This will allow you to keep this point together, but also allow you the movement you need to match the remainder of the seam. When it is in place, you should be able to rotate the top pattern, without moving the pattern underneath. 

4. As you rotate, the seams will line up again.

checking_patterns_curved_seams_6

5. Once they are in line again, hold in place and mark another notch. Remember to transfer the notch onto the pattern underneath with a tracing wheel.

6. Move the point of the stiletto to the next pivot point (where the seam lines diverge again), and rotate the pattern until the seams align again. 

checking_patterns_curved_seams_7

7. Mark another notch. Once again, ensure the notch is transferred onto both pattern pieces.

8. Check that the seams are the same length.

If one of your seams is longer by a small amount (up to 1cm), simply trim off the excess. If the discrepancy is bigger, you will need to remove half the excess from the length of one pattern, and add the other half to the other pattern, so that they are the same length.

Check the hemline

checking_patterns_curved_seams_8

9. Now, flip the pattern over, and place the two pattern pieces together (as if they have been stitched together and then pressed open), to check the hemline. As you can see in the example, there is a small dip where the two patterns are joined. Redraw the hemline as a smooth curve, and adjust the pattern pieces to match. 

checking_patterns_curved_seams_9

10. At this point, you should also check that the angle between the centre front and hemline is a right angle. This means that when you cut the piece on the fold, you will get a nice smooth line. Check the side seam too - this should also come to a right angle. 

Check the waistline

checking_patterns_curved_seams_10

11. The same way that you checked the hemline, check that the waistline is also a nice smooth curved (and if it's not, make some adjustments). 

ADD SEAM ALLOWANCE

checking_patterns_curved_seams_11

12. To finish, add seam allowance. 


As I mentioned in the last post, if you have a style of skirt you would like to know how to draft, let me know (comment here or email me) and I'll see if I can develop a tutorial around it!


You may also like:

How to : Draft a fit and flare skirt

how_to_draft_a_fit_and_flare_skirt_1

Over the last couple of weeks I have been writing blog posts about drafting skirts - from drafting a block to your own measurements, adding the correct markings to the pattern and adding seam allowance. Since the block was completed, I have been showing you ways that you can manipulate the pattern to create your own designs.

Last week I did a little round-up of all the posts so far, and asked if there was a specific style anyone wanted to learn how to make. 

Carol got in touch:

The skirt I would love to see as I fell in love with it when I first saw it, was from a blog post by Yoshimi. They call it a mermaid skirt. I think 6 gores with a flare at the bottom. I haven't seen a pattern like this and have a pic of it saved on my hard drive just to look at.

I was excited to get a suggestion, but also a little apprehensive about the skirt suggested. The term 'mermaid skirt' brought ball gowns to my mind... Which you may have noticed, is not really my style!

[ Image posted with permission from Yoshimi - http://yoshimitheflyingsquirrel.blogspot.com.au/2011/03/mermaid.html

But it was a lovely surprise when I found the skirt in question. It's lovely - sleek and simply, and a perfect skirt for a beginner to draft. So thank you very much for the suggestion Carol!

Drafting a flared skirt with panels

It may be difficult to see in the images, but the skirt is made up of 3 panels in the front, and 4 in the back (as the centre back has a seam for the zip). You could use this method with as many panel lines as you like, as it is a matter of preference, but I will draft it the same way as the source image.

To start this pattern, you will first need to add panels to your skirt block - which is one of the tutorials already in the series

Trace the pattern

Trace a copy of each of the pieces, without seam allowance. For the example, I will only be using the two front pattern pieces, as the process is exactly the same for the back.

how_to_draft_a_fit_and_flare_skirt_3

Mark flare point

1. Have a think about what point you would like the skirt to flare from. I wanted my pattern to be the same as the example from Yoshimi, so I measured down from my waist to the middle of my upper thigh, to find the right measurement for me (22cm [8 1/2in] down from the waist). Another way you could do this, is by putting on your skirt toile and marking the point you would like it to flare out. 

When you have the measurement, mark it on your pattern pieces, measuring down from the waistline. Draw perpendicular lines through each pattern piece at this point.

how_to_draft_a_fit_and_flare_skirt_4


2. You will be cutting through the pattern pieces at the horizontal lines. Before cutting, label each pattern piece so that they don't get mixed up.

I chose to label my pieces as 'Upper panel - side front,' 'Lower panel - side front,' 'Upper panel - centre front' and 'Lower panel - centre front.' It doesn't really matter what you call each piece - as long as you can remember what's what!

Cut pattern into sections

3. Cut along the horizontal lines so that you have four seperate pattern pieces.

Cut and spread

how_to_draft_a_fit_and_flare_skirt_4

4. We will be cutting an spreading to add volume (and create the flare) to the lower section of the skirt. Draw vertical lines through the the lower panels. It is up to you how many lines you would like to draw (and will depend on how many panels your skirt has), but I think 4 in the side panel and 2 in the centre front is a good place to start. Keep the spacing between the lines as consistent as possible. 

Have you cut and spread before? It is a really simple way to add volume (or remove) to a pattern. I wrote a tutorial here, if you would like a closer look at this technique


how_to_draft_a_fit_and_flare_skirt_5

5. You now need to carefully cut along each of the lines, starting from the hemline, and cutting up towards the top edge. Don't cut all the way through the piece, leave 1-2mm (1/16in) at the top to act as a "hinge" (a small strip of paper that will hold the pieces together, but also allow movement).

how_to_draft_a_fit_and_flare_skirt_6

6. Now it's time to spread! Carefully spread each cut line by the desired amount (this will depend on your preferences. I'd suggest 3-5cm [1 1/4 - 2in]). Be careful to spread each cut line by the same amount. You can play around until you are happy with the amount of fullness you have added. 

how_to_draft_a_fit_and_flare_skirt_7

7. You can now stick the lower pieces back on to the upper pieces, to create single pattern pieces. As the top edges of the lower pieces have become curved, the pieces may need to overlap a little (as seen in the example).

Trace the pattern

how_to_draft_a_fit_and_flare_skirt_8

8. Now take a piece of pattern paper and trace each pattern piece. Instead of the point that is created at the joint of the two pieces, draw a smooth curve. 

Add pattern markings

how_to_draft_a_fit_and_flare_skirt_9

9. Be sure to mark the grainline on each pattern piece, as well as cutting instructions.

The final thing to do, is to check that the seams fit together correctly. But I'll leave that bit for tomorrow!

I want to finish up by saying a huge thank you to Yoshimi for allowing me to use her images for this post! You should definitely head over to her blog for a look around - she has made some beautiful stuff, and her instagram is very nice too. 


Once again, thank you Carol for suggesting today's blog topic. Is there a skirt you would like to know how to draft? Please let me know and maybe it will be your suggestion next!


You may also like:

Throwback Thursday : How to draft a hem facing

how_to_draft_a_hem_facing_1

It's Thursday (somehow another week is coming to an end), which means it's time for a Throwback Thursday post! As I am still solidly in skirt mode from the skirt series I've been sharing with you lately, I thought it would be a good time to talk hem facings.

What is a hem facing?

A hem facing is a seperate pattern piece that is used to finish the hem of a garment (rather than just turning up the hem as you often do when hemming).

When should I consider using a hem facing?

A hem facing is a good way to finish a hem if you have a curved or shaped hemline (in the case of an A-line skirt or circle skirt, for example). It can also be used to finish a straight hemline if you would like to add weight to the hem (can help with the fall and drape of a garment), or just prefer this finish.

how_to_draft_a_hem_facing_2

If you have sewn The Rushcutter, you will know that I included a hem facing in the pattern, to help you achieve a lovely clean finish.

Why can't I just do a normal hem?

how_to_draft_a_hem_facing_3

The reason you cannot simply add a hem allowance to a curved hemline (left hand image) by extending the pattern beyond the side seam and centre front, as you often would to create a hem, is that when you have a curved line, the circumference of the cut edge will become larger than the hemline. When you fold up the hem (right hand image), there will be too much fabric and the hem will be unable to sit flat.

To avoid this, you will need to create a separate pattern piece - a hem facing.

How to draft a hem facing

how_to_draft_a_hem_facing_4

1. To get started, take the pattern you will be making a facing for. I am using the basic skirt block, that has been adapted to an A-line shape. You can find how to do this, by looking at this tutorial

The process is the same for the front and back patterns, so I will just use the front pattern piece for this example.

2. Decide how wide you would like the hem facing to be. Anything from 3 - 15cm (1 1/4in - 6in) is okay (this is obviously a very broad spectrum, which will depend on your design and the fabric you are using). If you want anything less than 3cm (1 1/4in), I would suggest using bias binding instead. If you are not sure of what width to use, have a look at your ready to wear clothes, to get an idea. 

Mark the width you would like your facing to be on the centre front, measuring up from the hemline. Mark this distance on the side seam too. 

how_to_draft_a_hem_facing_4

3. You will then need to mark the width of the facing at regular intervals between the centre front and side seam (every 10-15cm or so). Be sure to draw these lines perpendicular to the hemline.

4. Join the endpoints of all these lines with a smooth, sweeping curve. You have now created the shape of your waist shaping.

how_to_draft_a_hem_facing_5

5. Take a seperate piece of pattern paper, and trace off the shape of the hem facing.

6. Before removing the tracing, mark a notch close to the centre of the hem curve (if you have a very wide hem, you may consider adding an extra notch or two), and transfer onto the skirt pattern with a tracing wheel. This will help when you are sewing the pieces together later (it is not crucial if you are making a narrow skirt, but if you are making a full circle skirt, then you will thank your past-self for being so diligent when notching the hemline!)

 Transfer the grainline onto the hem facing (which will be parallel to the centre front).

how_to_draft_a_hem_facing_6

7. Add seam allowance to the body of the pattern (if you have not done so already), as well as the facing. I suggest 1cm (3/8in) along the long edges (the hem edge and the top edge) and 1.5cm (1/2in) on the side seam. You will not need seam allowance at the centre front, as the piece will be cut on the fold. For the back pattern piece, you can also cut on the fold, which will minimise bulk at the centre back seam. 

8. Add cutting instructions

Depending on the fabric, you may want to add interfacing to the pattern when you get to the cutting stage of the project - just keep this in mind.


You may also like:

Talking about pockets (again)

If you have been following this blog (or my Instagram) for longer than two minutes or made The Rushcutter, you will probably know about my love (okay, okay, you can call it an obsession, if you like) for pockets.

A couple of months ago, I met the lovely Kate from Sewing with Kate. As it turned out, she lives about 15 minutes away from me, and we have a whole lot in common (yay to finding sewing friends on Instagram), including a love of pockets. She asked me if I'd be interested in being interviewed for a post called 'An ode to the pocket,' and of course I jumped at the chance. If you are interested in hearing me ramble about pockets, or spy some pockety goodness, then you should definitely head over to her blog. Or, if you're not into pockets, you should head over there anyway, because Kate is great, and I am sure you will love her as much as I do. 

Oh and P.S. There is some pretty big news in her blog post, about a bit of a collaboration we've got planned (that I haven't got around to announcing on this here blog) for next year, which will hopefully excite a few of you Sydney-based folk!


You may also like:

How to make a waist sash

how_to-make_a_waist_sash_1

Last week, we pretty much finished sewing our Rushcutters! All we've got to do now is create a the waist sash (if you want a waist sash for your Rushcutter. It's totally optional!) 

Creating a waist sash is a really simple way to totally transform a silhouette. I decided to include a waist sash in the Rushcutter pattern to give sewers more options for their pattern.

If you haven't got the pattern, don't worry, keep reading, I'll tell you what measurements I used so you can make a waist sash for any pattern you like!

Drafting the pattern

First, you will need to consider how wide you would like your sash to be.  As a guide, the waist sash on the Rushcutter is 3.5cm wide.

Then you need to think about how long you would like your sash to be. Remember, you will need quite a bit of extra length for the bow. Consider tying some string or ribbon around your waist to work out how much extra you will need. For the Rushcutter, I took the waist measurement and added 1.15m for the tie. Sounds like a lot, but you really do need it!

Once you have your measurements, you can draft the pattern (or draw straight onto the fabric with tailor's chalk). Draw a rectangle DOUBLE the width of your finished waist sash and HALF the length of your finished sash. 

Add seam allowance (I went for 1cm, but this is up to you) to all sides. If you would prefer not to have a seam in the centre back, just add seam allowance to three sides (2 long sides and 1 short) and then write 'place on fold' on the side that doesn't have seam allowance.

Draw a line that cuts the pattern piece in half horizontally that will be your grainline and fold line.

Sew the sash

Take the two WAIST SASH pieces (from The Rushcutter pattern or the pieces you drafted) that you have cut and, with right sides together, join them together at the centre back with a 1cm (3/8in) seam allowance. Once stitched, press the seam open. 

how_to-make_a_waist_sash_3

With right sides together, fold the sash in half length ways and press. Pin along the long edge and stitch with a 1cm (3/8in) seam allowance. 

how_to-make_a_waist_sash_4

Use your fingers to roll the seam so that it is in the centre of the tube. Press the seam allowance open.

how_to-make_a_waist_sash_5

Turn back both short ends of the tube by 1cm (3/8in) and press.

TURN THE SASH

how_to-make_a_waist_sash_6

Take a safety pin or bodkin and attach it to one side of one of the short ends of the tube.

how_to-make_a_waist_sash_7

Feed the safety pin through the tube to turn the right side out. Press flat. 

how_to-make_a_waist_sash_8

Enclose the short ends of the sash, by stitching nice and close to the edge. Alternative, you could consider sewing by hand (with a slip stitch) to finish the ends invisibly.

Give the dress one final press and you are done!

The skirt series - Have you been following along?

Have you been following along with the skirt series I have been running for the last few weeks?

I have just put all the tutorials in one place, so they're easy to find if you would like to complete the series step by step.

If you would like to learn pattern making, then this is a great way to start. A skirt block is the most basic of all pattern blocks, and by drafting a block to your measurements, you will begin to learn many of the principles of flat pattern making. In the coming weeks I will be showing you different ways to adapt the pattern, to transform the block to a wearable skirt... So watch this space!


If you've got a skirt pattern you'd like to learn to create, then let me know, I may be able to include it in the series!


You may also like:

How to : Draft side pockets

how_to_draft_side_pockets

Last week, I showed you how to draft in-seam pockets (and included a pattern for your downloading pleasure if you want a pocket quickly). In-seam pockets are perfect if you don't want to make a feature of your pockets, but want them for their function. 

Why side pockets?

If you would prefer to make more of a feature of your pockets, you may prefer to try out side pockets (which are suitable for skirts and trousers) or patch pockets (which are suitable for almost any garment).

In today's post I am going to show you how to draft side pockets, and then next week I'll get onto patch pockets.

Getting started

how_to_draft_side_pockets_1

To start, have a think about what shape you would like to make your pocket opening. You can go with the standard curved pocket opening (1), the slanted pocket (2), the corner pocket (3) or something more unconventional (4). Look to your ready-to-wear garments for inspiration, or if you are struggling, have a look online.  

For this tutorial, I am going to create a curved pocket (1), but the principle is the same for other shapes.

Taking measurments

how_to_draft_side_pockets_2

Have a think about how big you would like your pocket opening to be. There are several ways you can do this:

1. Take meausrements from a pocket on a piece of ready-to-wear clothing that you feel is a good size

2. Put your skirt toile on and mark your pockets on the toile. This way you can mark your ideal pocket shape on the toile and get an idea of how it will look when it is made up

3. Place your hand on the skirt block and mark in the pocket width and depth, in relation to the size of your hand.

I would suggest making your pocket opening at least 10cm wide (4 inches) at the waist and at least 10cm (4 inches) deep at the side seam.

Draw pocket opening

how_to_draft_side_pockets_3

1. When you have decided on the width and depth of your pocket, you can mark these measurements on your pattern (I am using a basic A-line skirt for the example). If your pattern has seam allowance, be sure to mark these points on the stitch line, and not on the edge of the pocket (my pattern doesn't have seam allowance included).

2. Join these two points with a smooth curve (or a straight line - depending on what shape pocket you would like to make).

Draw the pocket bag

how_to_draft_side_pockets_4

3. Just like when we drafted an in-seam pocket, you can use your hand as a guide to the size and shape of your pocket bag. To do this, place your hand on your pattern, as if it was inside the pocket, and draw around it in the rough shape of a pocket bag (have a look at the in-seam pockets of some of your own clothes if you're not sure about the shape). You don't want it to be too tight around your hand, so leave a little bit of space between your hand and the line you draw.

4. Mark a couple of notches on the curve of your pocket bag. These will help when it comes to sewing the pocket bag to the pocket lining. Also mark a notch on the pocket opening, so that the front of the skirt can easily be joined to the pocket lining.

Trace the pocket pieces

how_to_draft_side_pockets_5


5. Take a separate piece of pattern paper and trace the outline of the pocket bag, being sure to also transfer the notches and grainline. 

6. Take another piece of pattern paper and trace the pocket lining piece. Again, be sure to also transfer the notches and grainline.

Trace the front pattern piece

how_to_draft_side_pockets_6

7. Take another piece of pattern paper and trace the front pattern piece, remembering to trace the notch on the pocket opening. Mark the grainline on your new pattern piece.

Add seam allowance and cutting instructions

8. Add seam allowance to each pattern piece. I suggest adding 1.5 cm (1/2in) to the side seam and waistband, and 6mm - 1cm around the curves (1/4in - 3/8in) to ensure a nice finish. Add cutting instructions. 

Fabric for pockets

Depending on what fabric you will be making the garment from, you may choose to cut the pocket pieces from something different to the fabric you are working with for the body of the garment. For example, if you are using a printed fabric, you may choose to use a plain fabric for the pocket lining, so that the print doesn't show through from underneath. If you are using something quite thick or bulky, you may choose to cut your pocket lining from something lighter. 

Working with denim

Look inside the pocket of your favourite jeans. You will notice that the pockets are not cut from denim, but normally a lightweight cotton. This is to ensure the pockets don't create any extra bulk. If you are making pockets for jeans, or a denim skirt (or something similar) you should consider creating a pocket shield and then cutting your pockets from cotton.

A pocket shield is a way to disguise that the pockets are cut from a different fabric.

how_to_draft_side_pockets_8

9. To create a pattern piece for a pocket shield, take the pocket bag and pocket lining pattern pieces that you created in the previous steps.

how_to_draft_side_pockets_9

10. Place the pocket lining on top of the pocket bag, matching up the notches to ensure the pieces are aligned correctly (as if they have been sewn together).  

11. Draw a line, the same shape as the pocket opening, about 2.5 - 3cm (1in) in from the edge on the pocket opening. This will ensure that the edge of the pocket shield won't be exposed.

how_to_draft_side_pockets_10

12. Take a piece of pattern paper and trace the pocket shield, being sure to also transfer the grainline.

13. Add cutting instructions

14. When it comes to constructing the pocket, you will just need to finish the edge of the pocket shield (with overlocking or zig-zag stitch) and then stitching on top of the pocket bag, before constructing the pocket as usual. 

You may also like: 

How to : Add panel lines to a skirt pattern

how_to_add_panel_lines_skirt_1

Panel lines are a great way to add interest to a design. There are countless variations and it is a way to include more than one fabric in your design if you would like. I really struggle to keep a design limited to one fabric, so often add a contrast fabric with panel lines. Panel lines are also a good way to eliminate darts, without losing the fitted shape of the garment.

Now that our skirt blocks are done, it's time to have a play! In today's post I will show you the basics of creating panel lines on a pattern. This same principle can be used on all different patterns, so keep reading, even if it's a bodice or dress you're planning to add panels to. 

how_to_add_panel_lines_skirt_2

I will show you how to add panel lines where the darts are on the original skirt block. With these panels, you will no longer need darts, as the shaping required will be provided by the panel lines.

Mark panel lines

how_to_add_panel_lines_skirt_3

1. Take your skirt pattern and draw a line from the tip of the dart to the hemline, ensuring it is parallel to the centre front (or entre back if you are working on the back pattern piece).

2. Add notches to the line. This will help when you are matching the two pieces together later. I suggest putting one in line with the dart point and another on the straight part of the line.

Now that you have the line marked, you can cut the pattern into two pieces, or you can trace the pieces onto seperate pieces of paper (my preferred method).

Create side front panel piece

how_to_add_panel_lines_skirt_

3. Take a separate piece of pattern paper, and place it on top of your skirt block. To start, you will be tracing the left side panel. Trace down the side seam, along the hemline, up the line you drew (Step 1), along the left dart arm (being sure that the transition between line and dart is a smooth curve) and then along the waistline. Transfer the notches from the panel line, and notch the hip line on the side seam.

4. Before removing the tracing, transfer the grainline, which should be parallel to the original grainline. Add pattern information and cutting directions (Front side panel / cut 1 pair).

Create centre front panel piece

how_to_add_panel_lines_skirt_4

5. Next, you will need to trace the centre front panel. Take another piece of pattern paper and trace down the centre front, along the hemline, up the panel line, up the right-hand dart arm and along the waistline. Once again, make sure your transistion from panel line to dart line is nice and smooth. Transfer the notches on the panel line.

6. Before removing the tracing, transfer the grainline, which should be parallel to the original grainline. Add pattern information and cutting directions (Centre front panel / cut 1 on fold).

Add seam allowance

how_to_add_panel_lines_skirt_5

7. Add seam allowance to both pattern pieces. I suggest 1.2cm - 1.5cm (1/2in - 9/16in). You may want to add more to the hemline, but for the sake of the example I have left the seam allowance consistent. Repeat process for the back pattern, and now you have a skirt with panels, instead of darts!


You may also like:

How to : Sew a rolled hem with a standard foot

how_to_sew_a_rolled_hem_1.jpg

There are many ways you could choose to finish the hem of your Rushcutter.

You could use the hem facing, just like I did for VIEW A, you could use a strip of bias binding, or like me, you could do a rolled hem.

You can do a really narrow rolled hem, which can be a beautiful finish on fabrics like organza or chiffon, but I went for something a little wider as I'd say most people aren't sewing their Rushcutters from chiffon! This method will work with a narrower hem, if you want one.

I know there are a bizillion great machine feet which can help you get all kinds of finishes, but I do things the old school way, as a lot of my learning was done on an industrial machine without any fancy feet. So in tofay's tutorial, I will show you how to sew a rolled hem with a standard machine foot.

Stitch

how_to_sew_a_rolled_hem_2

With the dress inside out, using your fingers, turn up the hem by 5mm (1/8in) and stitch. If you go nice and slow you don't need to press and pin, and can just fold up the hem as you go.

Press

how_to_sew_a_rolled_hem_3

Turn the hem by a further 5mm (1/8in) and press. Pin hem in place.

Stitch

how_to_sew_a_rolled_hem_4

 Stitch along the original stitch line.

Press

how_to_sew_a_rolled_hem_5

Give the hem a good press on the right side of the garment, You will see that you have only one row of stitching on the right side.  


I'd love to know if you have any secrets for finishing hems! Let me know in the comments.


You may also like:

How to finish an armhole with bias binding

how-to-finish-an-armhole-with-bias-binding.jpg

At this point in the Rushcutter Sew-along, our Rushcutter's are really starting to look like Rushcutters!

In today's post, we will be finishing the armholes with bias binding. I am a huge fan of binding as a finish, it gives you a lovely clean finish, without the extra bulk of a facing. 

Even if you are not sewing The Rushcutter, I am sure you will find this tutorial useful for projects to come!

Measure the armhole

how-to-finish-an-armhole-with-bias-binding_2

Take a tape measure and measure around the armhole. Take note of the measurement.

Prepare binding

how-to-finish-an-armhole-with-bias-binding_3

For this tutorial, you can use store-bought binding or make the binding yourself

Cut a piece of binding the length of your armhole.

If you are using binding that you made yourself, you will need to fold it before sewing. Take the binding and with right side down, press one long edge under by 10mm (5/8in).

Join binding

how-to-finish-an-armhole-with-bias-binding_4

With right sides together, bring the short ends of the bias binding together at a right angle. The overlap will create a square. 

how-to-finish-an-armhole-with-bias-binding_5

Pin in place and stitch across the diagonal of the square. 

how-to-finish-an-armhole-with-bias-binding_6

Trim back the seam, close to the stitch line, and press the seam open. 

Pin binding to armhole

how-to-finish-an-armhole-with-bias-binding_7

Now that the binding is in a continuous loop, with right sides together, pin the unpressed edge of the binding to one of the armholes, being careful to evenly distribute the binding around the armhole.

Be careful about where you place the binding seam - I suggest placing it somewhere where is there is not yet a seam, to minimise bulk (for example, the middle of the back armhole). 

Stitch

how-to-finish-an-armhole-with-bias-binding_8

Stitch the binding to the armhole with a 1cm (3/8in) seam allowance. 

Clip into the seam allowance at regular intervals. This will help you achieve a smooth armhole. Trim back the seam allowance by 2-3mm (1/16in) if your fabric is thick or bulky.

Understitch

how-to-finish-an-armhole-with-bias-binding_9

Turn the binding to the right side and, using your finger, press it (and the seam allowance) nice and flat. Understitch the seam allowance to the binding. 

Edge stitch

how-to-finish-an-armhole-with-bias-binding_10

Fold the binding to the inside of the dress, rolling the seam line towards the inside of the dress slightly (this is so you won't be able to see the seam line from the right side).

Give the armholes a good press, from the outside. Pin the binding in place and then stitch around the binding close to the fold. It’s a good idea to start and finish your stitching at the underarm point as this line of stitching will be visible from the right side of the garment.

And tah-dah! You have a lovely clean finish on your armhole. 


You may also like:

How to : Join the bodice to the dress

how_to_join_the_bodice_rushcutter_1

If you are following along, you will know that over the last few weeks I have been guiding you through the process of sewing a Rushcutter dress. 

how_to_join_the_bodice_rushcutter_2

Today we will be joining the body of the dress to the bodice and your Rushcutter will really take shape. 

Pin

how_to_join_the_bodice_rushcutter_3

With wrong sides together, match the notch at the centre front of the FRONT panel to the notch in the centre of the CENTRE FRONT PANEL. Pin. 

Continue moving from notch to notch, pinning the two pieces together. Curved seams can be a little tricky, so you will need to use lots of pins!

Stitch the seam with a 6mm (1/4in) seam allowance, going nice and slow. Stop regularly to left the seam up and check that all the seams are lying flat and there is no puckering underneath. 

Trim seam

how_to_join_the_bodice_rushcutter_4

Trim back the seam allowance by 2-3mm (1/16in) and press the seam up towards the neckline.

Stitch

Fold the seam with right sides together, enclosing the raw edge within the seam. Press and pin. Stitch seam with a 6mm (1/4in) seam allowance.

Press

how_to_join_the_bodice_rushcutter_5

Press the seam down towards the hemline.

It is just a quick post today, as tomorrow we are up to binding the armholes, and I wanted to write that as a separate post, so it can be a tutorial you can look back on in projects to come!


You may also like:

How to draft a shaped waistband

draft_a_shaped_waistband_1

Last week, I showed you how to draft a straight waistband for your skirt block (it will also work for other garments, such as trousers) as part of The Skirt Series I have been running for the last couple of weeks. Today, I will be showing you how to draft a shaped waistband. 

Before starting, though, I'd like to a little re-cap of a couple of things (which you may remember, if you read the previous waistband post).

two types of waistbands

Most waistbands on skirts or trousers are based on these two basic waistband shapes:

draft_a_shaped_waistband_2

A straight waistband - which is a long rectangle that generally does not have side seams. 

draft_a_shaped_waistband_3

A shaped waistband - which may, or may not, have side seams. 

SHOULD I DRAFT A STRAIGHT WAISTBAND OR A SHAPED WAISTBAND?

Either option can be drafted for the skirt block, and which is better for you comes down to individual preference and body shape. For me, I am a little too curvaceous in the lower half to feel comfortable in a straight waistband (as the top of a straight waistband tends to gape on me).

If you followed the tutorial to draft a straight waistband, you will see the first few steps are the same, so if you'd like to go back to the construction of your straight waistband, then you can! If you haven't already drafted the straight waistband, not to worry, just skip over the next two steps and start with 'Take measurements.'

Trace your pattern

draft_a_shaped_waistband_4

On a seperate piece of pattern paper, trace a copy of the straight waistband, without seam allowance.

Indicate the centre front and centre back.

draft_a_shaped_waistband_5

Using the notches to guide you, mark the points of interest (front dart, back dart, side seam) with vertical lines on the pattern.

TAKE MEASUREMENTS

If you haven't already drafted the straight waistband, you will need to start by taking some measurements from your skirt block. 

draft_a_shaped_waistband_6

Remember to measure along the stitch line, not the edge of the pattern.

Measuring along the waistline, on the front pattern piece:

1 - Centre front to first dart arm

2 - Second dart arm to side seam

On the back pattern piece:

3 - Side seam to first dart arm

4 - Second dart arm to centre back

WAISTBAND CONSTRUCTION

There are several ways to draft a shaped waistband, including using the waist section of the bodice block to construct, but as I have not yet shown you how to draft a bodice block (but definitely plan to in the future), I'll show you how to draft the waistband using the skirt block.

draft_a_shaped_waistband_7

Add the four measurements taken in the previous step together to find the length of the waistband. Remember this measurement gives you half the waistband, as the pattern piece can be cut on the fold. Draw a line as long as this measurement. 

draft_a_shaped_waistband_8

Decide how wide you would like your waistband to be - consider a measurement around 3 - 6cm (1 1/4 - 2 1/4in). Draw a perpendicular line from either end of your original line, the height of your waistband.

draft_a_shaped_waistband_9

Complete the rectangle by connecting the end points of the lines drawn in the previous step.

So now that you have the basic shape, it's time to get some markings onto your pattern piece.

draft_a_shaped_waistband_10

Going back to your original measurements (from your skirt block), measuring from the right hand side of your waistband, mark in each point of interest with a perpendicular line. You need to mark the location of your front dart, the side seam and back dart. You can also label each end as the centre front (right hand side) and centre back (left hand side).

And this is where the tutorial takes a turn away from the straight waistband tutorial...

Label your pattern

draft_a_shaped_waistband_11

Label each section of the waistband, with the following:

1 - Centre front

2 - Side front

3 - Side back

4 - Centre back

Measurements required

You will now need to find the difference between your waist measurement (where your skirt sits) and the top of your waistband.

draft_a_shaped_waistband_12

A good way of doing this, is by putting on your skirt toile (as you can see, my skirt is a digital one!) and working out where the top of your waistband will sit (this will depend on how wide you are making your waistband). Take a tape measure and measure around your waist at the point where your waistband will end. Take note of the measurement.

Compare measurements

Work out the difference between the measurement you just took and your actual waist measurement. Take note of this number.

You now need to divide this measurement by 2 (as you will be cutting your pattern on the fold) and then divide it by 3 (as you will be distributing the measurement evenly throughout the pattern piece).

For example, if the difference between your measurements is 6cm, you need to divide that by 2, which gives you a result of 3cm. You then divide the 3cm into 3, giving you 1cm. That number (in this case, 1cm) is the one you need in the next step.

Waistband construction

draft_a_shaped_waistband_13

Take that number and, on your waistband, mark a point to the right side of each vertical line (excluding the centre front and centre back), that distance away from the line. If you were to use the same numbers I used in the example above, for this step, you would need to mark a point 1cm from each vertical line. 

draft_a_shaped_waistband_14

Label these points as A, B and C.

Cut

draft_a_shaped_waistband_15

Cut down each vertical line, from the top of the waistband. Do not cut all the way through the pattern, leave a small "hinge" to keep the pattern pieces attached.

Close

draft_a_shaped_waistband_16

Being careful not to break the "hinge," rotate the centre back piece, until the slashed line overlaps point A. Tape or glue in place. 

draft_a_shaped_waistband_17

Repeat for the 'side back' piece (which is now attached to the centre back piece). Rotate until the slashed line overlaps point B and then stick in place. 

draft_a_shaped_waistband_18

Rotate the final slash line, aligning the cut line with point C.

As you can see, your waistband is no longer a rectangle! The top edge of your waistband is now narrower than the bottom edge. 

Trace the pattern

draft_a_shaped_waistband_19

Take a piece of pattern paper and place it on top of your waistband construction so that you can trace it. 

Start by tracing the centre front (and labelling it as the 'centre front'). From the centre front draw a perpendicular line at either end of the line.

draft_a_shaped_waistband_20

By doing this, you will ensure that you get a nice smooth waistband across the centre front and back (as you can see in the example above) - when the piece is cut on the fold.

Repeat for the centre back.

draft_a_shaped_waistband_21

Now, using a ruler, or a hip curve, join the perpendicular lines (drawn in the previous step) with smooth curves, creating the waistband shape.

Add notches

draft_a_shaped_waistband_21

Before removing the pattern from the construction underneath, mark each point of interest with a notch. These notches will make it much easy for you to sew the waistband to the skirt, without the worry of stretching the waistband. 

draft_a_shaped_waistband_22

It is also a good idea to add notches along the top edge of the waistband. I like to put them in a different spot to the notches on the bottom edge, to save any confusion. 

Add a side seam

draft_a_shaped_waistband_23

If you would prefer to have a side seam in your waistband (rather than all-in-one), at this point you should draw in your side seam.  Draw a straight line from the middle notch on the lower edge of the waistband up through the centre of the respective slash line (through the centre of the overlap).

Add seam allowance

draft_a_shaped_waistband_24

You should have now transferred all the necessary details from your pattern construction onto your pattern. You can now add seam allowance to the top and bottom edges, as well as the centre back. I would suggest 1-1.5cm (3/8 - 5/8in) on the curved edges and 1.5-2.5cm (5/8in - 1in) on the centre back. 

If you have added a side seam, I would suggest adding seam allowance of 1.2 - 1.5cm (1/2 - 5/8in) to this seam.

Add grainline and cutting instructions

draft_a_shaped_waistband_25


Mark the grainline (parallel to the centre front) and add cutting instructions (cut 1 on fold).

If you have added a side seam, the grainline on the back piece will run parallel to the centre back, and the cutting instructions will be 'cut 2 pairs'. 

You may consider fusing you waistband, but that will come down to your fabric choice and design. 


You may also like:

Throwback Thursday: How to draft in-seam pockets

Photo from Corey, one of my lovely pattern testers

Photo from Corey, one of my lovely pattern testers

I love pockets. I really do. I like to put pockets anywhere I can as they are oh so handy for phones and keys, but also very comfortable for hands!

This is a tutorial to help you with "in-seam" pockets - a pocket that is hidden... surprise, surprise... in a seam of your garment (normally the side seam). Yesterday I showed you how to sew in-seam pockets (with french seams), so today I thought I'd show you how to draft the pattern piece as it is a very quick and easy process (both pattern cutting the pockets and sewing them) and once you have a pattern you are happy with, you will be able to use it over and over again, with minimal changes.

Tools

For this tutorial you will need the pattern of the garment you are adding pockets to, as well as some basic pattern cutting equipment: a transparent ruler, a pacer (or pencil), some scissors and a small piece of pattern paper (just bigger than your hand).

LET'S GO!

how_to_draft_in-seam_pockets_2

1. Take the front piece of the pattern you are making pockets for. I will be using the basic skirt block (as we are in the middle of The Skirt Series) as an example, but you can use this same method to add in-seam pockets to any garment that has a side seam.

2. Think about where you would like your pattern to sit. A good way to do this is to put on your toile and put your hands where the pockets would feel comfortable. Mark the location with a pin.

If you don't have a toile, you can just measure down from your waist to work out a good spot. For me, if I am adding a pocket to a waisted garment, I will place the pocket 9 - 10cm (3 1/2 - 4in) down from the waist. 

Mark this point on your pattern piece. 

3. Now think about how big you would like the opening to your pocket to be. I suggest around 15-20cm (6 - 8in). Measuring along your stitch line, down from the point you marked in the previous step (the top of the pocket), indicate the bottom of the opening with another notch. 

Draw the pocket bag

how_to_draft_in-seam_pockets_3

4. I think the easiest way to get a good pocket shape, is by tracing roughly around my hand. To do this, place your hand on your pattern, as if it was in a pocket, and draw around it in the rough shape of a pocket bag (have a look at the in-seam pockets of some of your own clothes if you're not sure about the shape). You don't want it to be too tight around your hand, so leave a little bit of space between your hand and the line you draw.

5. Take a separate piece of pattern paper and, using a weight to hold the pattern in place, trace the shape of the pocket (leaving enough space around it to add seam allowance). 

6. While you are tracing the shape of the pocket, you can also trace the seam allowance at the side seam. 

how_to_draft_in-seam_pockets_4

7. Add a notch, roughly in the centre of the pocket opening, and then using a tracing wheel, transfer that notch onto the front pattern piece. This notch will help when you are positioning your pocket, when it comes to sewing.

8. Add a grainline to your pocket piece, making sure it is parallel to grainline on the pattern you are adding the pocket to (this will ensure that the pocket sits nice and flat, when it is sewn in).

Add seam allowance and pattern details

how_to_draft_in-seam_pockets_5

9. Add seam allowance to the curve. I suggest 6mm - 1.2cm (1/4 - 1/2in) to make the curve as easy as possible to sew.

10. Add a notch to be used as a balance point on the curved seam - this helps when sewing the front and back pocket bags together.

11. Add cutting instructions (cut 2 pairs).

When it comes to cutting, you may choose to cut from your main fabric, or something lighter, to minimise bulk.

Transfer notches

how_to_draft_in-seam_pockets_6

12. The last thing you need to do is transfer the notches from the front pattern piece, to the back, so that you can place the pattern correctly on the back piece when it comes to sewing. 

how_to_draft_in-seam_pockets_7

13. Lay the back pattern piece onto the front, matching the side seams at the stitch line. Transfer the three notches onto the back pattern. If your pattern paper is not transparent, you can use a tracing wheel to transfer the notches. And there you have it... You now have in-seam pockets!

ONE LAST THING

how_to_draft_in-seam_pockets_8

If you are creating a pocket pattern for a garment with a waistband (like the skirt in the example), you may want to consider making your pocket piece so that it sits flush with the waistline. This can give you a lovely finish, and can prevent the pocket bags moving. 

To do this, simply draft the pattern piece the same way as the standard pocket bag, but continue to curve up to the waistline. To complete, add seam allowance, notches and pattern markings. 

Download a pocket pattern

Just in-case you'd prefer a printable pattern, instead of drafting your own, I have included one for you to download (just click on the diagram above, to start the download). It is a 2 page PDF, so nice and easy to put together. If you would like some help printing it, check out my tutorial on printing PDF patterns.

Happy sewing!


You may also like: