Curated By In The Folds

ISSUE 167 - MEMBER QUESTIONS WE'VE ANSWERED ABOUT ORMOND

THE Q & A SERIES

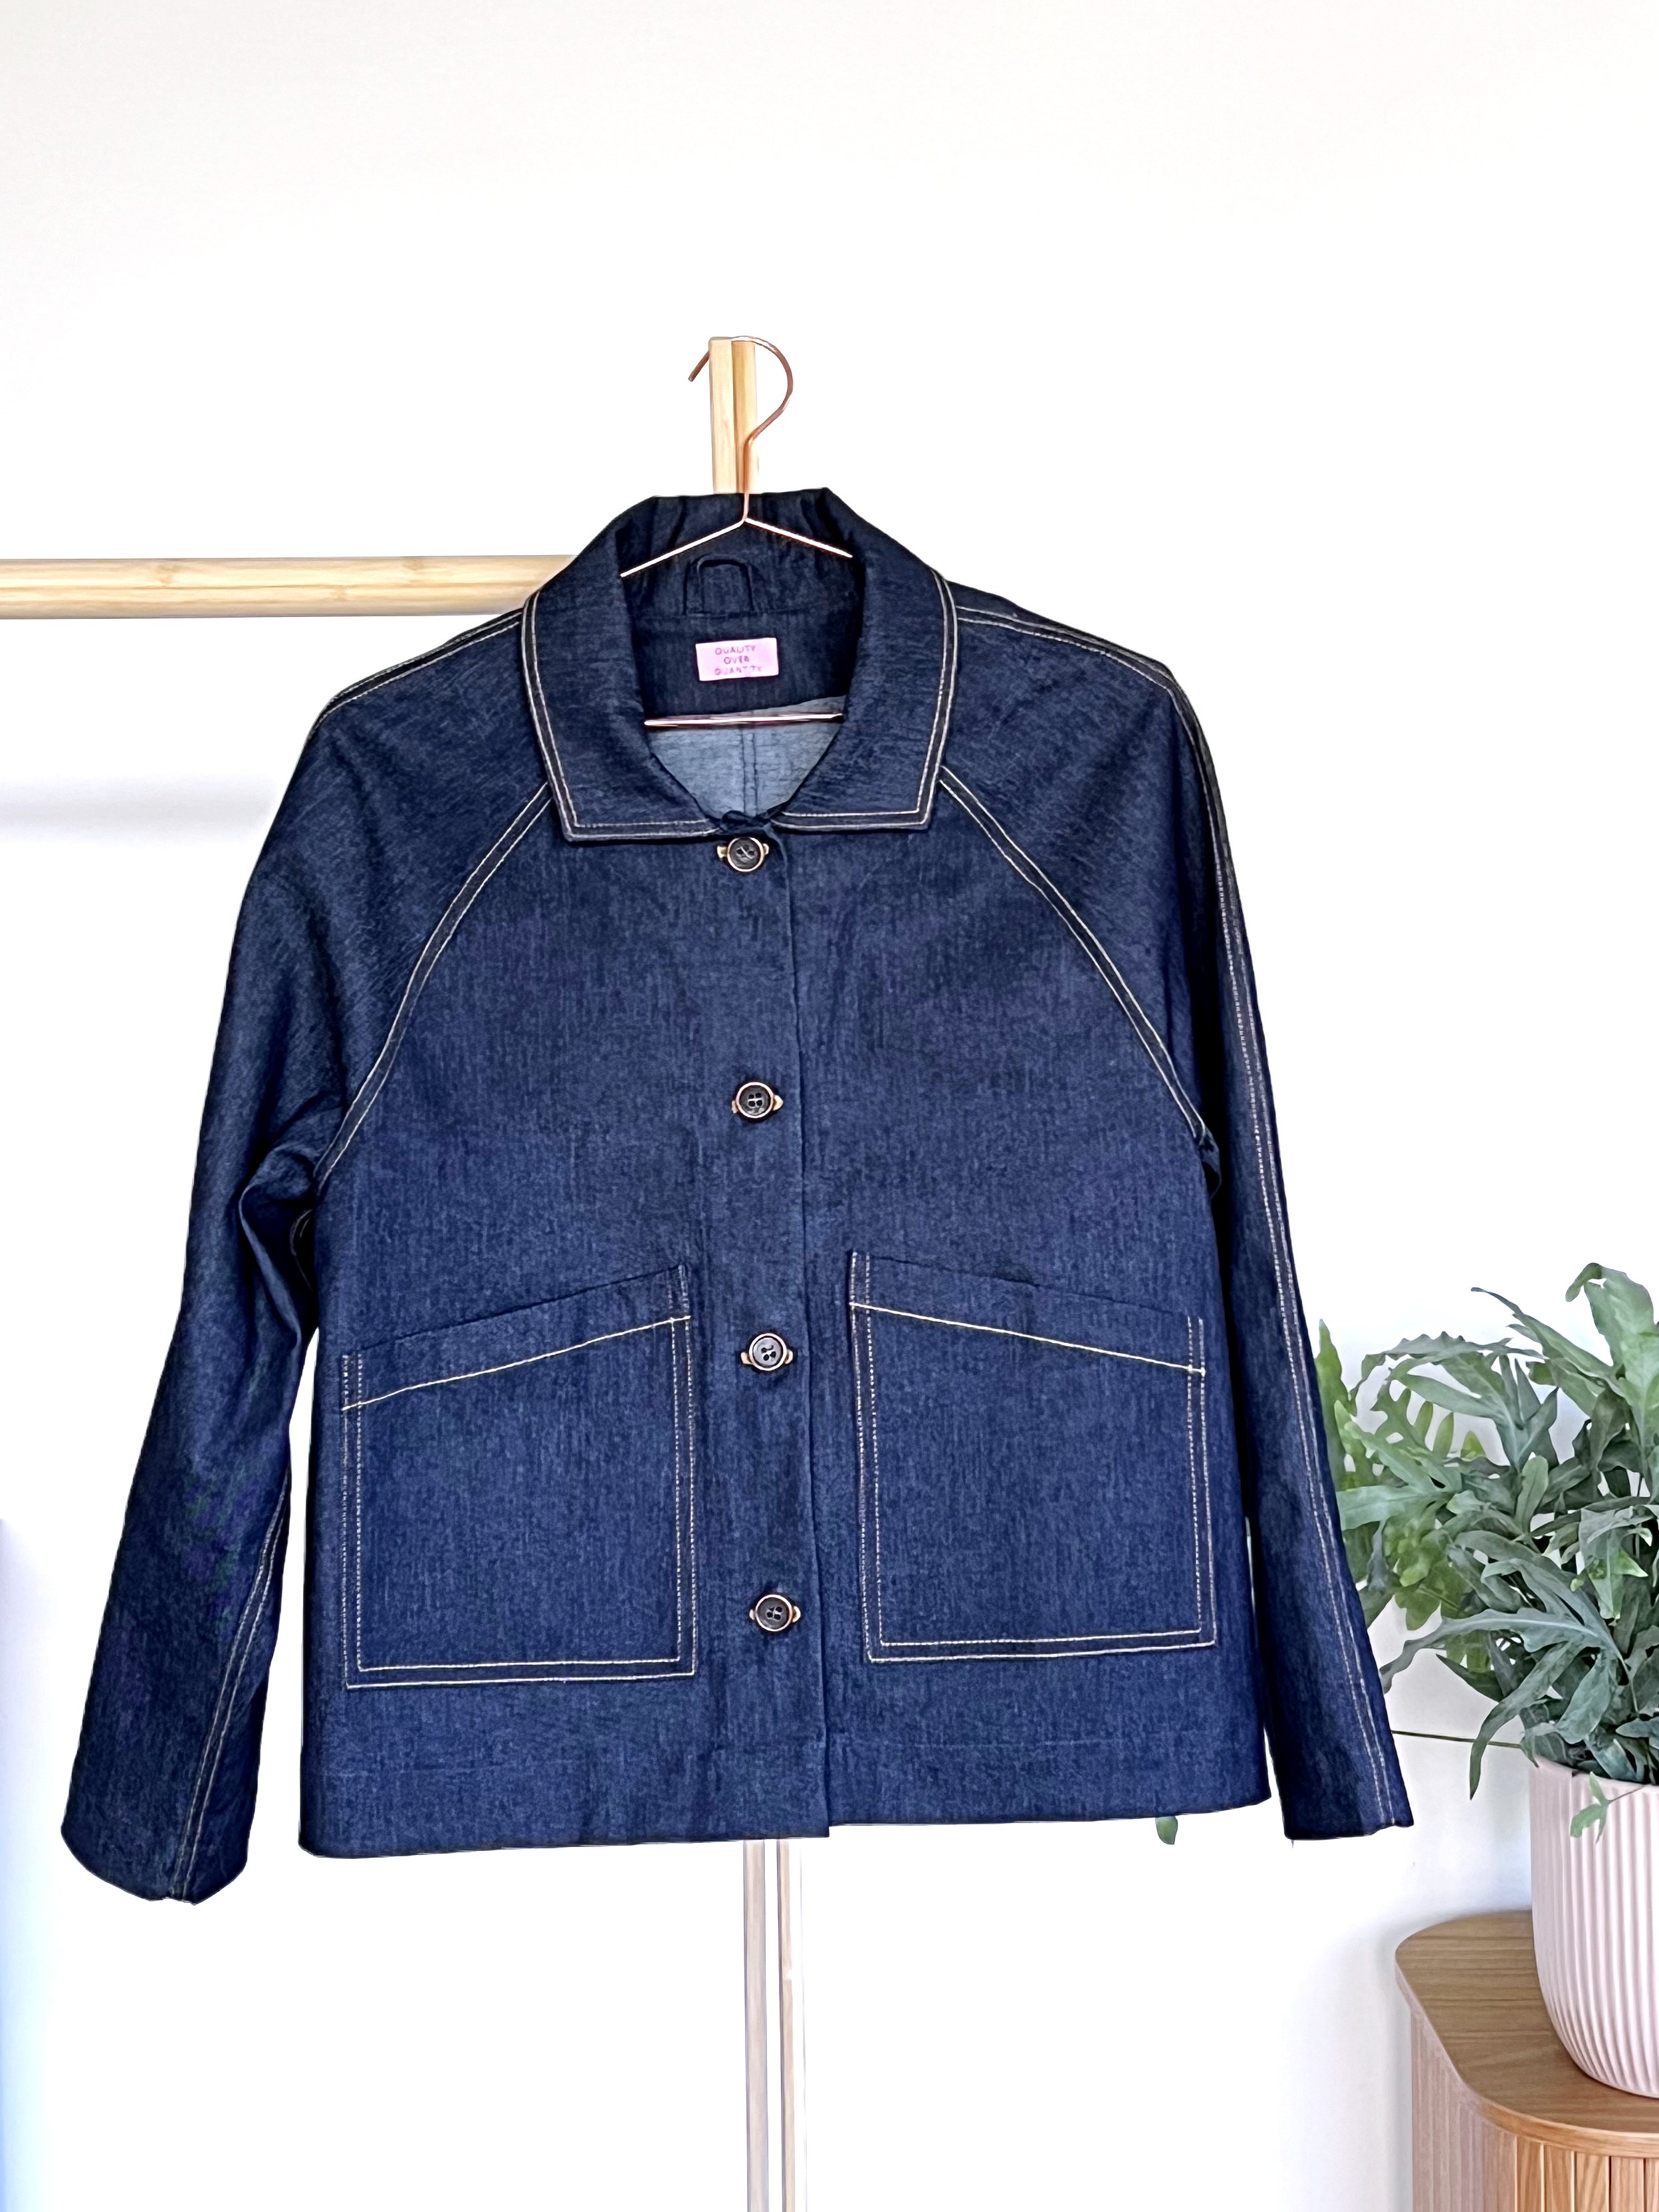
Ormond coat questions answered!

With each new Curated by ITF project we release we get lots of fantastic questions from our members in our private online community. From new sewists to the more advanced, there’s ALWAYS something to learn. 

And of course, we love to answer them! Our daily to-do list includes checking in with our community to get to know them, see what they’ve been chatting about and answering their questions in ways that make their sewing experience easier and more enjoyable.

Here’s a few we’ve answered recently which you might find helpful too.


INTERFACING ON ORMOND VIEW A BUT NOT VIEW B?

Question from Curated member, Kim:

I was flipping through the instructions and note that on View A the coat hem and sleeve hems are interfaced but the View B ones are not. I’m assuming it has something to do with the length, but curious as to why the hems (especially the sleeves) are interfaced?

Emily’s answer:

Good question Kim! I went back and forth about this decision and opted for only interfacing on View A because of the length and the more traditional style of View A. 

Interfacing adds a bit of extra weight to the hems, so this helps it sit nicely and helps with the folds. For View B, because it's a more casual style I decided to leave off the interfacing. You could add interfacing to View B if you wanted to.


BIAS BINDING WIDTH FOR THICK FABRICS?

Question from Curated member, Michaela: 

Emily, you mentioned about not buying bias binding yet if using a thick fabric, to ensure it’s wide enough. I’m using a vintage pure wool blanket for View A. What would be the best way to work out what width bias binding I need?

Emily’s answer:

What I'd do is stack three layers of your fabric together and sew them together with a 1.2 or 1.5cm seam allowance. 

Start with the binding width you think would work best and test it out by sewing it to one edge. If it's not wide enough, trim it off and sew the seam again and then try with a wider binding. Sara (our pattern tester who made the wool version) said that the bulk through the vent is the main place she needed the extra width in the binding. She made her binding 4cm so that's the width I would try at first.


ORMOND COATS FOR MEN?

Question from Curated member, Lucy: 

How would it be best to adjust the Ormond coat pattern for men? Just from chest down straighten it?

Emily’s answer: 

This is a good question! To be honest, I'm not sure. I'm a womenswear patternmaker so only have very limited experience with mens patterns. For the G-P range you would need to alter the pattern due to the bust dart, but for the A-J range I think it would be worth giving it a go. 

My approach would be:

  • Choose size based on chest measurement (in relation to bust)

  • Definitely make a toile to check the fit. The areas I'd be wanting to have a good look at would be across the back and shoulders and through the arms / bicep

  • Due to it being a raglan sleeve it is easier to make adjustments through the shoulder than a set-in sleeve, so I'd be sewing the shoulder seam with a basting stitch so it's easy to unpick if you need to add in some of the seam allowance.

  • I think the pattern would be easy enough to alter for menswear after you've looked at the toile to check everything.

  • Check the length of sleeves, length of body of jacket and pocket position.

Comment from Curated member, Jo:

I just noticed that Friday Pattern Company have a blog post up about adjusting a cis male jacket pattern for cis female body shape - the principles in reverse might help you. Here it is.


TOPSTITCHING ADVICE?

Question from Curated member, Sarah:

I'm interested to try contrast topstitching. I have a dark sea green cotton twill and am considering a cyclamen pink thread. Do I use the one thread for everything or swap it in when there is an obvious top stitch?

Leanne’s answer:

That sounds like such an awesome combo! I would only switch in the topstitching thread in areas where you want topstitching to be visible. 

For other purposes like stay stitching or anywhere you don't want visible top stitching (in my case that meant the facing stitch line and hems) then just use your regular matching thread. 

FYI - I used 2 spools of top stitching thread for my Ormond Coat but I played thread chicken at the end, it was really down to the wire. Having three spools on hand would have helped ease the stress levels! (But I also did have to unpick and redo a couple of topstitched areas, so you might find you can get away with two spools, depending on which size you are making. (I made an E) Hope all this helps!  


And finally—a tip from Curated member, Lynda!

Today I finished a lined wool jacket and thought I'd share a tip I wish I'd known. The fabric is mid blue and I used the white interfacing I had, not knowing it would show when I cut open the large thick buttonholes which have two layers of wool + interfacing (boo!).  A fusspot sewist thing for sure that only I will see, but next time I'll definitely consider the colour!


As well as giving you a little insight into the kind of place our private online community is (read: fun, happy, super inclusive and ALL about sewing!), I hope these questions have helped you on your sewing journey. And if you’d like to have help just like this at your fingertips, sign up to our Curated by ITF sewing subscription and get the Ormond coat pattern as well!

Happy sewing,

Emily


RESOURCES MENTIONED IN THIS ISSUE

  • Our private online community is an In the Folds sewing resource available exclusively to members of our Curated by ITF subscription. Each month we share additional resources that relate to the current project, as well as answer questions our members might have about anything sewing related. Past issues are now available for purchase by current subscribers.


For more issues of the Q & A series, you can check out the archive here.


WHAT YOU’VE BEEN MAKING


MORE POSTS IN THE SERIES

ISSUE 161 - HOW TO MANAGE A GROWING WARDROBE OF HANDMADE CLOTHES

THE Q & A SERIES

HOW TO MANAGE A GROWING WARDROBE OF HANDMADE CLOTHES

From all your makes do you ever feel like you have too many clothes? What do you do about storage and do you wear all your makes regularly? Do you ever get rid of your older makes that no longer work for you?


This question came up in our private, online Curated by ITF community this week and it got such great interaction that we thought we’d share everyone’s comments with you today!

For most makers, having a full wardrobe is definitely not an unusual ‘problem’. And we use the word ‘problem’ very carefully because the concept of sewing as a form of self-care is known and very much appreciated in the creative community.

Emily sits at a sewing machine and is working on a toile.

the benefits of sewing : more than just clothing

The benefits we get out of making are so much more than just having clothes to put on. Making gives us the opportunity to take a break from day-to-day life. When the rest of our life happens at break-neck speed, sewing allows us to focus on the task at hand and to be mindful and meditative.

Sewing motivates and challenges us. It gives us the opportunity to continue to learn and solve problems once we’ve finished studying for our profession. It teaches us resilience, because it doesn’t matter how long we’ve been sewing for, there will always be moments when our makes just don’t go to plan.

And one thing we know for sure, because we see it everyday with our Foldies in our Curated by ITF community, sewing provides an opportunity to connect with others who share our love for the craft. And we think this is probably the best part of all!

So with all that in mind, here are some ways our Foldies manage a growing wardrobe of clothes!

Charity shop donations

If you’re getting stressed about your expanding wardrobe, consider gifting any unworn makes to your local charity shop. One of our clever Foldies likes to help the volunteers out by including a little tag that includes the size of the garment and the fabric content. 
Gift to family and friends
If you’ve been sewing for a while then it’s likely that you’ve had a friend or family member comment positively on a garment you’ve made. Try to remember if anyone has admired the garment you’re wanting to move on and wrap it up as a little pressie for them. 

If you’ve decided you definitely need to slow down or stop making clothes for yourself for a while, but you’re also thinking about your growing fabric collection, consider loved ones you can make gifts for. By making clothes for others, you’re filling your sewing cup, practicing fitting on other people and emptying your fabric stash at the same time! Win, win, win!

Only make garments you need and really, really love

If you have trouble handing over garments you’ve poured your heart and soul into, you’re not alone! In this case, being more selective in the garments you choose to make can help. Try not to be influenced by trends or the latest patterns. Instead, take a look at your wardrobe and think about the garments you always go back to over and over again. Why is this the case? Is it the fabric? The colour? The cut? The style? Where are the gaps in your wardrobe? Our Slow Sewing Planner is a helpful tool to have when working through this process. 

@sewingwithkate wearing her original Rennie dress

@sewingwithkate wearing her refashioned Rennie dress

Refashion garments to make them more wearable

Sometimes it’s not until after we’ve made something and tried it on or worn it a few times that we realise it just doesn’t suit us. In these situations it can be helpful to consider whether there’s any little changes you can make to a garment to improve it. 

Take it in if it’s too baggy. Turn a dress into a skirt and top. Take up the hem or let the hem out.

The pattern instructions may say you’re finished, but your imagination doesn’t have to! Take the opportunity to try something you may not have thought of before.

Reuse the fabric in another garment

Depending on the garment size, take the time to cut off all the seams so that you have as much usable fabric as possible. Return what fabric you have left to your fabric stash to be used in another make in its entirety or for pocket bags, facings, or making bias bind. 

One-in-one-out

If you’re making a new garment, commit to donating the least favourite alternative already in your wardrobe. If you decide you love everything in your wardrobe, adopting this approach may help curb the impulse to make something new!

It’s important to find balance with everything we do, including the garments we sew and the hobbies we have, so we hope this post helps you if you’ve been struggling with an expanding wardrobe full of beautiful me-mades!

Happy sewing,

Emily


RESOURCES MENTIONED IN THIS ISSUE

  • Curated by ITF is our sewing subscription and private, online community. Join now to get a new project each month to stop pattern-stashing and start skill-building!

  • Our Slow Sewing Planner helps you gain clarity on what’s missing from your wardrobe, as well as sustainable tips for organising what you already have.

  • Our Rennie dress pattern is a boxy, relaxed fitting calf-length dress made for easy dressing that incorporates a range of finishing techniques for a beautifully finished garment. This pattern will elevate your wardrobe and sewing skills!


For more issues of the Q & A series, you can check out the archive here.


WHAT YOU’VE BEEN MAKING


MORE POSTS IN THE SERIES

ISSUE 153 - HOW TO SEW FLAT FELLED SEAMS

How to sew flat felled seams.

THE Q & A SERIES

How to sew flat felled seams

Hi Emily,

I am really loving being a member of Curated. I’m learning a lot and it’s pushed me out of my comfort zone. Something I would like to suggest for an upcoming pattern is flat felled seams. I love the look of them and would love to give them a go. I know I could just try them out myself, but there’s something about getting a push from the monthly project that I know will encourage me to do it. And it’s always fun to do it along with the other ‘Foldies’ too.

Jennifer
Preston, UK


Hi Jennifer,

I am assuming you’ve seen our shiny new pattern, the Attwood pants, by now! 

We are really excited about this one as it’s our first pattern that includes flat felled seams! We’ve covered French seams and bound seams in some of our other patterns, but never flat felled… so we thought it was about time we rectify that!

What is a flat felled seam?

Flat felled seams are one of the strongest seam finishes. The raw edge is enclosed inside the seam (like French seams), and then it's pressed flat and stitched to keep the seam nice and flat.

When should I use a flat felled seam?

Flat felled seams are suitable for hardwearing items such as jeans and jackets. You will also sometimes use this finish for making shirts. They can also be used as a design feature - as we have done with the Attwood pants.

Types of flat felled seams

There are various ways to sew flat felled seams and we have chosen the method we find the most straightforward. Flat felled seams can be sewn so that the seam is enclosed on the right side of the garment (Option 1) or on the wrong side of the garment (Option 2).

For the Attwood pants, we used the method that has the enclosed seam on the right side of the pants to make a feature of the flat felled seams. If you would prefer the alternative (enclosed seam on the wrong side of the garment), you can construct them that way. We suggest sewing samples of both options to work out your preference.

Flat Felled Seam Option 1 

Seams sewn wrong sides together. Seam allowance is enclosed on the right side of the garment when the seam is complete. This is the method used throughout these instructions.

Flat Felled Seam Option 2 

Seams sewn right sides together. Seam allowance is enclosed on the wrong side of the garment when the seam is complete.

How to sew a flat felled seam

How to sew flat felled seams - Step 1.

Step 1
Pin the pieces you are joining together with wrong sides together. Stitch with a 1.2cm (½in) seam allowance (or what your pattern specifies).

How to sew flat felled seams - Step 2.

Step 2
Trim down one side of the seam allowance to 6mm (¼in). The instructions will guide you as to which side to trim down. If sewing a sampler, you can trim down either.

How to sew flat felled seams - Step 3.

Step 3
Press the seam open with the seam allowance pressed to one side.

Step 4
Turn the wider side of the seam allowance over the narrow side. The raw edge of the wider side should sit about 1mm back from the stitch line. Press well when you are happy with where the edge is sitting.

How to sew flat felled seams - Step 5.

Step 5
Flip the seam allowance over to the other side of the seam, so that the raw edge is now enclosed in the seam. Press and pin through all layers.

How to sew flat felled seams - Step 6.

Step 6
Carefully stitch close to the fold to complete the seam.

As you know, Jennifer, we’ll be going through everything with our Curated by ITF online community, so if you have any questions you definitely ask then! (And you’re right… it’s way more fun to do it together!)

Happy sewing,

Emily


RESOURCES MENTIONED IN THIS ISSUE


For more issues of the Q & A series, you can check out the archive here.


WHAT YOU’VE BEEN MAKING


MORE POSTS IN THE SERIES

ISSUE 152 - HOW TO ALTER A RAGLAN NECKLINE

THE Q & A SERIES

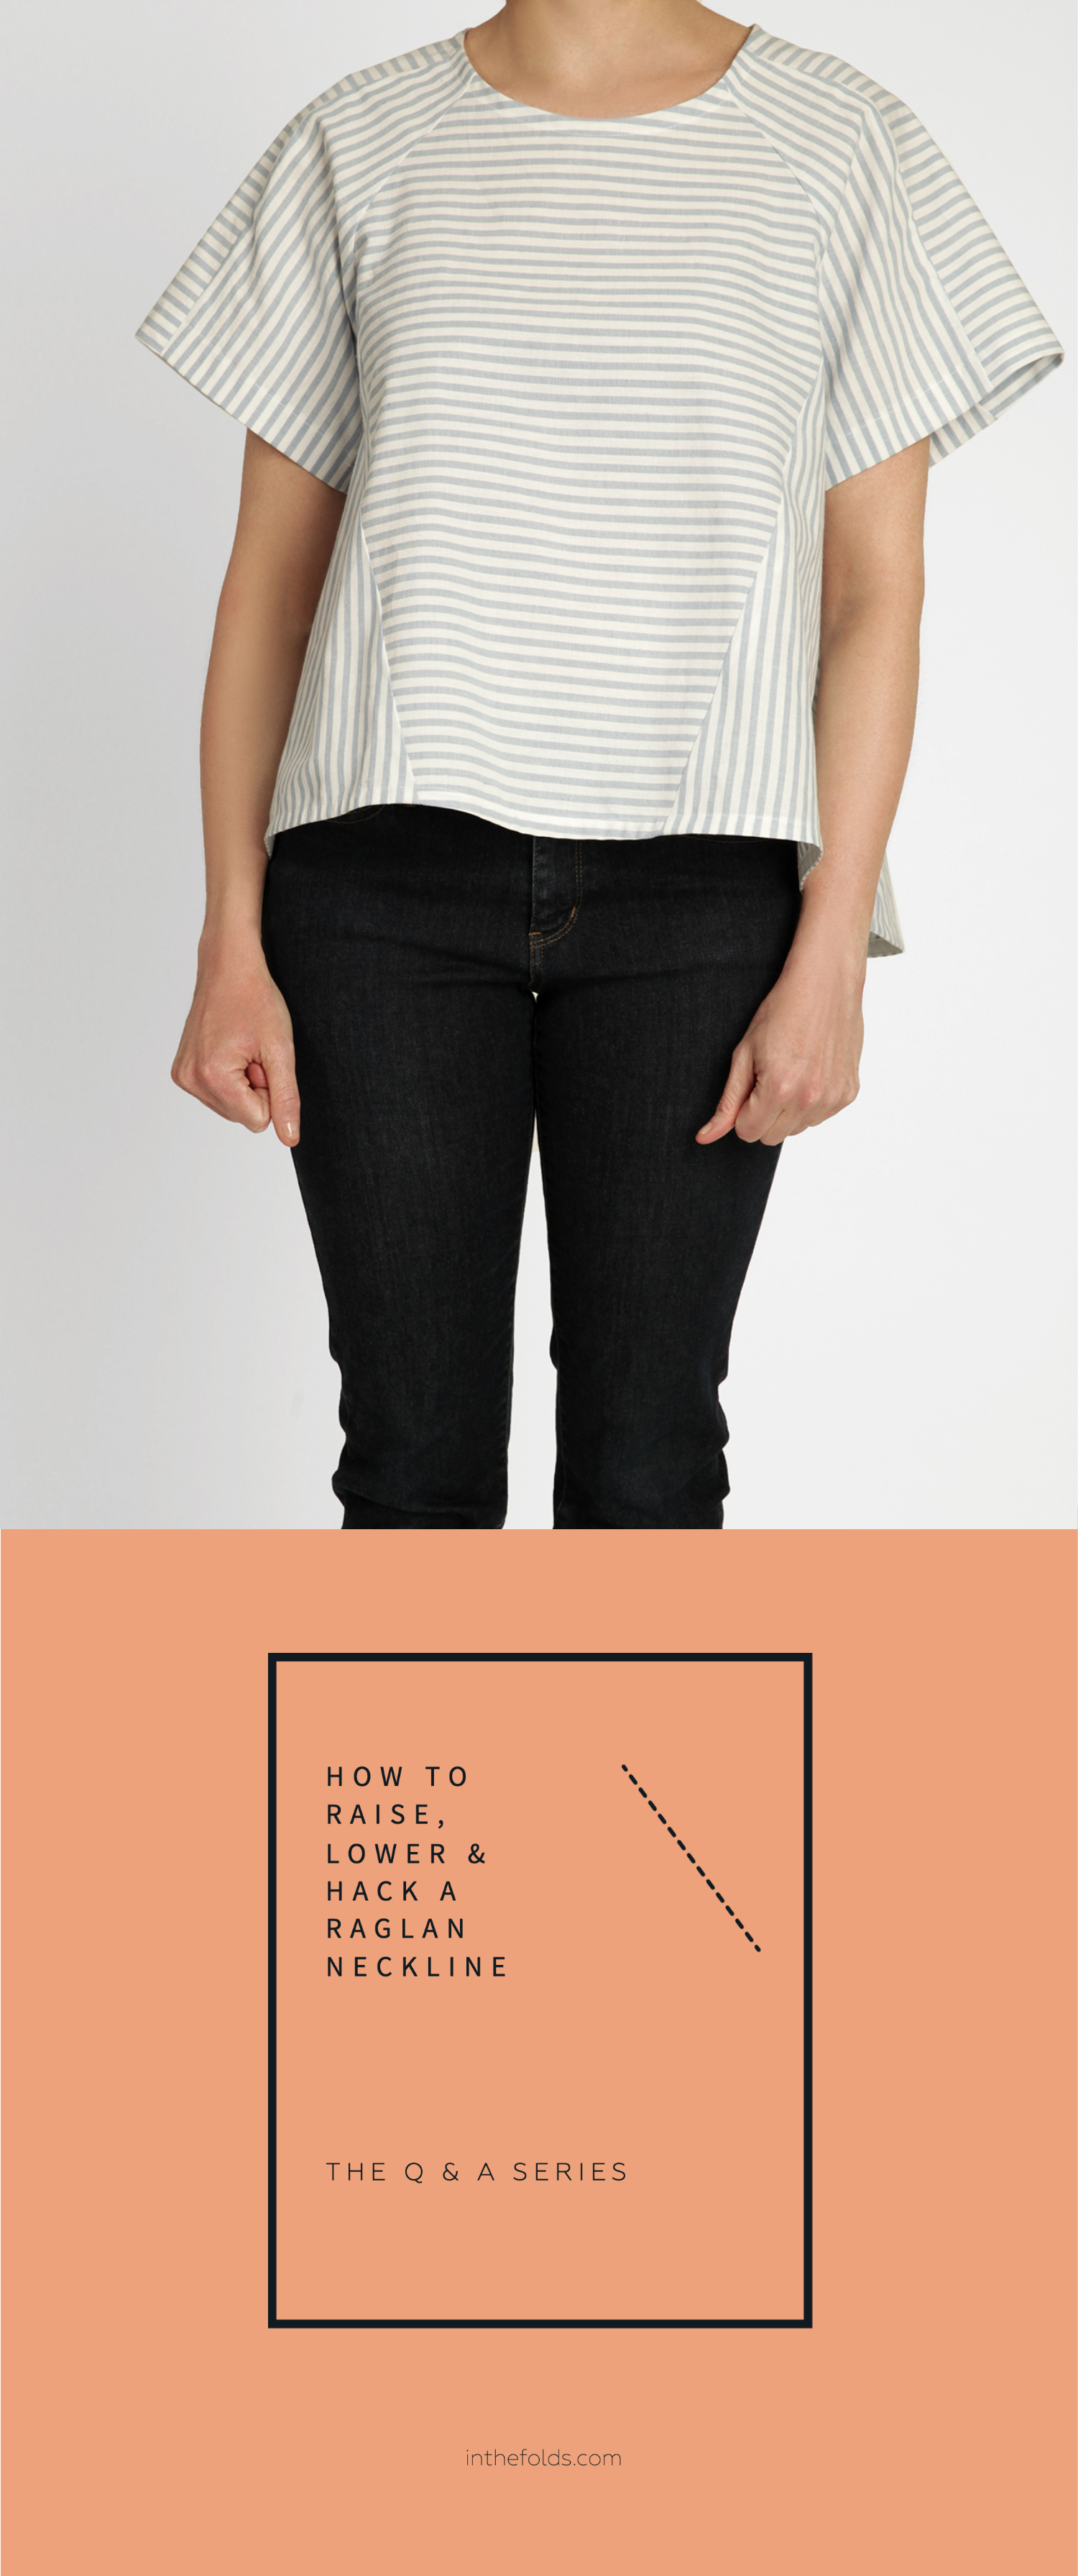
How to alter a raglan neckline

Hi Emily,

How do I make a raglan neckline smaller? Is it as simple as lengthening each of the four seam lines or is there more to it to maintain the shape?

Katie
Long Beach, USA


Hi Katie,

Raglan sleeves have been on our mind this month as it’s one of the tutorials included in our Cartwright dress Hack Kit, so we thought this would be a great question to tackle! And the raglan sleeve design has to be one of our favourites. Two of our first patterns ever released included it - the Rushcutter dress and the Collins top!

And I’m pleased to tell you, you are correct! To raise the neckline on a raglan sleeve (which will make it smaller) you need to continue the seam lines to your chosen neckline height.

I wanted to show you this on the raglan sleeve we drafted from the Cartwright dress + top pattern but realised the neckline couldn’t get much higher, so I’ll show you how to lower it first and then add back on… as I realised that someone out there might like to learn how to do the opposite!

How to lower the neckline on a garment with a raglan sleeve

Step 1

First you need to know how much you would like to lower the neckline by. You can work this out by referring to your toile (if you have one).

On the pattern, measuring from the STITCH LINE, mark in your new neckline with a broken line - marking the distance you would like to lower the neckline by.

For my example, we are lowering the neckline by 2.5cm (1in). Mark the new neckline on the FRONT, BACK and SLEEVE.

If you would like to see how we mark a curved line with a broken line you can check out this video.

Step 2

Join the broken line with a ruler or French curve. Make sure your new neckline meets the CENTRE FRONT and CENTRE back at a right angle.

Step 3

Before adding seam allowance, it’s a good idea to line up the pieces, stitch line on stitch line, to check the flow through of the neckline.

Checking the flow through means that you check how a line will look when the garment is assembled. You want lines to transition smoothly across seams with no lumps or bumps.

For more information on checking the flow through, or checking and truing, read this post.

Step 4

When you’re happy with the new neckline, add seam allowance. We suggest using a seam allowance of 1cm (3/8in), although if you prefer sewing a neckline with a seam allowance of 6mm (1/4in) that works too. Cut along the line to remove excess paper.

How to raise the neckline on a garment with a raglan sleeve

To raise the neckline, do the opposite.

Tape or glue some paper onto the top section of each pattern piece, so that you can “grow on” the new neckline.

Extend each STITCH LINE by the desired amount, following the angle of the seam.

Mark the new neckline by marking it at regular increments, measuring up from the original line.

As we did when lowering, it’s a good idea to check the flow through of the lines before adding seam allowance.

How to draft an alternate RAGLAN neckline

While we’re talking about necklines and raglans, I thought it would be fun to show you how to change the design of a raglan neckline - so, rather than just raising or lowering, how to change the shape like in the V-neck raglan neckline above.

Step 1

Place the SLEEVE on the FRONT, stitch line on stitch line, as if it has been sewn. Draw in your new neckline going from the shoulder dart to the CENTRE FRONT.

Step 2

On the dart STITCH LINE, measure down to determine how much you have lowered the neckline at this point. Mark this same amount on the other side of the dart. This will ensure the two sides of the dart meet cleanly when you sew the dart.

Step 3

Place the SLEEVE on the BACK, stitch line on stitch line, as if it has been sewn. Draw in your new neckline going from the point marked in STEP 2 to the CENTRE BACK.

And you’re done! I hope this tutorial gives you the confidence to start altering necklines on raglan sleeve patterns so you can make them exactly how you want them to be!

If you’re interested in learning more about patternmaking and hacking, our sewing membership, Curated by ITF, is the perfect place. With a new project each month, a back catalogue of past issues to keep you busy, support from industry experienced teachers and an inspiring online community you’ll learn everything you need to know to turn patterns into whatever beautifully finished garments you want to wear, and that fit perfectly!

Happy sewing,

Emily


RESOURCES MENTIONED IN THIS ISSUE


For more issues of the Q & A series, you can check out the archive here.


WHAT YOU’VE BEEN MAKING


MORE POSTS IN THE SERIES

ISSUE 147 - TIPS FOR SEWING KNIT NECKLINES

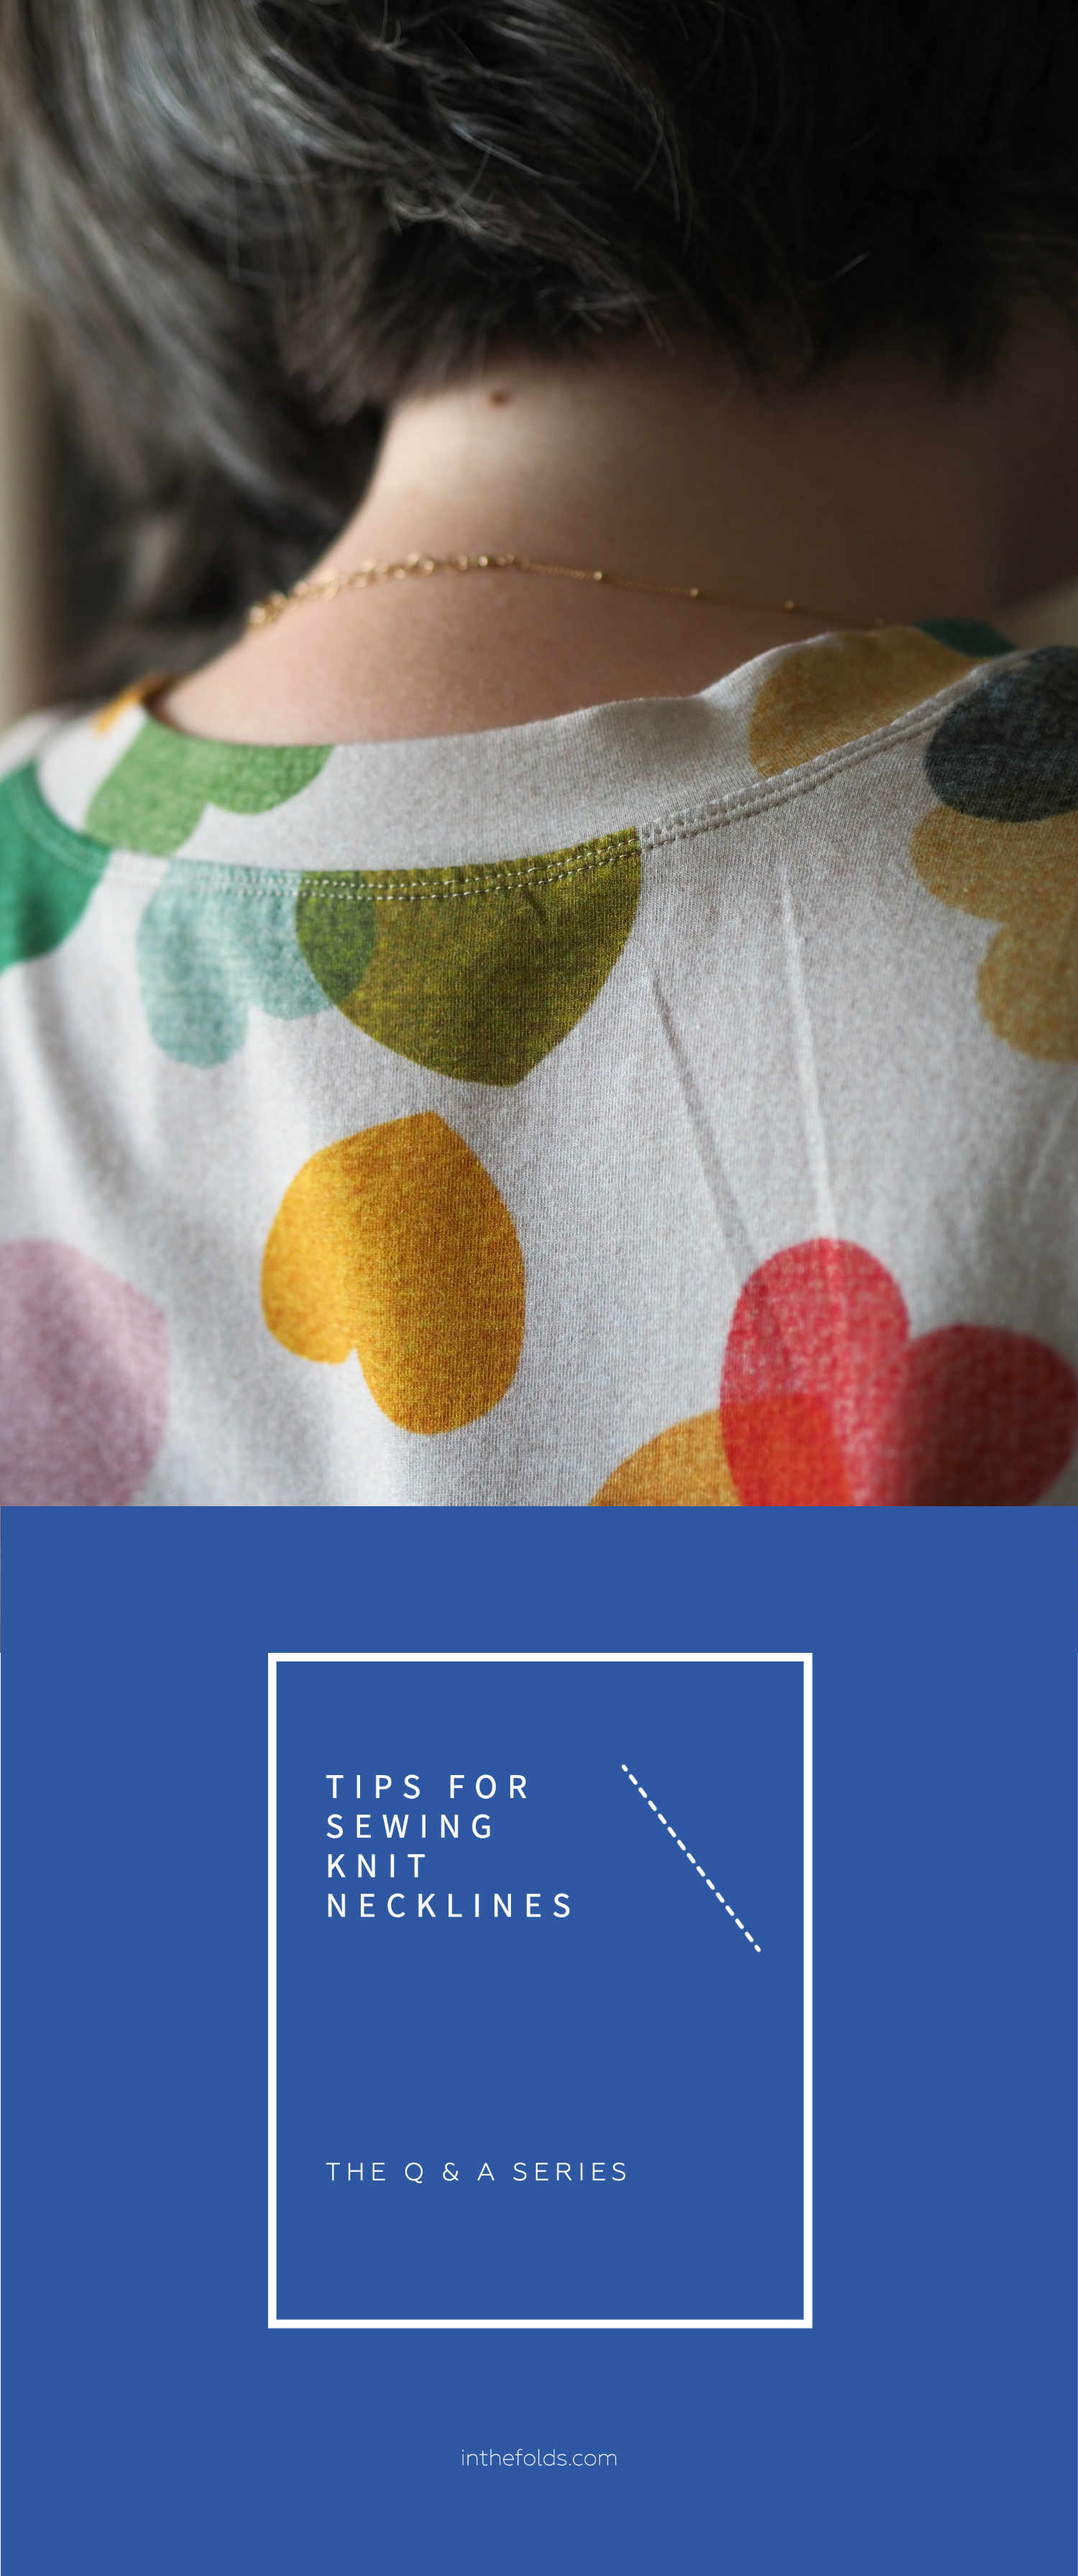
TIPS FOR SEWING KNIT NECKLINES

THE Q & A SERIES

TIPS FOR SEWING KNIT NECKLINES

I am having trouble getting a nice smooth neckband when sewing knit tops. In my first attempt, I cut the neck band the recommended length, but found I could not avoid some  puckering at the front of the top. The next time, I cut the band longer. This mostly avoided the puckering, but my neckband stood up instead of lying flat. In both cases I used a fairly firm knit and cut the neckband from the same fabric, but on the bias, as per the pattern instructions.

Any tips most gratefully received!

Karen

Melbourne, Australia


Hi Karen,

These days, so much of our wardrobe contains garments made from stretch fabric so, sewing with knits is a skill that we’d all love to add to our kit, but many are afraid to try. We were keen to knock this fear on the head with our two-part Sewing Knits series as part of our Curated by ITF subscription, and from the feedback we’ve been getting, I think we’ve succeeded!

Samplers are a great way to learn a new skill and this is the approach we’ve used in part one of the series, the Sewing Knits Skills Kit. Not only does it provide a low-pressure method of tackling a new technique (you can happily practice and make mistakes because you’re not going to wear it!), it’s also low-cost because you can just use fabric scraps you already have in your stash.

The second part of the series, the Kealy T-shirt, is a the perfect next-step pattern. It’s a classic design that allows you to start applying the new skills you’ve learnt, but doesn’t require you to combine them with tricky techniques. Plus, it’s a quick sew, and you can make a few shirts in one sitting which gives you even more opportunity to practice!

But, moving on to your question…

To start with, I am curious about the pattern suggesting you cut the neckband on the bias.

CUT NECKLINES ON THE STRAIGHT GRAIN, NOT BIAS

When it comes to knits, we normally cut the neckband on the straight grain. When sewing woven fabrics and finishing a neckline with bias binding, we cut on the bias. This gives the woven fabric a slight stretch and helps it fit around curves and press nice and flat.

So to start, I’d suggest confirming this aspect of the instructions and consider cutting the neckband on the straight grain instead. 

USE A NECKLINE RATIO

Often patterns call for you to ‘quarter the neckband’ on a stretch pattern for ease of explaining the instructions.

However, because the front neckline is longer than the back, this means the front is stretched more, making the neckband uneven. In the Folds patterns always have notches to distribute the stretch evenly, but if you don't have these notches you can calculate the ratio following these instructions.

Measure your pattern

Record the following measurements of your pattern. Remember to double any measurements which are cut on the fold, and measure the STITCH LINE (the pattern without seam allowance), not the CUT EDGE.

A - Front neckline =
B - Back neckline =
C - Total neckline measurement (A+B) =
D - Total neck ribbing / neckband measurement =

Divide the total neck ribbing (D) by the total neckline measurement (C) to find the ratio.

E - D/C = ratio of neckline = 

E.g. 44/54 = 0.81 ratio.

Then use the ratio (E) and apply it to the front and back neckline (A and B). Once you have these measurements you can mark the notches onto the pattern. Remember to halve the measurements to find the CENTRE FRONT and CENTRE BACK of the neckband / ribbing.

Front ribbing / neckband - Front neckline (A) x ratio (E) =
Back ribbing / neckband - Back neckline (B) x ratio (E) =

Tips for making neck ribbing

If you're creating your own neck ribbing pattern or you need to adapt a pattern to suit your fabric, you can choose the ratio that works best for you. Here are some tips to get you started:

  • Always toile the new neck ribbing pattern in the right fabric before sewing the final garment.

  • You'll notice when using a self fabric (the same jersey as the body of the T-shirt) as a neck band that it has less stretch than a separate ribbing fabric. Ribbing fabric has raised vertical lines.

  • The more stretch the ribbing has, the shorter the neckband should be.

  • A good place to start for a regular crew neck T-shirt and self fabric is to make the neckband pattern around 80% of the neckline measurement. Self fabric won't stretch as much and won't lie as flat as a separate ribbing fabric.

  • It is often a balancing act between getting the neckband to sit flat to the body and not stretching too much that it causes the neckline to gather. Sew a test and tweak the ratio by a few % if necessary until you're happy with the fit.

  • A good place to start for a regular crew neck T-shirt and ribbing fabric is to make the neckband pattern around 70-75% of the neckline measurement.

  • Stretchier ribbing may go below 70%, but if it is stretched out too much, it may create gathers around the neckline.

  • The narrower the neckband, the more likely it is to lie flat. We recommend using 2cm (3/4in) width for self fabric and 2.5cm (1in) for ribbing fabric. These are finished widths, so don't forget to double them and add seam allowance when making your pattern.

PRESS, PRESS, PRESS!

The final thing we want to say is, don’t underestimate the power of steaming (with an iron) when you are sewing a neckband (or anything else for that matter)!

Don't worry if the neckline looks wrinkled after attaching the neckband/ribbing, as long as there are no pleats or puckering. You can see in our example how it completely transformed after pressing.

Using a pressing ham helps a lot when pressing curves like this.

I hope this tutorial helps you achieve a neckband you are happy with!

If you’d like to learn more skills related to sewing knits, we suggest you checkout this month’s issue of Curated - the Kealy T-shirt, along with last month’s issue - Sewing Knits Skills Kit, which you can purchase separately after you sign up.

Happy sewing,

Alys


RESOURCES MENTIONED IN THIS ISSUE

  • The two-part Sewing Knits series includes the Sewing Knits Skills Kit and the Kealy T-shirt pattern, which are available with a Curated by ITF subscription. The Kealy T-shirt pattern is the April project and can be purchased here. The Sewing Knits Skills Kit can be purchased here by current subscribers only. More information about the subscription can be found here.


For more issues of the Q & A series, you can check out the archive here.


WHAT YOU’VE BEEN MAKING


MORE POSTS IN THE SERIES

ISSUE 145 - SEWING KNITS: INDUSTRIAL VS DOMESTIC TECHNIQUES

THE Q & A SERIES

SEWING KNITS: INDUSTRIAL VS DOMESTIC TECHNIQUES

Hi Emily,

How do I achieve the techniques I find in my RTW knits while sewing at home?

Thanks,

Rosa


Hi Rosa,

One thing many sewists strive for is to learn how to make their homemade garments look as finished as ready-to-wear. (Well, not all ready-to-wear, we have to admit… but you know what we mean!) We’re not embarrassed to admit that you can often find us turning a store-bought garment inside out to figure out how a particular finish was achieved!

So, we think it’s a great idea to look in your wardrobe for inspiration!

One of the best ways to learn about different seam finishes and construction techniques is by looking at ready-to-wear garments in your wardrobe or a shop, and taking photos for future reference if you see a finish you like.

This month in Curated by ITF, we’re looking at all the techniques you need for sewing knits at home on a domestic sewing machine.

In industry, they use specialist machines to achieve some of these techniques and of course, it’s unlikely you’ll have access to those kinds of machines, but that doesn’t mean you can’t get the same finish (or at least similar) at home!

Read on to find out about two industry techniques that we like, and we’ll show you how to mimic these techniques while sewing at home on a budget!

Sewing knit seams

In industry, stretch seams are sewn on an overlocker. Four threads are used to maintain the stretch of the garment, with a 6mm (1/4in) seam allowance.

At home, on a regular sewing machine we usually sew a stretch stitch (on some machines, this is called lightening bolt stitch or triple stitch) or a narrow zig-zag stitch, with a 1cm (3/8in) seam allowance. We then finish the edges with a zig-zag stitch, overlocker or an edge foot.

If you have an overlocker, you can, of course, sew the seams directly on the overlocker. However, you must change the seam allowance to 6mm (1/4in) and use four threads to stitch the seam, rather than three.

It’s important to make a sample first, and pull the seam to ensure the overlocker has the correct tension and the seams will hold as they stretch on and off your body.

Hemming Knits

In industry, an industrial coverstitch machine is used to sew the hems of a stretch garment.

At home, we use a twin needle to provide a double row of stitching on the front and a zigzag stitch on the back. You can also choose to overlock the hem first, but this is not necessary as knit fabrics don’t tend to fray. In this month’s Curated by ITF Issue we encourage you to make two samplers to test these techniques so you can decide what works best for you and the fabric you’re working with.

This simple, but effective knit fabric finishing technique saves home sewists both money and space! A stretch twin needle costs around $8 AUD, whereas a domestic coverstitch machine ranges between $1200 - $2000 AUD! (Of course, if you’ve got the budget and the storage space, feel free to invest if you think you’ll get the benefit of it.)

Take a look in your wardrobe

You might find it interesting to see how your RTW garments differ from home sewing approaches. But you shouldn’t feel like you need to invest in expensive technology to be able to achieve it at home. With the right guidance and techniques, we’re certain you'll be pleasantly surprised by the amazing results you can create at home on a domestic machine!

If you’d like to learn more about sewing knits, we’d like to invite you to join us in Curated by ITF this month. We think it’s high time sewists kicked the fear of stretch fabric to the curb and we’re here to help you do just that with a two-part knit fabric series!

This month we’re working through all the knit fabric skills and techniques you need to know to confidently sew stretch on a regular sewing machine, including machine settings, tools, stitch types and more.

Then we’re applying this information through the use of samplers. This is a learning approach that we love to use at In the Folds as it gives you the opportunity to practise and fine-tune skills before applying them to a wearable garment.

Once you’ve worked through the content for the month you’ll be ready to kick on to part two - a T-shirt pattern that we know will become a go-to in your wardrobe and sewing regime!

Happy sewing,

Alys


RESOURCES MENTIONED IN THIS ISSUE

  • The first in a two-part stretch fabric series, the Sewing Knits Skills Kit is currently available with a Curated by ITF subscription for the month of March 2023. More information can be found here.

  • Stay tuned for next month’s knit T-shirt pattern!


For more issues of the Q & A series, you can check out the archive here.


WHAT YOU’VE BEEN MAKING


MORE POSTS IN THE SERIES

ISSUE 144 - HOW TO CUT KNIT FABRIC

THE Q & A SERIES

TIPS FOR CUTTING KNIT FABRIC

Hi Emily,

I’m struggling to cut knit fabrics. Whenever I cut them out and unpin the pattern pieces, they appear smaller than the pattern! Do you have any tips to help me cut more accurately?

Thanks,

Mel


Hi Mel,

This is actually a really common problem, so I’m glad you asked the question!

This month in our Curated by ITF sewing subscription we’re learning all about how to sew with stretch fabric with our Sewing Knits Skills Kit.

It can be really tricky to cut knit fabric because it often stretches as you pin and cut, meaning the pieces become the wrong size. Just another reason people find sewing with knits a bit frustrating!

I’ve got a few simple tips that will help ease the process and allow you to cut your stretch fabric accurately.

Before you start

Prewash your fabric

When making garments you should always wash and dry your fabric before starting. This is no different for stretch fabric.

I recommend that you use the same method you intend to use when washing your garment after wearing so it doesn’t shrink after the first wash. If you wash in cold water only, then prewash in cold water. If you wash in warm water, then prewash in warm water.

Press your fabric

After you’ve washed and dried your fabric, give it a good press. Take care not to overstretch the fabric while doing this.

If you find that the edges of the fabric are rolling, now is a great time to use some starch spray. This helps to stabilise the fabric and washes out after sewing. And you’ll actually find this helps while sewing the pieces together, as well as when cutting.

Use the right tools

Pinning and cutting with scissors is often what makes the pieces smaller or misshapen.

Instead, use a rotary cutter, weights and a cutting mat. These tools help with accuracy because they stop the fabric from pulling as you cut, which happens as you pin and cut with scissors.

This is a great chance to make the pattern weights from Issue 17 of Curated by ITF!

Cutting technique

Check the grainline

Ensuring your pattern piece is on grain will also help with cutting your knit fabrics accurately.

To do this, take your pattern pieces and lay them on your fabric with the grainline of each pattern piece running exactly parallel to the selvedge.

Use a tape measure to measure from each end of the grainline mark on your pattern piece to the selvedge. Adjust the pattern piece until the measurement is the same from both ends of the grainline mark.

Use the pattern’s cutting plan as a guide to lay out your pieces.

Cut the fabric flat

If a pattern piece says ‘CUT 1 ON FOLD,’ it means to align the pattern piece's fold line with the fabric's fold so that you will be left with a full pattern piece once cut. However, we recommend cutting knit pieces flat rather than on the fold.

To do this, trace both sides of the pattern so that you have a full pattern piece, and then use this to cut your knit fabric.

If you want to cut the pieces on the fold, take particular care not to stretch the fabric. It may help to cut the fabric into smaller pieces to stop this from happening.

Take care when cutting notches

Instead of using scissors or a rotary cutter to cut notches, cut them with snips. Take care not to cut too deep, as the seam allowance on stretch patterns is often smaller than on wovens.

Alternatively, mark notches with chalk to avoid the possibility of creating a run in the knit fabric.

Learn more knit skills with us!

Knit fabric has become such a large part of our everyday life, and yet it’s a textile that many sewists find a bit overwhelming. That’s why we created the Sewing Knits Skills Kit. The first in a two-part knit fabric series, we’re using samplers to learn everything we need to know to sew stretch patterns on a regular sewing machine so we can put our new skills into practice with part two in the series, our T-shirt pattern.

There’s so much to learn that will make it much easier to sew with this tricky (but oh so comfy!) fabric. I hope you can join us!

Happy sewing,

Emily


RESOURCES MENTIONED IN THIS ISSUE

  • The Pattern weights tutorial is part of Issue 17 of Curated by ITF and is only available for purchase by current members at this time.

  • The Sewing Knits Skills Kit is currently available with a Curated by ITF subscription for the month of March 2023. More information can be found here.


For more issues of the Q & A series, you can check out the archive here.


WHAT YOU’VE BEEN MAKING


MORE POSTS IN THE SERIES

ISSUE 143 - HOW TO SEW BIAS BINDING ON A V-NECK

THE Q & A SERIES

How to sew bias binding on a V-neck

Hi Emily,

Great series on bias binding. I am just starting to master that. Next, I'd like to tackle a V-neck. Could you break down the steps for a V?

Thanks

Sam


Hi Sam,

Great question!

This month’s Curated by ITF pattern, the Stow dress, has a V-neck detail on the neckline. While designing the pattern, we took the time to experiment with a few different techniques to finish it because we wanted to make sure it gave a beautiful finish, and was an achievable approach.

The Stow dress has two Views. View A is a standard V-neck, while View B has a button placket at the front. We’ll show you how to finish a standard V-neck with binding in this tutorial, which is applicable to Stow dress View A.

BEFORE YOU START

We recommend using this technique to finish the neckline after sewing the shoulder seams of the garment. This will allow the garment to lay flat while adding the binding, making it easier to handle. You can then assemble the side seams afterwards.

NOTE: General In the Folds seam allowances have been included for your reference. If you have chosen different seam allowances (or are using another company's pattern), please be mindful of this.

PREPARE BIAS BINDING

Step 1

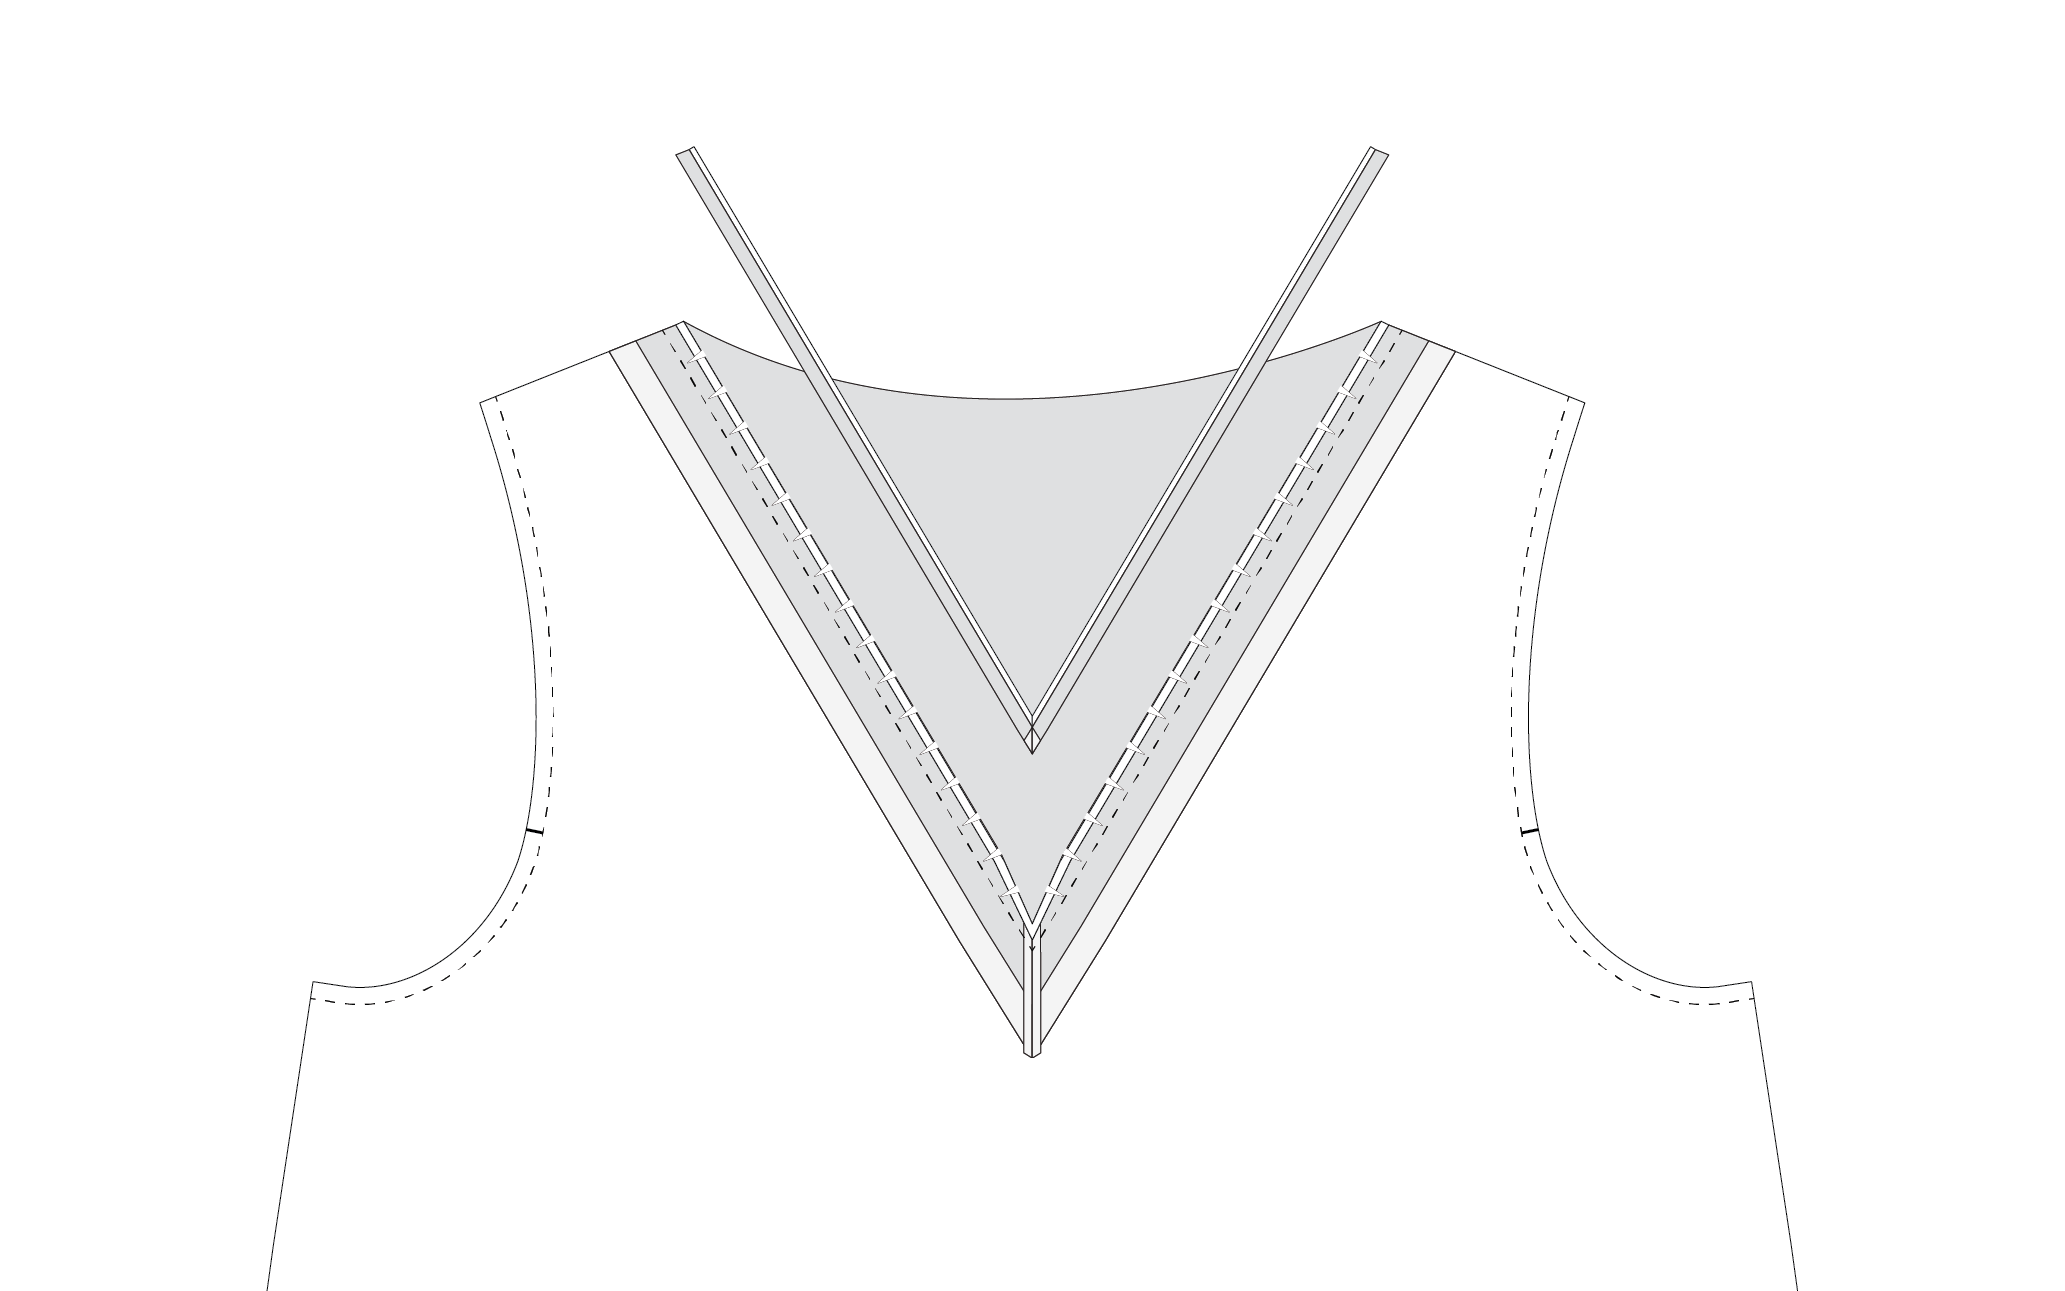
a Using a tape measure, measure around the neckline of the dress starting from the CENTRE FRONT V-neck on one side and continuing around the neckline until you reach the CENTRE FRONT again.

b  Cut a piece of bias binding about 6cm (2⅜in) longer than your neck measurement. If you are making your own binding, it needs to be 32mm (1¼in) wide. 

c  If you have made your own binding, place it right side down and press one long edge of the binding under by 1cm (⅜in). It will look like the middle image above. Commercial bias binding will look like the bottom image above.

Step 2

Fold the binding in half to find the midway point. Finger press the fold.

Unfold and pin the right side of the binding (at the midway point) to the right side of the garment at the CENTRE BACK of the neckline.

Step 3

a Pin the binding onto the neckline, carefully working your way to the shoulder seam.

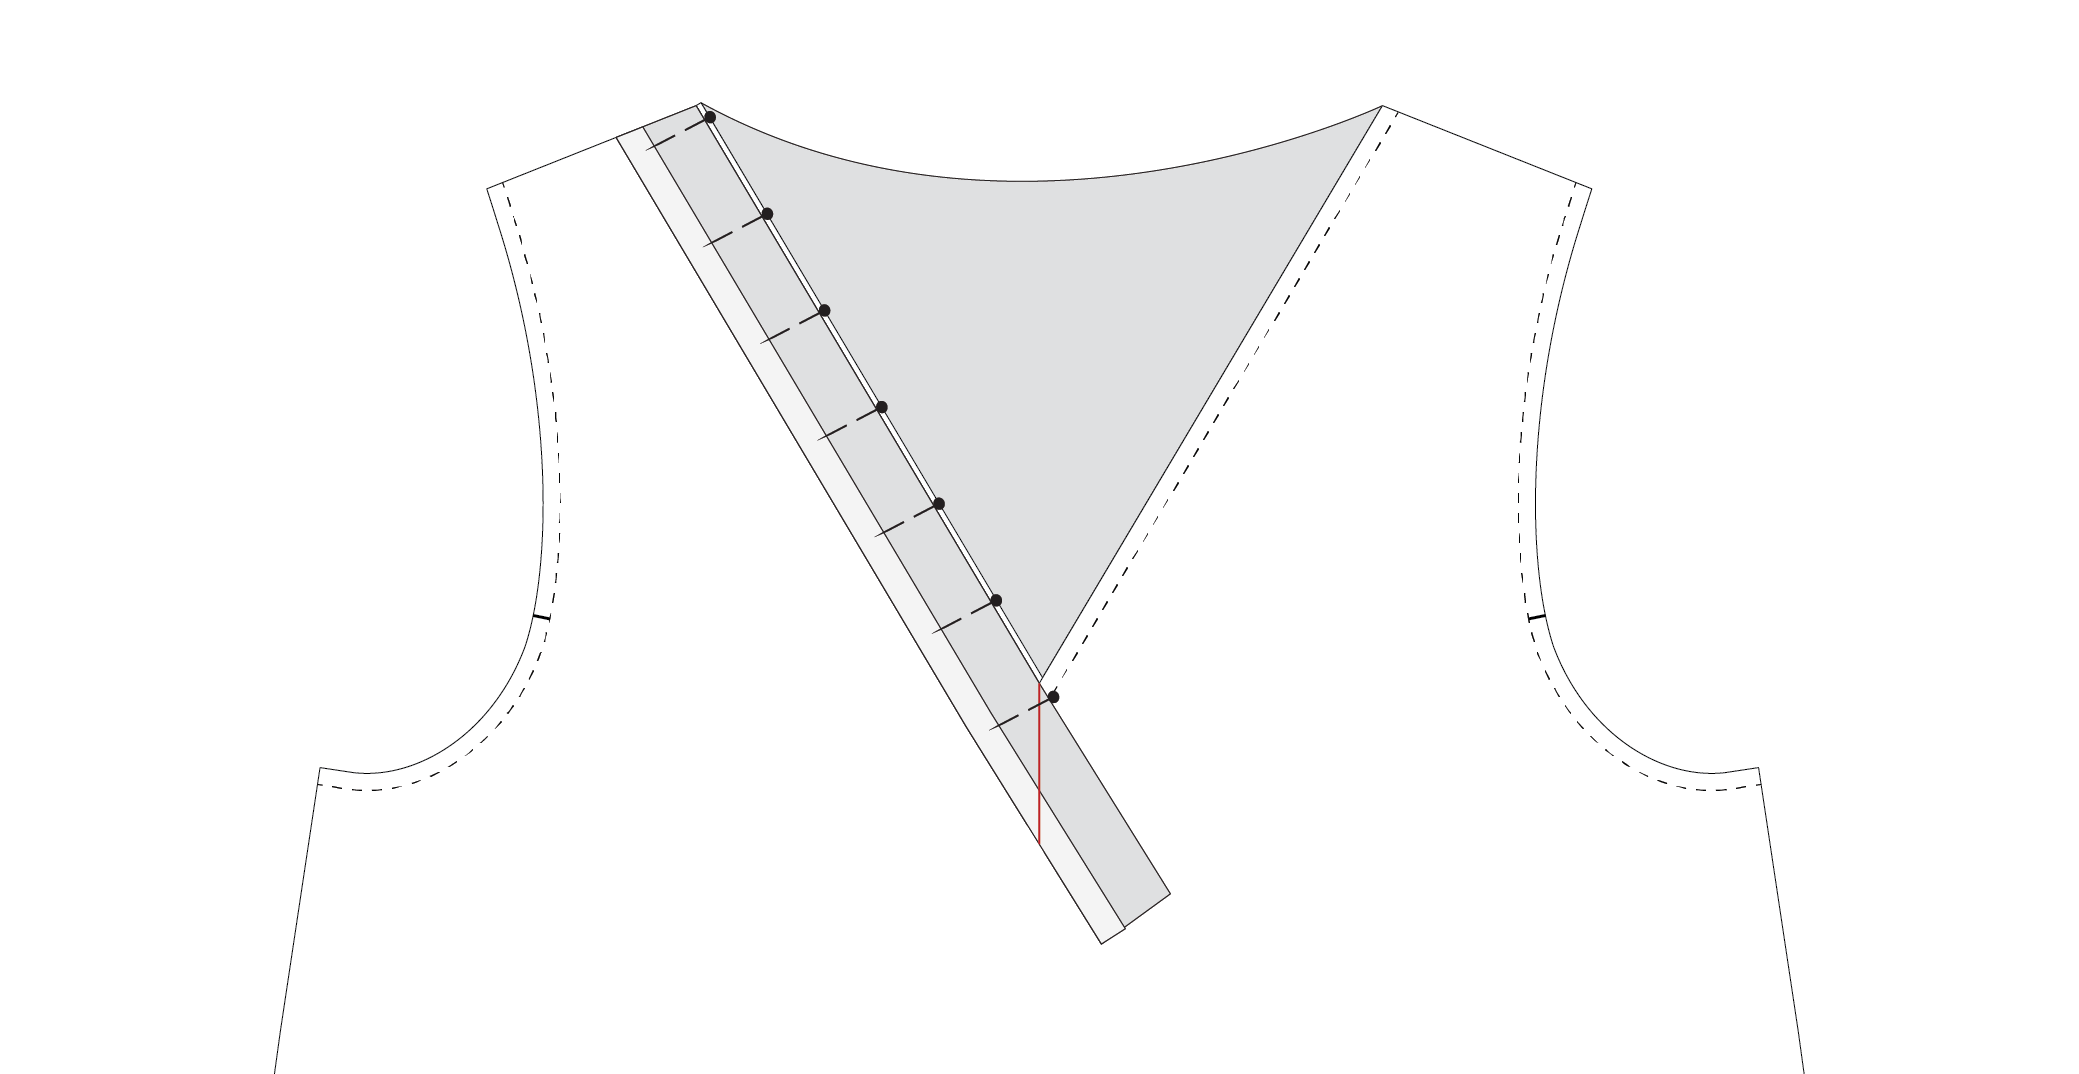
Flip the dress to the front. Continue pinning the binding around the neckline until you reach the CENTRE FRONT. When you get to the V-neck point, stop pinning and mark the CENTRE FRONT line onto the binding with chalk or erasable pen and a ruler.

b Going back to the binding at the CENTRE BACK, continue pinning the rest of the binding to the neckline. Again, mark the CENTRE FRONT line on the other side of the binding with chalk or erasable pen and a ruler.

Step 4

a Remove the last couple of pins so that you can lift the binding on either side of the CENTRE FRONT. (These pins were only used so you could ensure the CENTRE FRONT line you marked was precise).

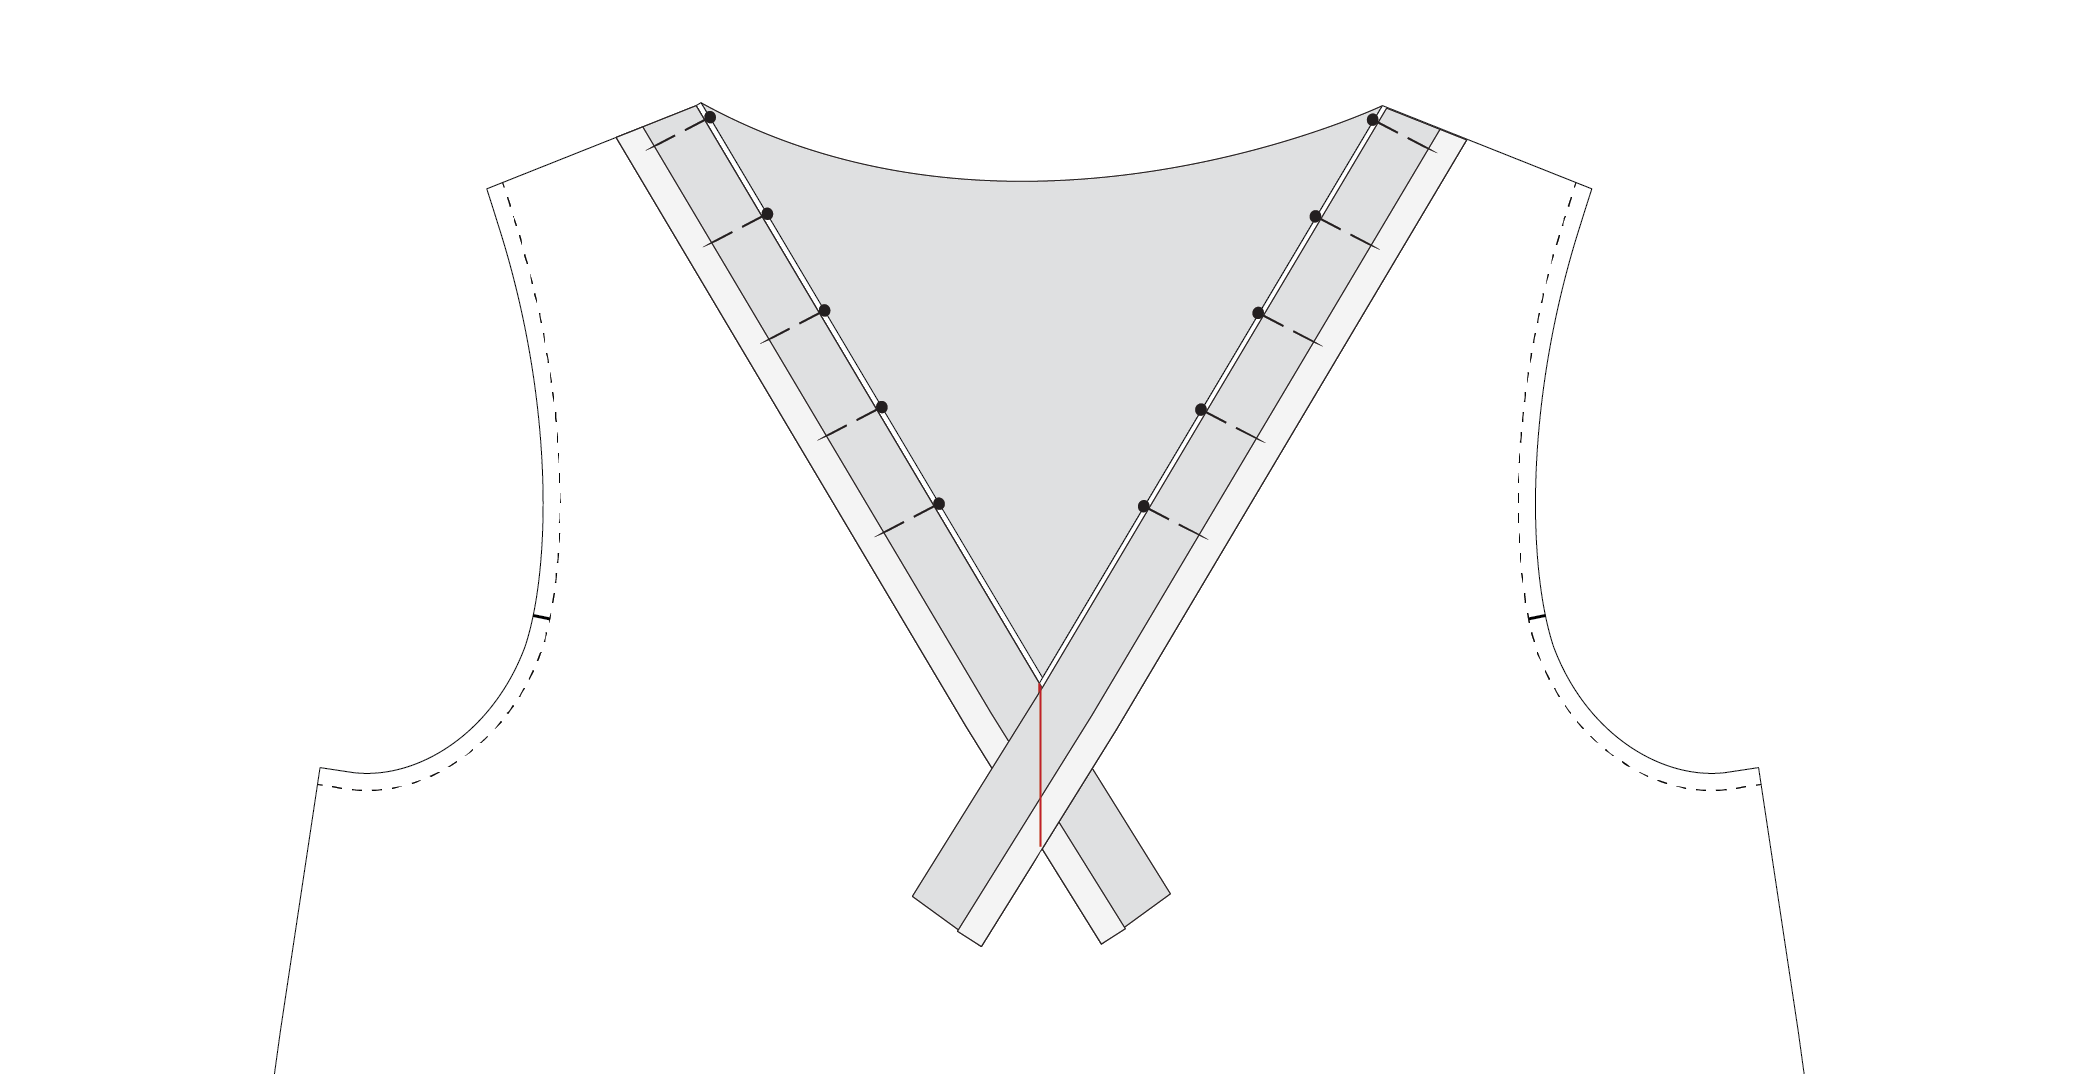
b Place the binding right sides together, matching the two lines marked. The outer long edge of the binding should still be folded up. Pin. Stitch along the marked line.

c Trim back the seam allowance close to the stitch line. Press the seam allowance open.

Step 5

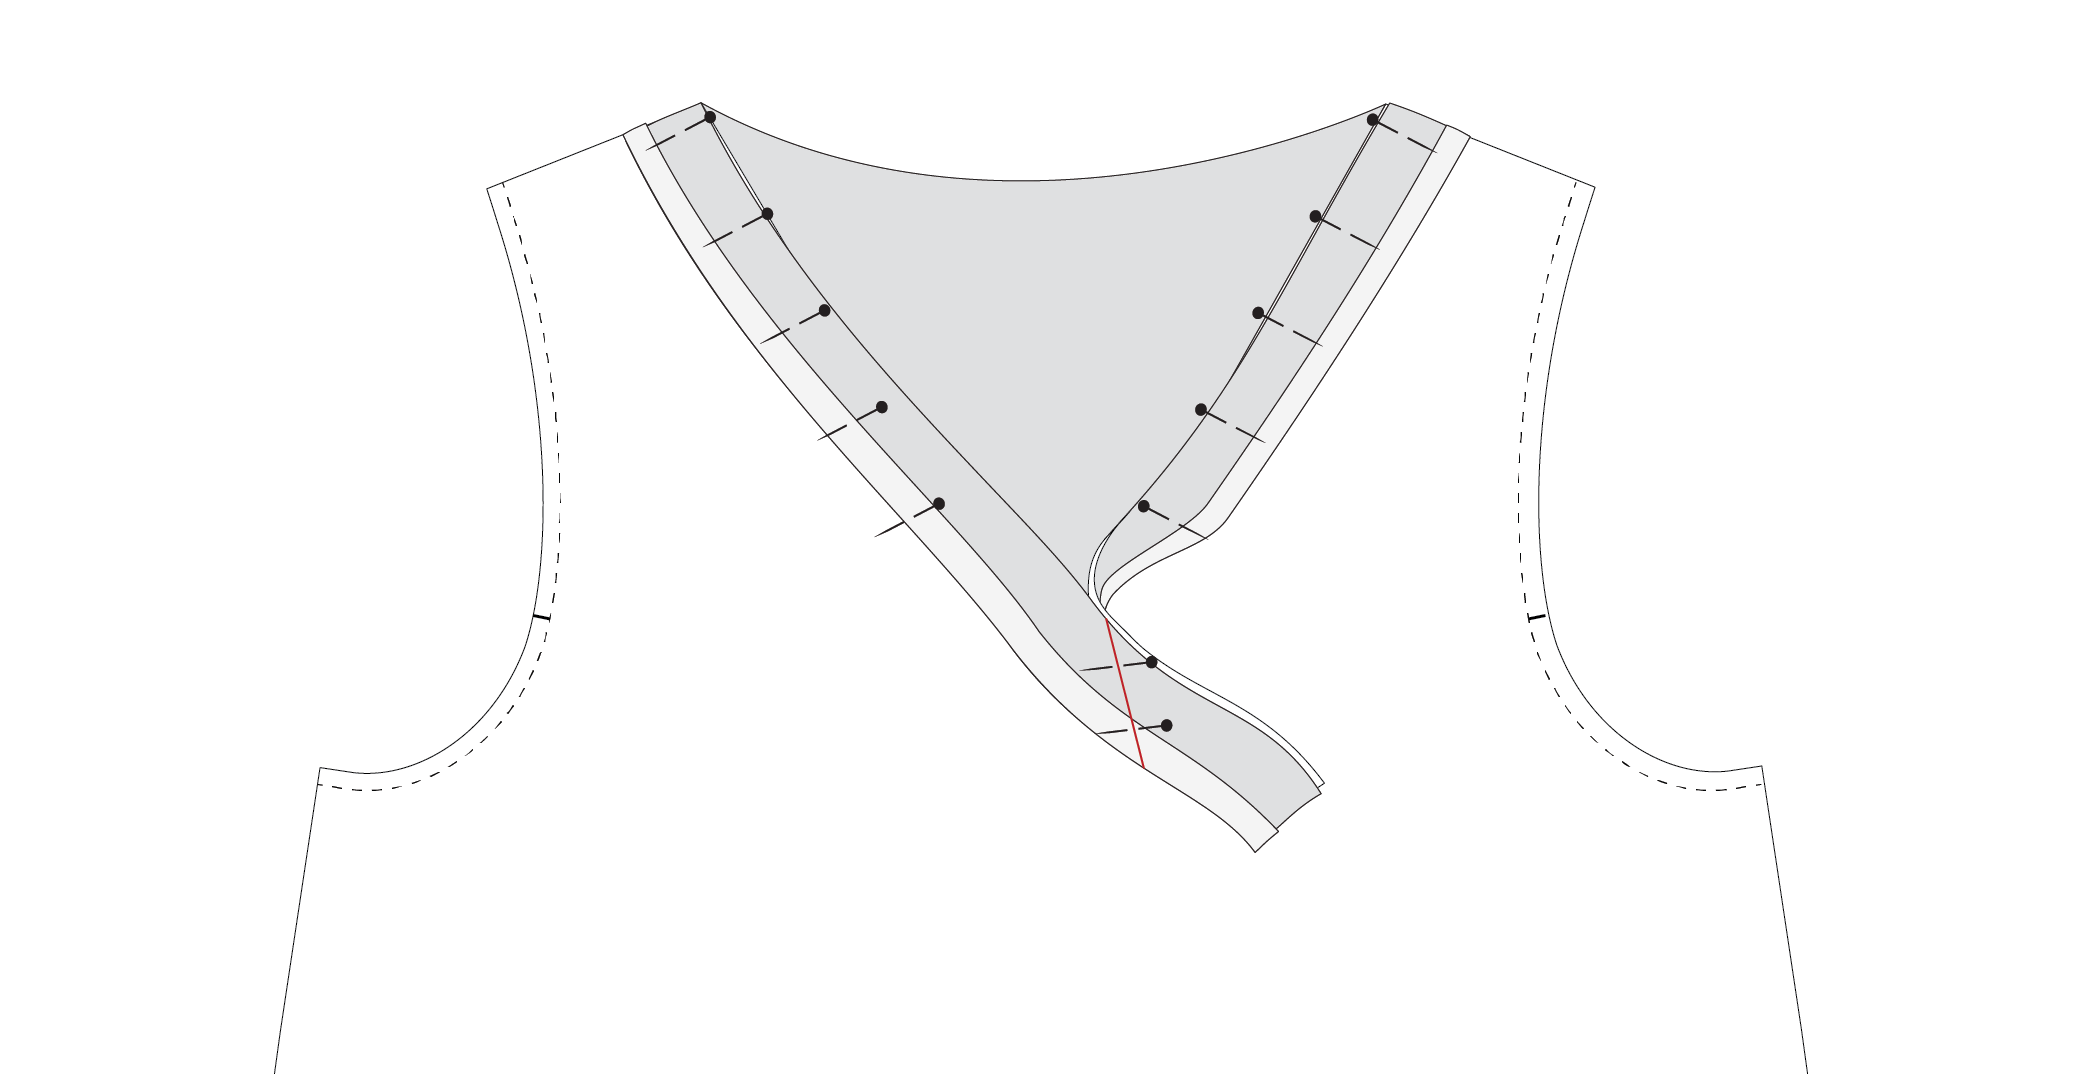
Repin the binding to the neckline, lining up the seam in the binding with the CENTRE FRONT V-neck point of the dress. The binding should sit flat on the garment at this point.

Step 6

a Sew binding in place with a 1cm (⅜in) seam allowance. Start at the CENTRE BACK or shoulder seam and work your way around to the CENTRE FRONT or opposite shoulder seam. Walk your stitches as you approach the CENTRE FRONT to ensure your needle lines up with the seam in the binding. Pivot to continue sewing around the neckline.

b Trim, clip and grade the seam allowance. Trim in nice and close to the point of the V at the front to minimise bulk as much as possible. Be careful not to cut through the stitching!

Step 7

Flip the binding to the right side and, using your finger to press the seam allowance towards the binding, understitch.

Start stitching about 1.2cm (½in) back from the points of the V on one side and then repeat on the other side.

Step 8

Turn the dress inside out and roll the binding to the inside. Press well and pin in place. Stitch in place close to the folded edge of the binding.

Happy sewing,

Emily


RESOURCES MENTIONED IN THIS ISSUE

  • The Stow dress pattern is currently available with a Curated by ITF subscription for the month of February 2023. More information can be found here.

  • How to make your own bias binding - tutorial here.

  • Attaching single-fold bias binding - tutorial here.

  • Attaching double-fold bias binding - tutorial here.


For more issues of the Q & A series, you can check out the archive here.


WHAT YOU’VE BEEN MAKING


MORE POSTS IN THE SERIES

ISSUE 141 - HOW TO TRANSFER PATTERNS ONTO CARD

THE Q & A SERIES

HOW TO TRANSFER PATTERNS ONTO CARD

Hi Emily

Thank you so very much for doing this question and answer series.

I would like to know how to make our own patterns that will be used over and over again, and what kind of paper or other substance.

- Cerisse


Hi Cerisse,

Great question!

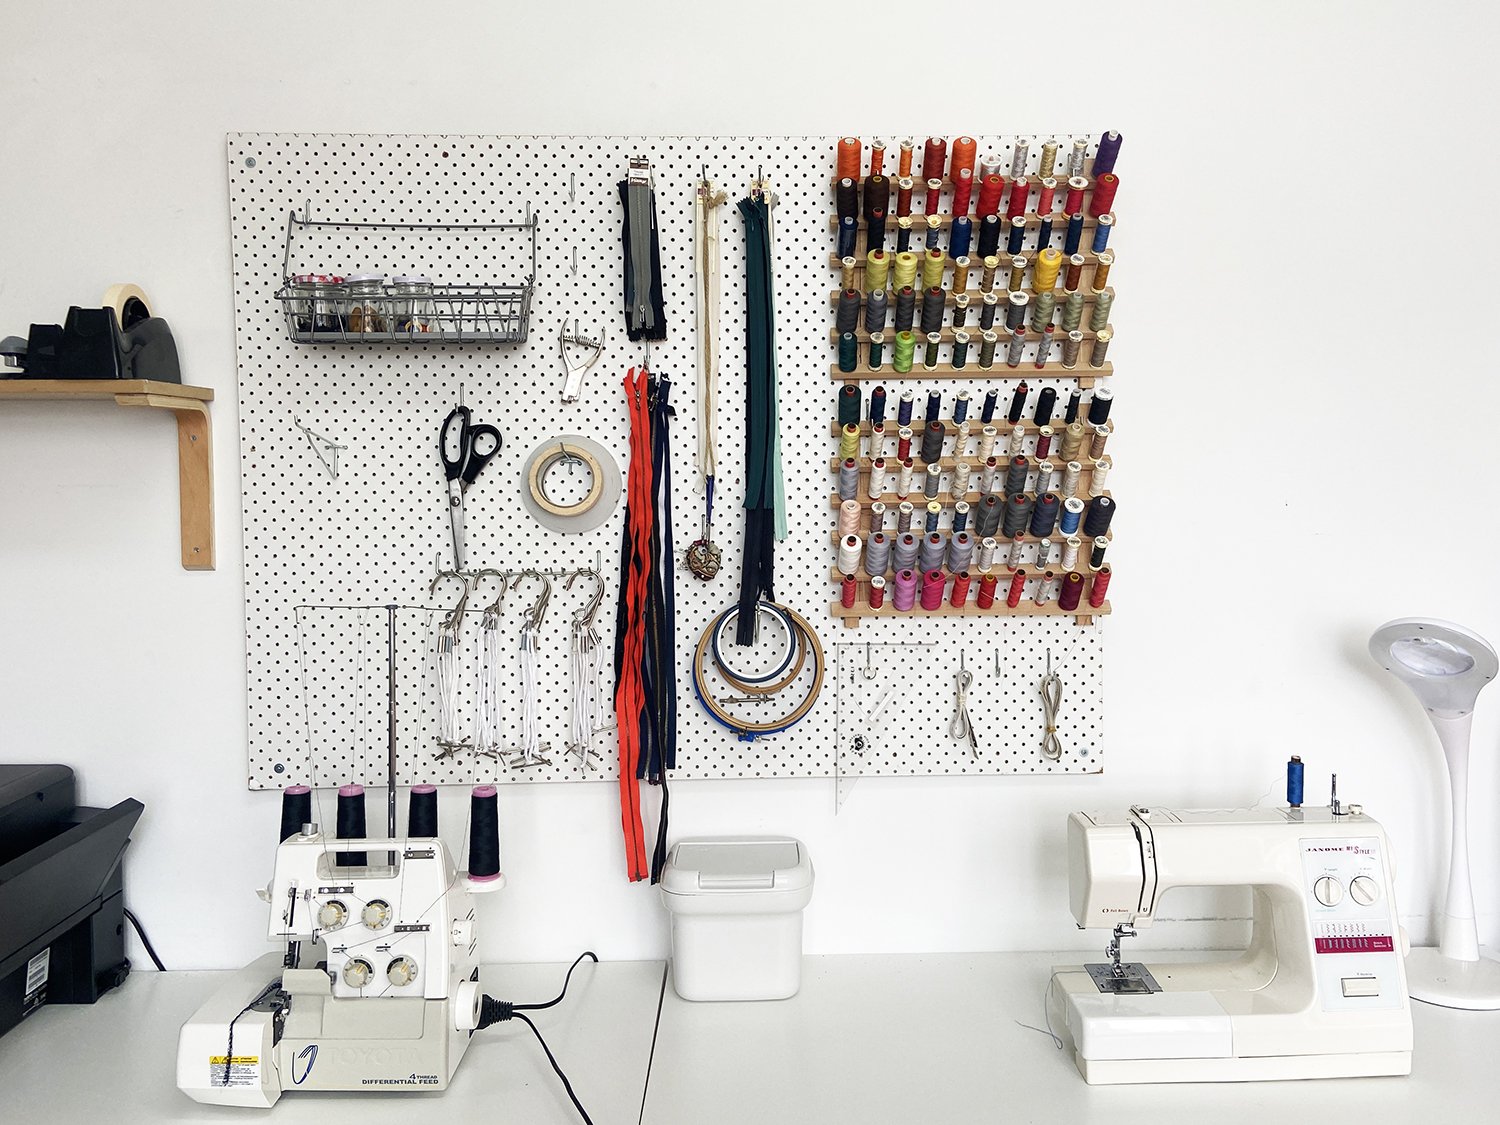
This month we’re diving into organising our spaces in our Curated by ITF sewing subscription. We’ve covered a range of topics, including storage options for supplies, fabrics and patterns and how we can best set up our spaces to make them easy to use and inviting.

If you’ve sewn with the more common commercial patterns you’ll know how flimsy and easy-to-break sewing pattern paper can be. It doesn’t take much to tear, and if they’re a much-loved pattern, the constant use will quickly lead to damage.

While In the Folds paper patterns are printed on a heavier paper than commercial patterns (and you have the option to choose your preferred paper weight when printing our digital patterns), how you store your patterns is still key to making them last as long as possible.

Transferring sewing patterns onto card is a great way to achieve this.

TRANSFERRING PATTERNS ONTO CARD

When working with patterns you use time and time again, like pattern blocks, it’s a great idea to transfer the pattern onto card. This way the pattern can act as a "master" pattern that you can refer to over and over.

There are two ways you can do this:

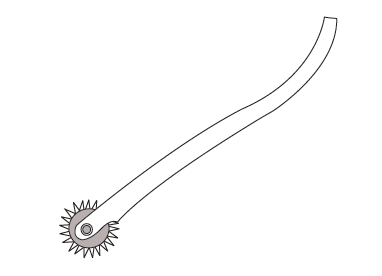
  1. Use weights and a tracing wheel to transfer the pattern lines onto the card, and then use a pencil and ruler to join the dots.

  2. Glue the paper pattern onto the cardboard and cut it out.

BENEFITS OF TRACING YOUR PATTERN ONTO CARD

As mentioned above, tracing onto card will increase the longevity of your patterns because card is stronger than paper, but there’s other benefits that you should also consider.

When a pattern has been traced onto card it is very quick and easy to trace a new copy. Simply trace around the outside!

Also, if you do it after you’ve made all your alterations and fitting changes, it becomes very clear which pattern is the final version.

A PATTERN TRACING TIP

Depending on what you plan to use your pattern for, you may choose to remove the seam allowance before transferring the block onto card.

Traditionally, pattern blocks do not include seam allowances. This means you can quickly and easily trace a copy and make changes to the design without worrying about seam allowances getting in the way.

Think about what you plan to use your pattern or block for and then decide if having the seam allowance on your card will be helpful for your workflow.

If you’d prefer to use paper, you can find our article about which paper to use, and how to trace patterns here.

Happy sewing!

Emily


RESOURCES MENTIONED IN THIS ISSUE

  • What is a pattern block? Tutorial can be found here.

  • How to trace patterns - Tutorial can be found here.

  • The Organise Your Space resource is currently available with a Curated by ITF subscription for the month of January 2023. More information can be found here.


For more issues of the Q & A series, you can check out the archive here.


WHAT YOU’VE BEEN MAKING


MORE POSTS IN THE SERIES

ISSUE 140 - TIPS FOR CHOOSING A CUTTING TABLE

THE Q & A SERIES

TIPS FOR CHOOSING A CUTTING TABLE

Morning In the Folds,

I was wondering if you can help me decide on a cutting table.

I have just moved home and for the first time I'm lucky enough to have a space that I can dedicate to a sewing table.  I realise in the end it's each to their own and dependant upon the space available but as you must have used a variety of tables over the years I wondered if you could pass on what's great to have and things to avoid. 

I've been wondering, would you avoid a folding table, what height would you go for and what surface would you suggest? Also, what is the minimum size top you wouldn't go below (might that be based around the size of a bolt of fabric)?  I also figured it would be useful to have a table on casters and ideally be able to walk around it rather than it be up against a wall.

Anyway, knowing what others with more experience have found suitable will really help so thank you in advance if you get time to reply (I know you're always busy).

Kind regards,

Sharon, UK 


Hi Sharon,

How exciting that you have space for a cutting table!

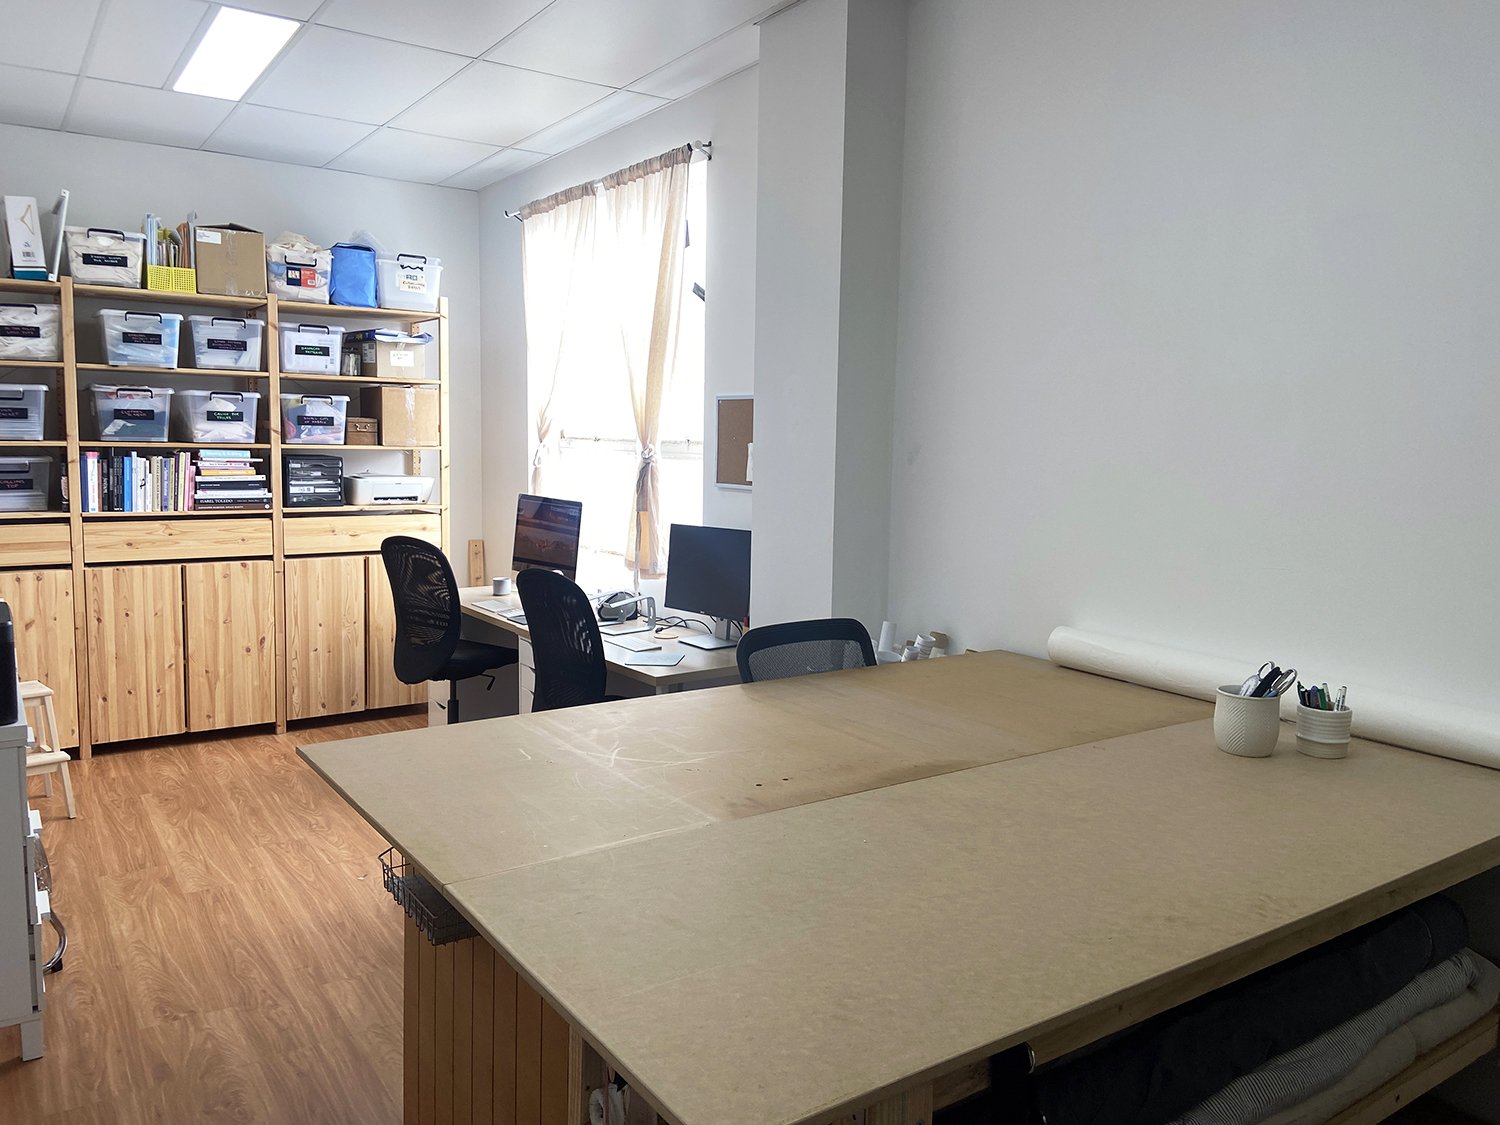
This is actually a question I’ve had to consider myself recently. Last year I moved studio spaces and had more space available for a larger cutting table, so I’ve definitely got some thoughts on what to consider.

The focus of this month’s Curated by ITF project, Organise Your Space, also focuses on setting up your sewing space to make it easier to get stuck in and sew, so we’ve been thinking about this a lot!

When designing any space it’s always good to have a clear idea of how you intend to use the space you have, and then come up with a design based on that, so I’ve come up with some questions you might want to consider and answer for your yourself. I’ve included my own thoughts as well.

Will the cutting table be where you put your sewing machine?

Knowing the answer to this before you start out is important because it will impact the height of the table you want to have. It also determines whether or not you can use underneath the table for storage, or if you will need space to slide a stool or chair so you can sit at the table and sew.

You might not be able to answer this question until you’ve answered the question below, so consider these in tandem.

DO you PREFER TO STAND OR SIT when you sew?

With people now focusing on how much they’re moving each day, a lot of creatives are choosing to stand at their machine.

My workbench in my old studio was a comfortable height for standing, but when I used it as a sewing table I used a stool. It worked well, but I know this might not be comfortable for everyone. But, if you think about the time you actually spend sewing when you are making a garment (compared to cutting, pinning and ironing), you might find that you’re sat at your machine a lot less than you think!

Standing to sew might also mean you move between the different stages of garment construction more quickly and efficiently because you don’t have to stand up, move a chair out of the way, relocate to another area, etc.

how high should the cutting table be?

The height your cutting table will really depend on how tall you are.

Choose a height that is comfortable to stand at for long periods of time and doesn’t make you bend down too much. I think somewhere around the top of your hips is normally a good finished height to start with.

HOW WIDE SHOULD THE cutting TABLE BE?

When deciding on the table size you should also consider the patterns and fabric widths you tend to sew with, as it will be much easier to cut larger fabric pieces if you have the support of a table to match.

Off the bolt fabric can go up to 1.5m wide, so start there and work backwards.

If you don’t have the space to accomodate a table that big a 1.2m width would also work as only a small amount of fabric will be hanging off the edge if using larger widths, and most of the time you will be cutting on the fold.

how much sewing space do you have?

How much space you have for your sewing set-up will be a big factor in deciding on what furniture you can use.

If you have the space, I'd suggest having a dedicated cutting table. A large cutting table gives you space to do all the work that requires more room, such as pinning and set-up work, allowing you to have a separate smaller table just for sewing on your machines.

If possible I'd avoid a folding table. They can be great if you don't have the space, but they don't have the stability of a free standing table, which can be frustrating.

A table on casters is a great bonus to have. Being able to move the table out from a wall makes a big difference as you can access all sides which makes cutting a lot easier. It also means that you’re not completely dominating the space with a table and can move it around and out of the way when required. Keep in mind that castors will raise the height of a table.

WHAT TYPE OF SURFACE IS BEST?

I always try to consider longevity and sustainability when I’m setting up a new sewing space. For this reason I like to go with a timber that can take some wear and tear, but a piece can also be easily repaired or replaced later on if need be. A timber surface also means it can be lightly buffed when required.

To help protect your cutting table, large cutting mats are a great addition as they provide a smooth surface that won't catch or snag fabric. I’d highly recommend investing in a cutting mat (or however many you need to cover your table), particularly if you do lots of pattern alterations or use a rotary cutter as they will help prevent damage to the table top and make it last longer.

build or buy?

I love building a cutting table to fit my space because it means I can get the exact size, shape and height I need and want for my space.

There are some great resources online with directions for making one, like this one or this one (which has an interesting approach to the table top surface that I had never seen before!).

What's great about this style of table is that you have a lot of storage room underneath and can even put in a second shelf (depending on the height you go with and what you will be storing underneath).

It can also be handy to put some storage on the side - I have little hanging baskets on the side of mine where I can put a few tools etc. and then a rail where I can hang patternmaking tools.

If building a table is not possible, there are some great IKEA ideas / hacks around - like this one or this one.

I hope that's helpful and gives you some food for thought as you make plans for your new table!

Happy sewing,

Emily


RESOURCES MENTIONED IN THIS ISSUE

  • The Organise Your Space resource is currently available with a Curated by ITF subscription for the month of January 2023. More information can be found here.


For more issues of the Q & A series, you can check out the archive here.


WHAT YOU’VE BEEN MAKING


MORE POSTS IN THE SERIES

ISSUE 139 - Checking and truing a self-drafted pattern

THE Q & A SERIES

How to check a self-drafted pattern

Hi Emily,

I’ve been loving the recent pants fitting and designing content and it’s got me feeling confident to give drafting my own pair of pants a go! I have a design in mind and am about to get started on the pattern. I’m still quite nervous though about everything going a bit awry once I alter the pattern. 

Any tips or words of wisdom to give me some confidence would be greatly appreciated.

Thanks,

Susan


Hi Susan,

I’m so pleased you have been enjoying our Pants series! This is a great question.

Firstly, with the release of our three month pants sewing project, (check them out here: Pants Sewing Skills, Pants Fitting Pattern and Fit Kit, and Pants Designing) our aim has been to ensure makers feel as confident as possible to make the pants they want to wear! This means really breaking down the process into manageable chunks so you can face one thing at a time.

We started out by concentrating on sewing skills that particularly relate to pants. Think fly fronts, welt pockets and slash pockets, among others! In the second month we focused on pants fitting with the release of our Pants Fitting pattern and Fit Kit. This month we’re bringing it all together with our Pants Designing Kit.

I understand that it can be daunting making your first pattern and to feel confident to cut into your precious fabric to sew it up. That’s why we thought sharing some tips of things to keep in mind when going from drafting your own pattern to sewing it up would be a good way to round-out the series.

3 STEPS TO FOLLOW AFTER YOU’VE DRAFTED OR ADJUSTED A PATTERN

Step 1 - Check and true the pattern.

I teach first year pattern making at a local university here in Sydney and one of the first things we teach is how to check and true a pattern.

What this means is that you need to “walk” your seams together as if they have been sewn to check they come together correctly. At first this seems like a bit of a chore, but once you realise how much time (and fabric) it can save you in the long run, it will become one of the most important skills in your tool belt!


We have two tutorials that show you how to check patterns - this tutorial focuses on straight seams, and this one is for curved seams.

Step 2 - Make a toile.

If you’ve only made small adjustments (such as altered the length or added a pocket) and have already made a toile then you may be able to skip this step.

For any larger alterations - such as raising or lowering the waist on a pair of pants or changing the shape of the pants considerably, we’d suggest making a toile to check you are happy with the changes you have made.

If you have only made changes to the upper section of the pants, you may consider making a shorts version as a toile to save on fabric.

If you’ve added panel lines, or made an alteration that doesn’t change the fit of the pant, but you’d like to see what the new design is going to look like, you might be fine just to make one pant leg, rather than a full toile.

When it comes to designing your own patterns, you no longer have the instruction booklet to guide you through every step. In this situation, making a toile gives you a chance to experiment with the best order of construction. We suggest taking notes and photos as you go so you have a record to refer to when you sew up your final pair.

Step 3 - Sew samplers.

For Issue 13 of Curated by ITF we practiced pants sewing techniques by sewing samplers.

What is a sampler?

A sampler is a piece of fabric, or small portion of a design, used to practice sewing techniques. They’re a great way to create a personal reference of techniques that can be referred to again in the future.

Due to their size, they are easy to store and refer to. Consider stapling them to the printed instructions for each technique and putting them in a binder. Alternatively, you can staple folded cardboard to the top of each sampler, punch a hole in one corner and hang on a ring in your sewing space. Consider transferring the pattern pieces to card so they are durable and able to be used again and again.

Sewing a sampler is a great way to learn a new technique or build confidence before sewing a garment. Trying out skills on samplers is far less intimidating than sewing on an actual garment and allows you to slow down, relax and enjoy the process of learning something new. Like any new skill or hobby, getting good at it will take time. By sewing just a small part of a design, you can gain confidence and have something to refer to when you make your pants.

I hope this gives you the confidence to go from drafting a pattern to sewing a garment!

A QUICK REMINDER…

This will be our last Q&A email for 2022 as our little team takes a pause for some much needed rest and relaxation and I start maternity leave. New Q&As will be back in your inbox in the new year, but if you’re worried you’re going to miss learning with us too much, remember that our whole Q&A archive is on our website. So why not take a deep dive into learning something new these holidays?

Happy sewing,

Emily


RESOURCES MENTIONED IN THIS ISSUE

  • The Pants Sewing Skills Kit, Pants Fitting pattern & Fit Kit and the Pants Design Kit are the first, second and third parts of our Pants Sewing project series, which is available through our Curated by ITF subscription. Past issues are also now available for purchase by subscribers. More information can be found here.

  • How to check and true patterns - tutorials for straight seams and curved seams.

  • How to and why make a toile - tutorial can be found here.


For more issues of the Q & A series, you can check out the archive here.


WHAT YOU’VE BEEN MAKING


MORE POSTS IN THE SERIES

ISSUE 138 - HOW TO LOWER THE WAIST ON A PANTS PATTERN

THE Q & A SERIES

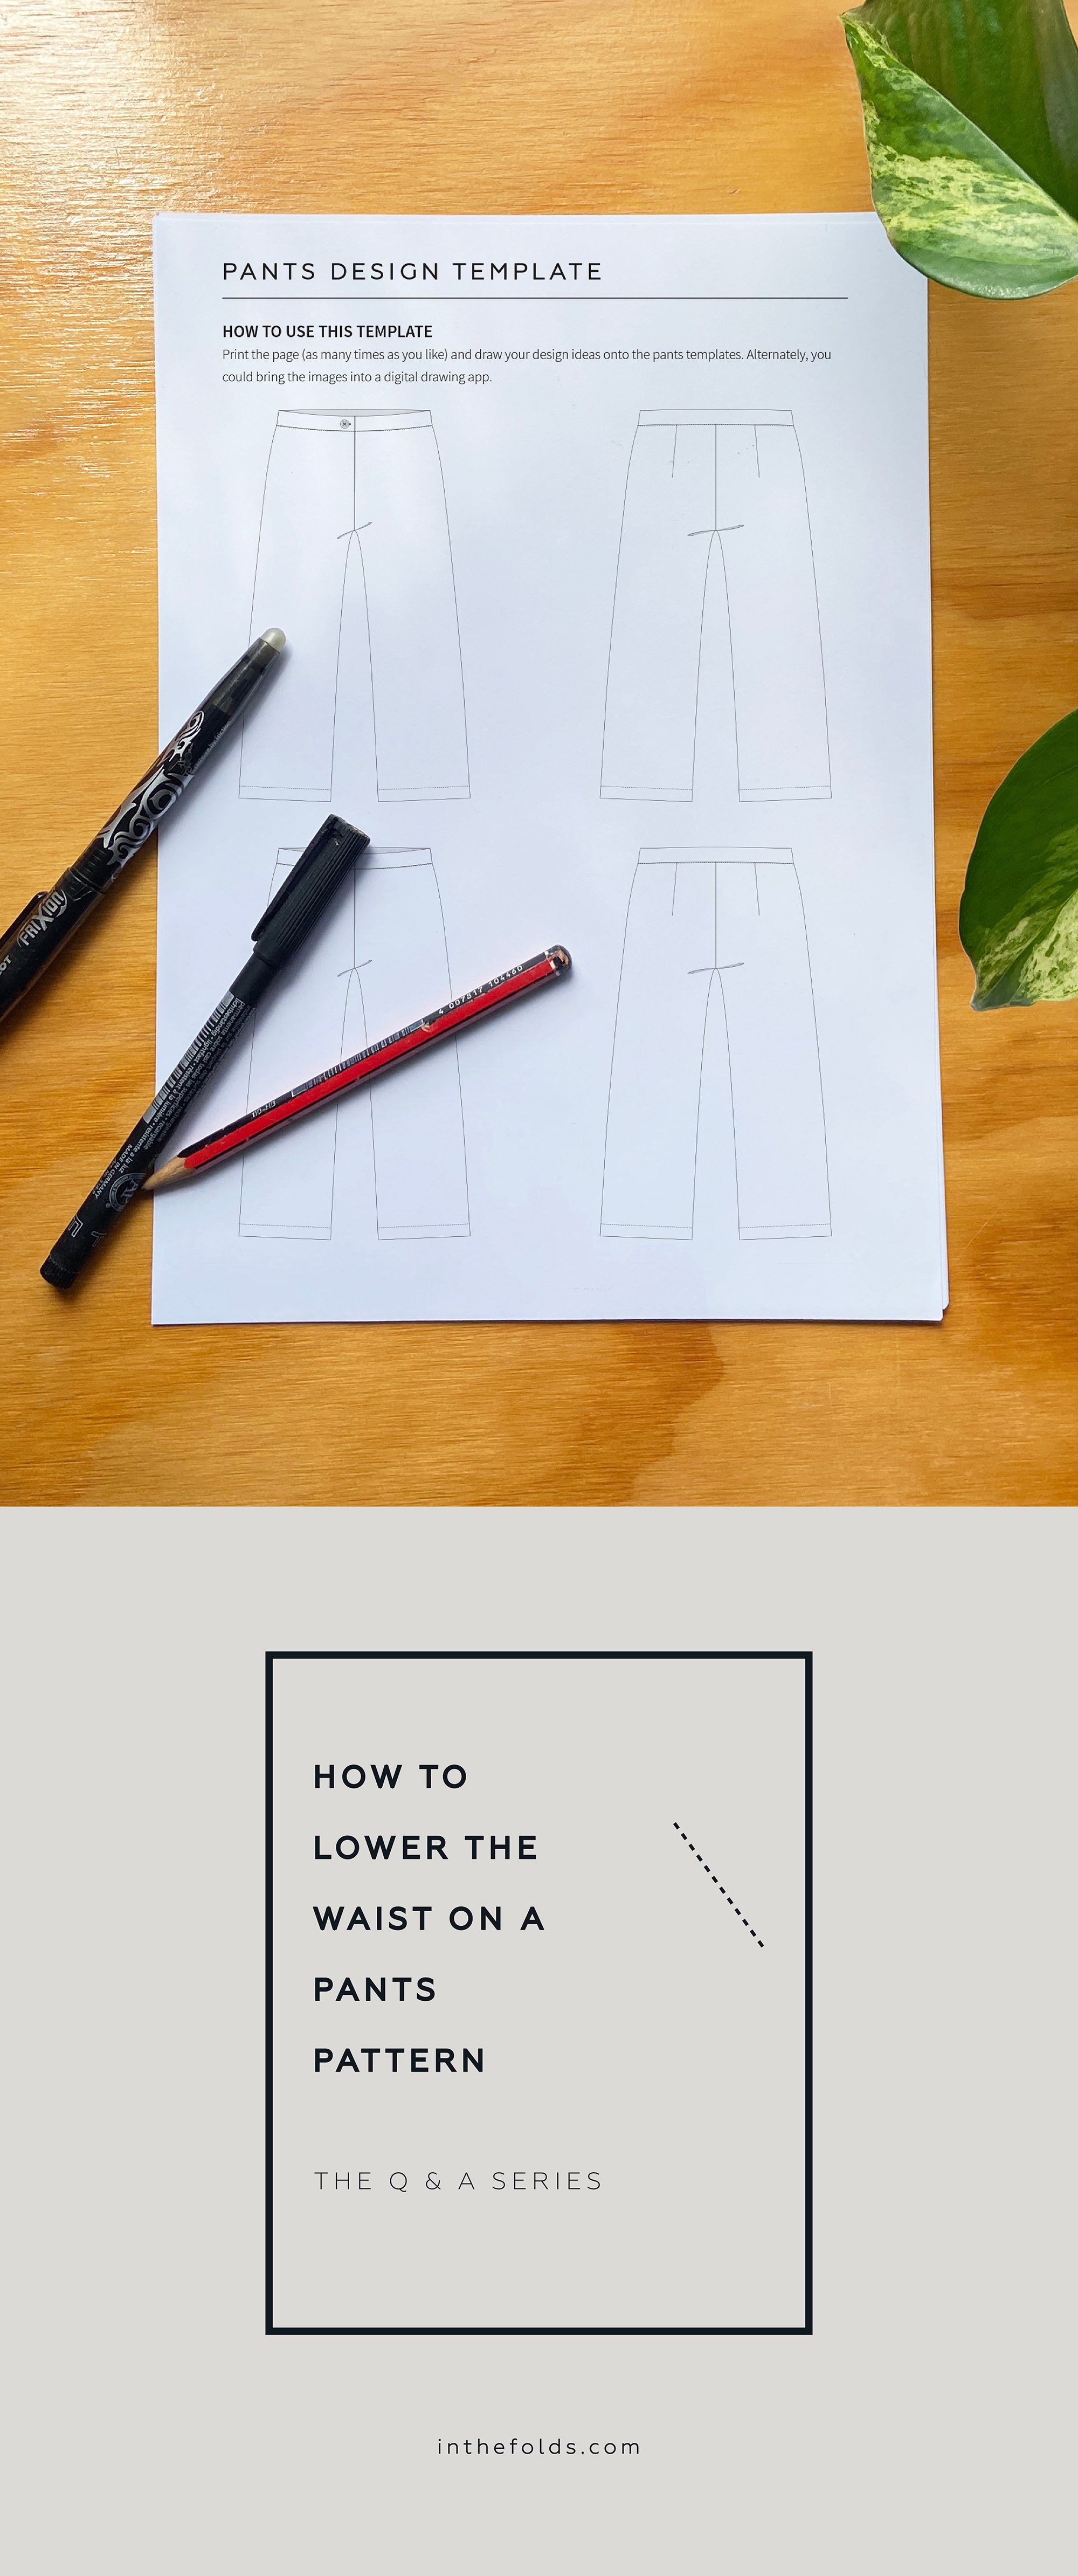
How to lower the waist on a pants pattern

Hi, 

I love the wide leg Pants pattern but prefer to wear all trousers much lower down, like on my hips, a low rise is it?! 

How can I modify the pattern to sit on my hips? - just below my belly button! ;) 

Really hoping you can help me as I really want to make these!! 

Thanks you so much, 

Janie :)


Hi Janie,

For the last three months of Curated by ITF we have been working on all things pants - sewing, fitting and designing. This includes adapting patterns so they suit your preferences, like lowering the waist.

ALWAYS START WITH A TOILE

If you want to lower where a pair of pants sit on the body, you can use a toile to work out how much to lower the waist by.

We strongly suggest making a toile to check the fit of the original pattern before going ahead and making large-scale pattern alterations. Once you're happy with the fit, you can draw on the toile where you'd like the new waistline and waistband to sit. You may like to refer to a pair of pants in your wardrobe to get an idea of the exact fit.

For your toile, if you’re using the Peppermint Wide Leg pants pattern (or a similar pattern that has pockets), we’d suggest converting the pattern into a block before you get started. This way you don’t have to worry about the pockets. Once you are happy with the fit and have lowered the waist, then you can add the pockets back in. We’ve got a tutorial showing you how to add pockets to a pants pattern in this month’s issue of Curated, but if you’re not a subscriber you can see this tutorial we created about adding pockets to a skirt pattern.

A STEP-BY-STEP TUTORIAL TO LOWER THE WAIST ON PANTS

Step 1

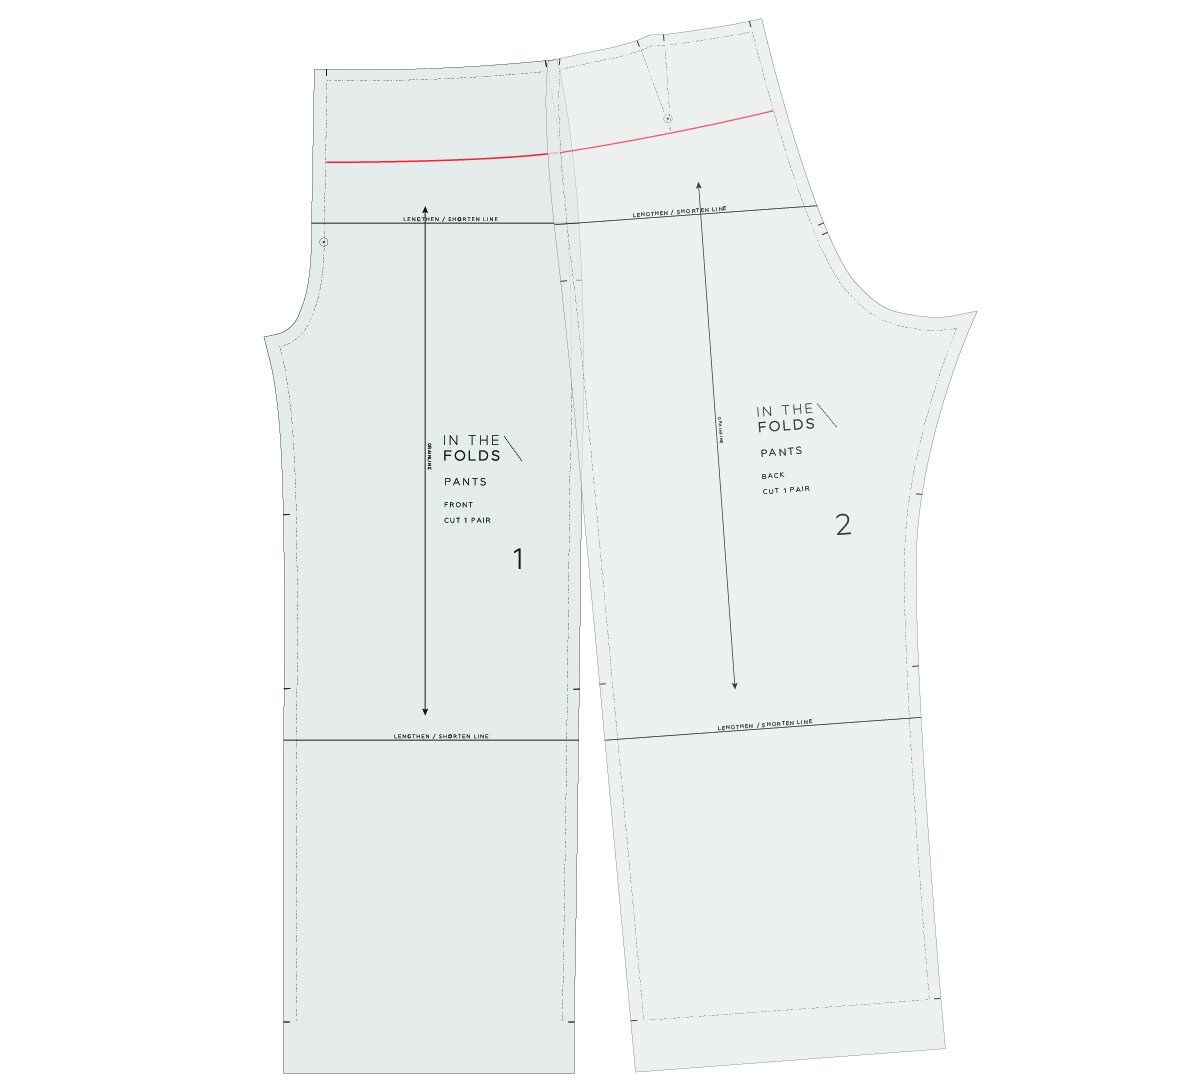
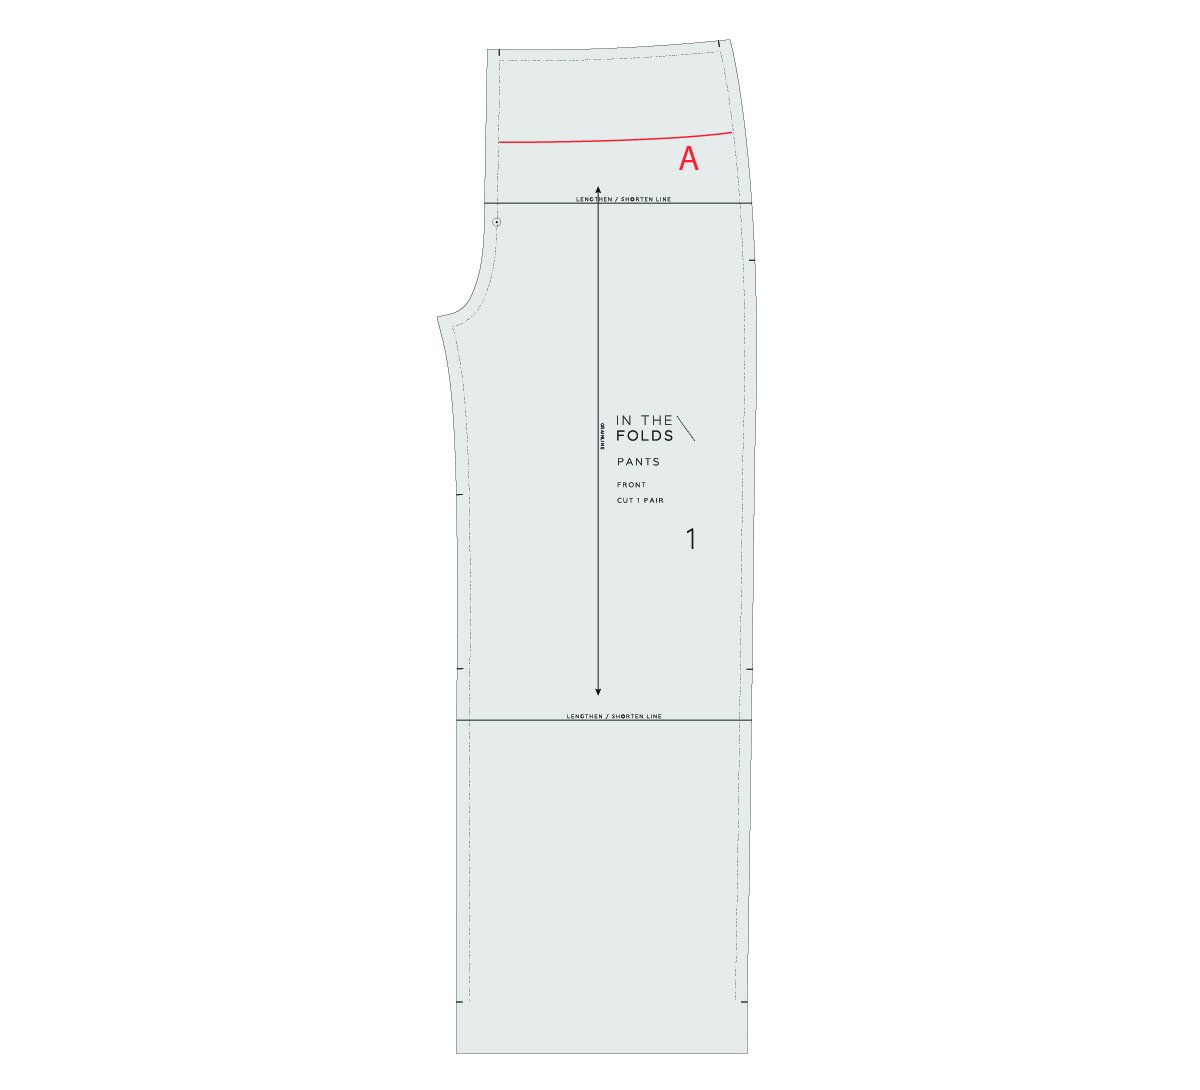
Using your toile as a reference, draw the desired waistline onto the pattern at the point where the pants meet the waistband (not at the top of the waistband). Let's call this line A.

Step 2

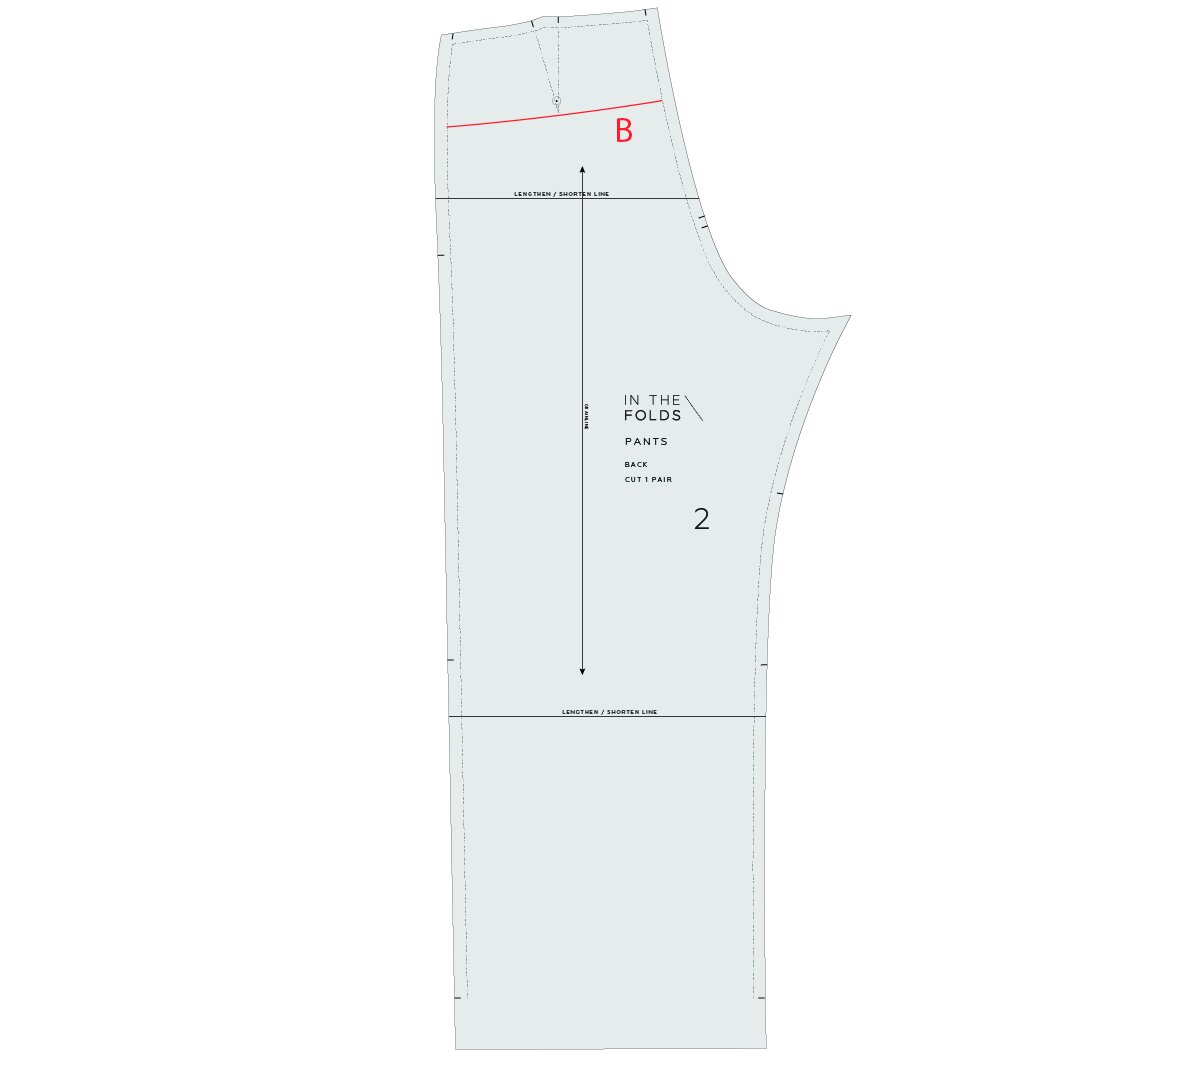
Repeat for the back pattern. Let's call this line B. For the example we chose to lower the waist to a point below the dart, eliminating the need for a dart.

Step 3
Line up the side seam STITCH LINES of the FRONT [1] and BACK [2] as if they have been sewn together (one on top of the other).

Check that the new waistline flows smoothly between the front and back. Adjust if necessary.

Step 4
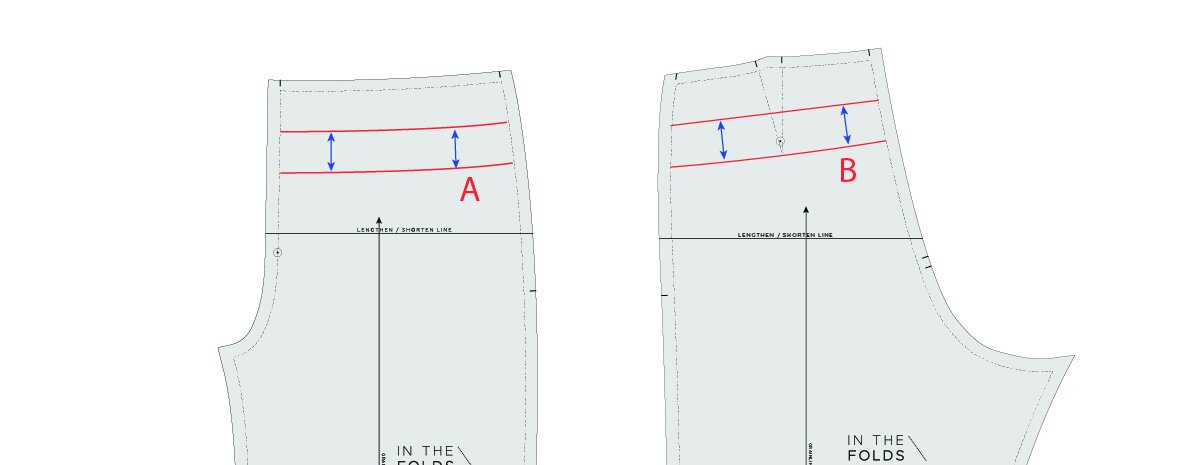
You will need to create a new waistband for the altered pattern. Draw lines parallel to lines A and B, at the desired height of the new waistband. We recommend a 3-4cm (1¼-1½in) waistband.

STEP 5

a Trace the front waistband shape. Add a grainline to the pattern parallel to the CENTRE FRONT.

b Trace another copy on the reverse side (with the waistband flipped). The reason we trace both sides is because the left and right waistband are not identical (we will add a fly front extension to the left waistband only).

c For the left waistband, add an extension for the FLY SHIELD. The extension needs to be the width of the FLY SHIELD (in this case 4.5cm (1¾in)) and the edge needs to be parallel to the CENTRE FRONT.

Step 6

Add 1cm (⅜in) seam allowance to the top and bottom edges of the waistband pieces. Add 1.2cm (½in) seam allowance to the CENTRE FRONT and side seam.

You can change the amount of seam allowance to your preferred width, but remember that the lower edge of the waistband should have the same amount as the top of the pants.

Make sure your patterns are labelled "CUT 1 PAIR + BLOCK FUSE" for both the right and left front Waistband.

Step 7
Trace the back waistband piece in the same way.

Trace the dart and we will show you how to remove it in the following steps.

Add a grainline to the pattern parallel to the CENTRE BACK.

Step 8

a Cut down one of the dart legs.

b Close the dart by moving the cut dart arm so that it meets the uncut dart arm. Tape / glue pattern in place.

Step 9
Fold a piece of pattern paper and line up the CENTRE BACK of the new BACK WAISTBAND with the fold.

Trace a copy of the piece, smoothing out the top and bottom edge where the dart was removed. Label the piece "CUT 1 PAIR + BLOCK FUSE".

Add seam allowance in the same way that you did on the front waistband pieces. Mark a notch at the CENTRE BACK on the top and bottom edge.

Step 10

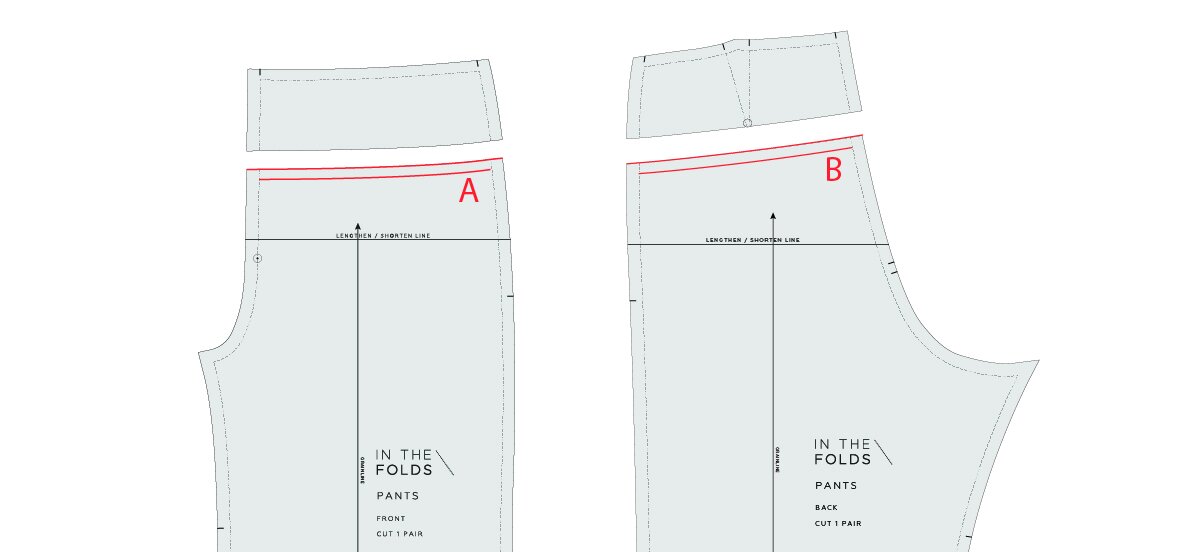
Take the pants pattern and add 1cm (3/8in) seam allowance to lines A and B. You can choose whether to trace a copy to keep as a draft or cut off the excess.

Alter the fly pieces by lining up the piece on the pattern and shortening to reflect the new rise height. You will also need a shorter zip to fit the new lowered waist.

Happy drafting,

Emily


RESOURCES MENTIONED IN THIS ISSUE

  • The Pants Sewing Skills Kit, Pants Fitting pattern & Fit Kit and the Pants Design Kit are the first, second and third parts of our Pants Sewing project series, which is available through our Curated by ITF subscription. Past issues are also now available for purchase by subscribers. More information can be found here.

  • The Wide Leg Pants pattern is a free pattern and can be found here.

  • How to convert a pants pattern into a block - read the tutorial here.

  • How to draft side pockets - read the tutorial here.


For more issues of the Q & A series, you can check out the archive here.


WHAT YOU’VE BEEN MAKING


MORE POSTS IN THE SERIES

ISSUE 137 - ADDING PLEATS TO PANTS

THE Q & A SERIES

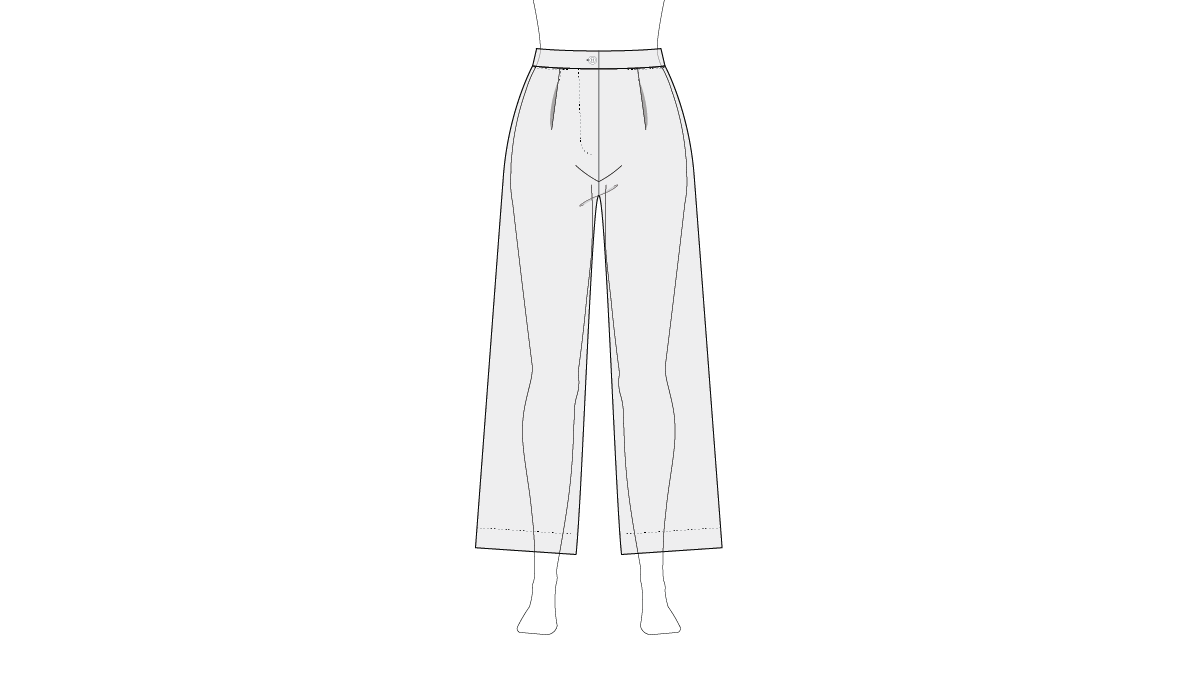
How to add pleats to pants

Hello,

I recently tried adding pleats to your Peppermint Wide Leg pants pattern and although I am happy with my results I think that I should have also added a little more width to the back panels. Is there a particular method that you would recommend for this type of pant pattern alteration?

Thank you.

Sincerely, 

Jess


Hi Jess,

Learning how to hack patterns we already have is a wonderful skill to be able to add to your sewing toolbelt, and it’s something we focus on in our sewing subscription, Curated by ITF. This month we’ve been showing our members how to design pants using the pants block we made previously.

Apart from making sewing more economical, knowing how to hack patterns means that we can make clothes that we want to wear, regardless of what fashion trends are in at the moment. It also means our clothes will be unique and we’re not going to walk around a corner and see someone wearing the exact same outfit!

What are pleats?

Pleats are made when fabric is folded over on itself. They are a fantastic way to add volume and shaping to a garment - in this case a pair of pants - without the need for darts.

Pleats in pants

There are a range of different pleats you can use when wanting to add fullness to pants. Forward pleats, reverse pleats, double pleats…

A single pleat on each side of the front waist is the most common approach in pants.

If you want to increase the volume at the back of pants, you can add a pleat there as well, but it is important to consider how much volume you want in the pants overall.

My suggestion is to add pleats in the front, and then use the cut and spread technique to add the extra volume you’d like in the back.

WHAT TO keep in mind when adding pleats to pants

Depending on the pattern you’re hacking, adding more fabric into a design may impact areas of the pattern differently. Here’s two things you should keep in mind when adding pleats to pants:

  • If it is too close to the CENTRE FRONT this could add excess volume in the crotch area.

  • If it is too close to the side seam, there may not be room for the volume of the pleat when it is folded in place and could add too much bulk if you choose to include a pocket.

DETERMINING PLEAT WIDTH & DIRECTION

You will need to have a think about the size of the pleat you want to add to your pattern. This is totally up to you, and depends on the look you are wanting to achieve.

If you are struggling to work out the width you would like your pleat to be, have a play around with some fabric (or even a piece of paper). Fold different sized pleats into the fabric to get an idea of how it will look and how much fabric it will use.

Keep in mind where you intend the pleat to be placed in the garment and how much room there is. This will help you determine the best size for the pleat.

It’s up to you which direction you'd like to fold your pleat - it's just a design decision. If you're unsure, have a look at your pleat sample! We like to fold ours towards the side seam as this avoids excess volume flaring into the crotch area.

How to add volume to pants using pleats

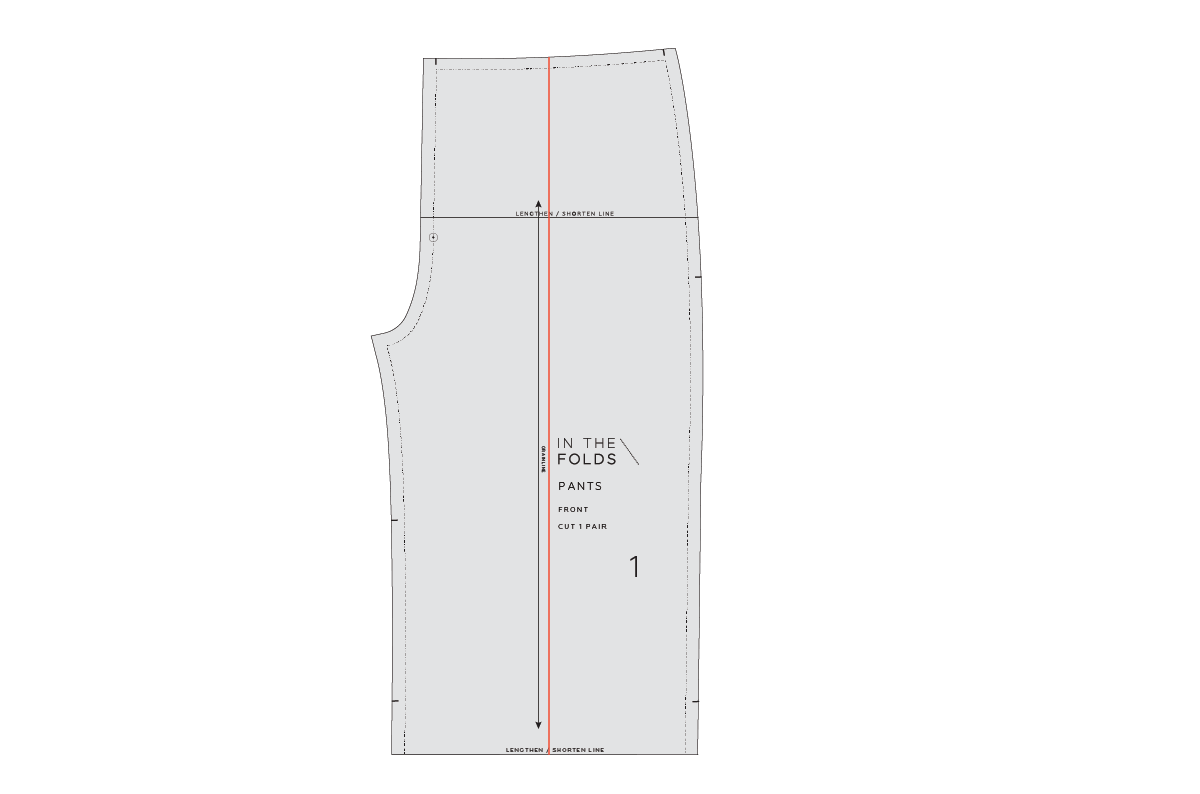
In this example, we only want to add volume in the upper section of the pattern, so we will separate the pattern at the knee.

This allows us to add volume for the pleat, yet keep the hem width the same. You can skip this and add volume through the whole piece, if you prefer.

In the case of our Pants block, the knee line should be around the same area as the LENGTHEN/SHORTEN LINES. Hold the pattern up to your body to check.

Take care to draw the slash line perpendicular to the grainline.

Step 1

Consider where you would like to add a pleat/s. We recommend it be in the middle of waistline so you don’t add too much volume to the crotch or bulk to the pocket area. For this example we will create one pleat, but you can add multiple if you like.

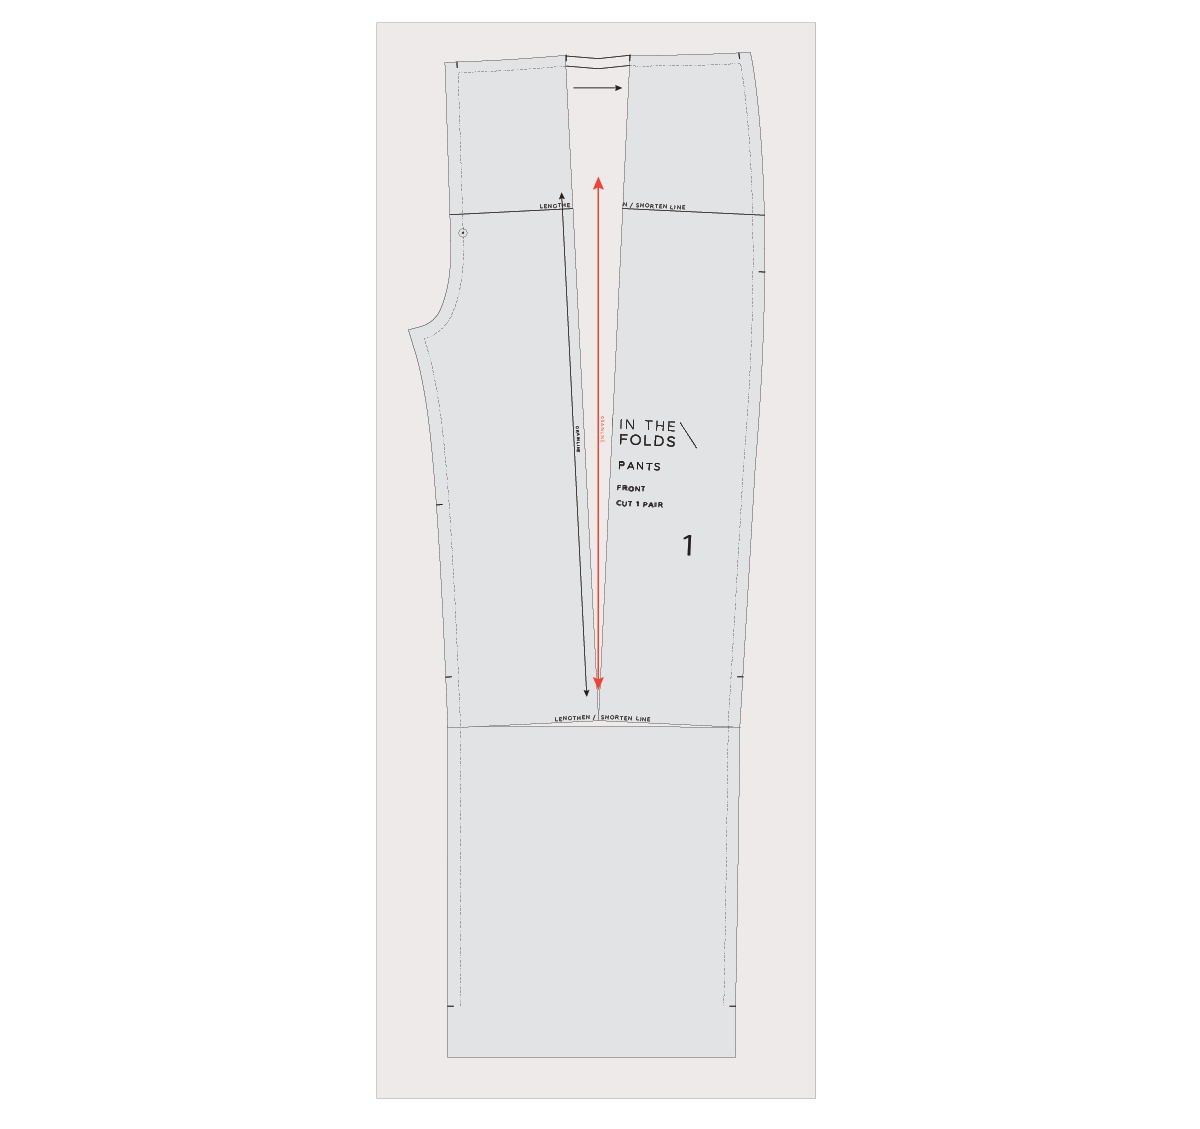
Draw a slash line through the pattern where you plan to place your pleat (or pleats).

Step 2

Slide a large piece of pattern paper under your pattern.

Cut along the line from the waist, stopping 1-2mm from the knee line. This should create a hinge in the paper.

Make sure you check that there is room for a pleat this width in relation to the CENTRE FRONT / BACK and side seams (depending on where you have placed your pleat/s).

Step 3

Using the hinge, open the pattern by the amount you'd like to add for the pleat, measuring at the waist STITCH LINE. Remember that the amount needs to be double the width of your finished pleat.

Tape / glue pattern in place.

Step 4

Fold the pleat in the direction you'd like it to be sewn. Press down at the waist area to form creases.

Step 5

When you fold a pleat on a curved edge, you need to adjust the edge of the pleat so that it sits flush with the waistline.

Using a tracing wheel, transfer the waist shaping onto the pleat edge at the waist STITCH LINE. Add seam allowance to the pleat.

Step 6

Add FOLD LINES either side of the pleat. Add notches where the FOLD LINES meet the CUT LINE at the waist.

Mark an arrow to indicate which direction the pleat needs to be folded.

Step 7

Take the lower section of the pattern which you cut off before you started. Place it back on the top pattern by lining up the side seams at the STITCH LINE.

You will have an excess triangle on your pattern where the two meet - don't worry about this! The inseam and side seam are still the same length and the excess will blend into the pleat once folded.

If you've opened up your pattern a large amount, you can smooth the inseam and side seam at the knee area if necessary.

Step 8

Redraw the grainline in the centre of the pleat.

Step 9

Measuring down from the waistline on the FOLD LINES of the pleat, mark drill holes the distance down you would like to stitch your pleat.

In industry, these markings would normally be offset from the fold line by 5mm (¼in) so that the holes would be hidden inside the pleat. In the home sewing world we don't mark drill holes with actual holes in the fabric (we use chalk or a tailor's tack) so we are fine to have these markings on the FOLD LINE.

Happy sewing,

Emily


RESOURCES MENTIONED IN THIS ISSUE

  • The Pants Sewing Skills Kit, Pants Fitting pattern & Fit Kit and the Pants Design Kit are the first, second and third parts of our Pants Sewing project series, which is available through our Curated by ITF subscription. Past issues are also now available for purchase by subscribers. More information can be found here.

  • The Wide Leg Pants pattern is a free pattern and can be found here.

  • Adding volume to a pattern - tutorial for the cut and spread technique can be found here.


For more issues of the Q & A series, you can check out the archive here.


WHAT YOU’VE BEEN MAKING


MORE POSTS IN THE SERIES

ISSUE 132 - WHAT YOU NEED TO KNOW TO SEW PANTS THAT FIT

THE Q & A SERIES

WHAT YOU NEED TO KNOW TO
SEW PANTS THAT FIT


How do you make a pants pattern fit?  

Thanks,

Nancy
Hampton Georgia, United States


Hi Nancy,

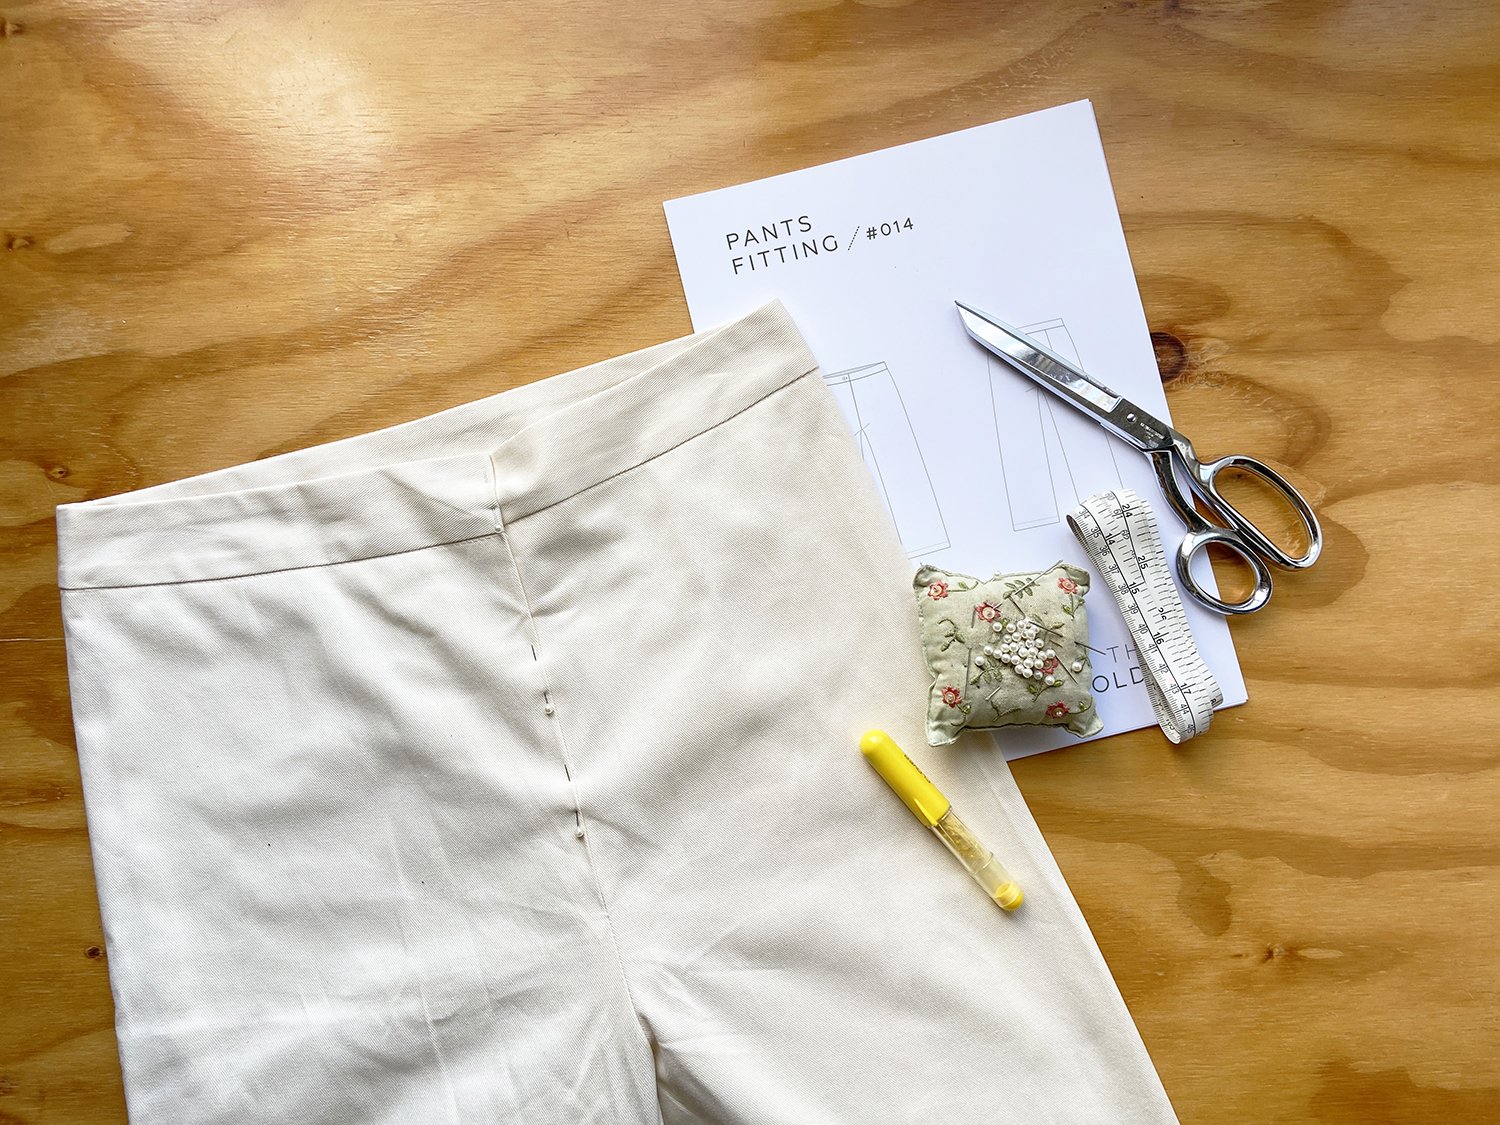
That’s a great question. How to sew pants that fit is a question we have answered in great detail in this month’s Curated by ITF project, the Pants Fitting pattern & Fit Kit!

We all know that fitting pants can be a little overwhelming. Just like our mantra here at In the Folds,  what we suggest you do is slow down, take the pressure off and take it one step at a time. Keep reading to see what we believe you need to know to sew pants that fit, plus we share a Pants Fitting Checklist that you can use whenever you’re working through the fitting process.

BE WARY OF OVER-FITTING

Before getting started with fitting a pair of pants we suggest you get a clear goal in mind.

It is important to remember that the goal is not to make pants that have no creases. This is called “over-fitting” and indicates that the pants have no ease in them. As you can imagine, this would make them very uncomfortable to wear and to move around in! The goal is to make pants that are comfortable to wear and that you like the look of.

It can be easy to get caught up in fitting a garment perfectly - especially as you're standing in a static pose, in front of a mirror, wearing calico.

Try to remember that as you move and use the real fabrics, the creases that seem to stand out while standing still most likely won't show up as much as they do in calico. 

TAKE ACCURATE MEASUREMENTS

It’s a very good idea to take accurate body measurements with a tape measure before getting started. To do this, we recommend putting on some tight clothes, like leggings or just your underwear.

Take your waist and hip measurements first. Be sure to measure at the fullest part of your hips. Do this in front of a full length mirror and check from the side that the tape measure is not dipping up or down. It’s also a good idea to take your waist and hip measurements while sitting down, to ensure you will have enough ease while sitting.

If your measurements are between sizes, use the finished garment measurements from the pattern to help you decide if you should select the smaller or larger size. This measurement shows the amount of ease in the pattern. If a pattern is somewhat fitted, we recommend selecting the larger size for your toile, as it is easier to remove fabric from the toile than add fabric in.

ALWAYS MAKE A TOILE

We all know what it’s like... You purchase (or draft) a new pattern and you just want to get into it and make it so you can wear it!

While this approach may work for some garments, when it comes to sewing pants, we strongly recommend you make a toile first. A toile is a test version of a garment, made from a similar, but often cheaper, fabric. You can read more about making a toile here. By making a toile you can check the fit of the garment, and make any adjustments before cutting into your 'real' fabric.

Consider increasing the stitch length on your machine. This makes sewing your toile faster, but also means it's a lot easier to open up seams if you want to make an adjustment during the fitting process. We suggest that you trace a copy of the pattern before making any adjustments. This way you always have a copy of the original pattern to refer to.

FITTING YOUR TOILE

Once you have selected your size and made your toile, you can do a fitting to check if you need to make any alterations.

This is a good time to mention that most of us will require some alterations. This is not to deter you, but to let you know that it’s completely normal to need to make alterations!

Patterns are designed to a standard shape, but most of us are not the standard. By reminding yourself of this you can see pattern alterations as another skill to add to your repertoire and see it as just another part of the sewing process instead of a chore.

When fitting your toile, try to be methodical. It can be easy to be overwhelmed by the process, but just remind yourself that one effective alteration can make a world of difference and will often resolve multiple issues.

Because of this, it’s also good to remember not to make too many changes once. Just make one alteration to your toile and then re-fit before doing anything else you think you need.

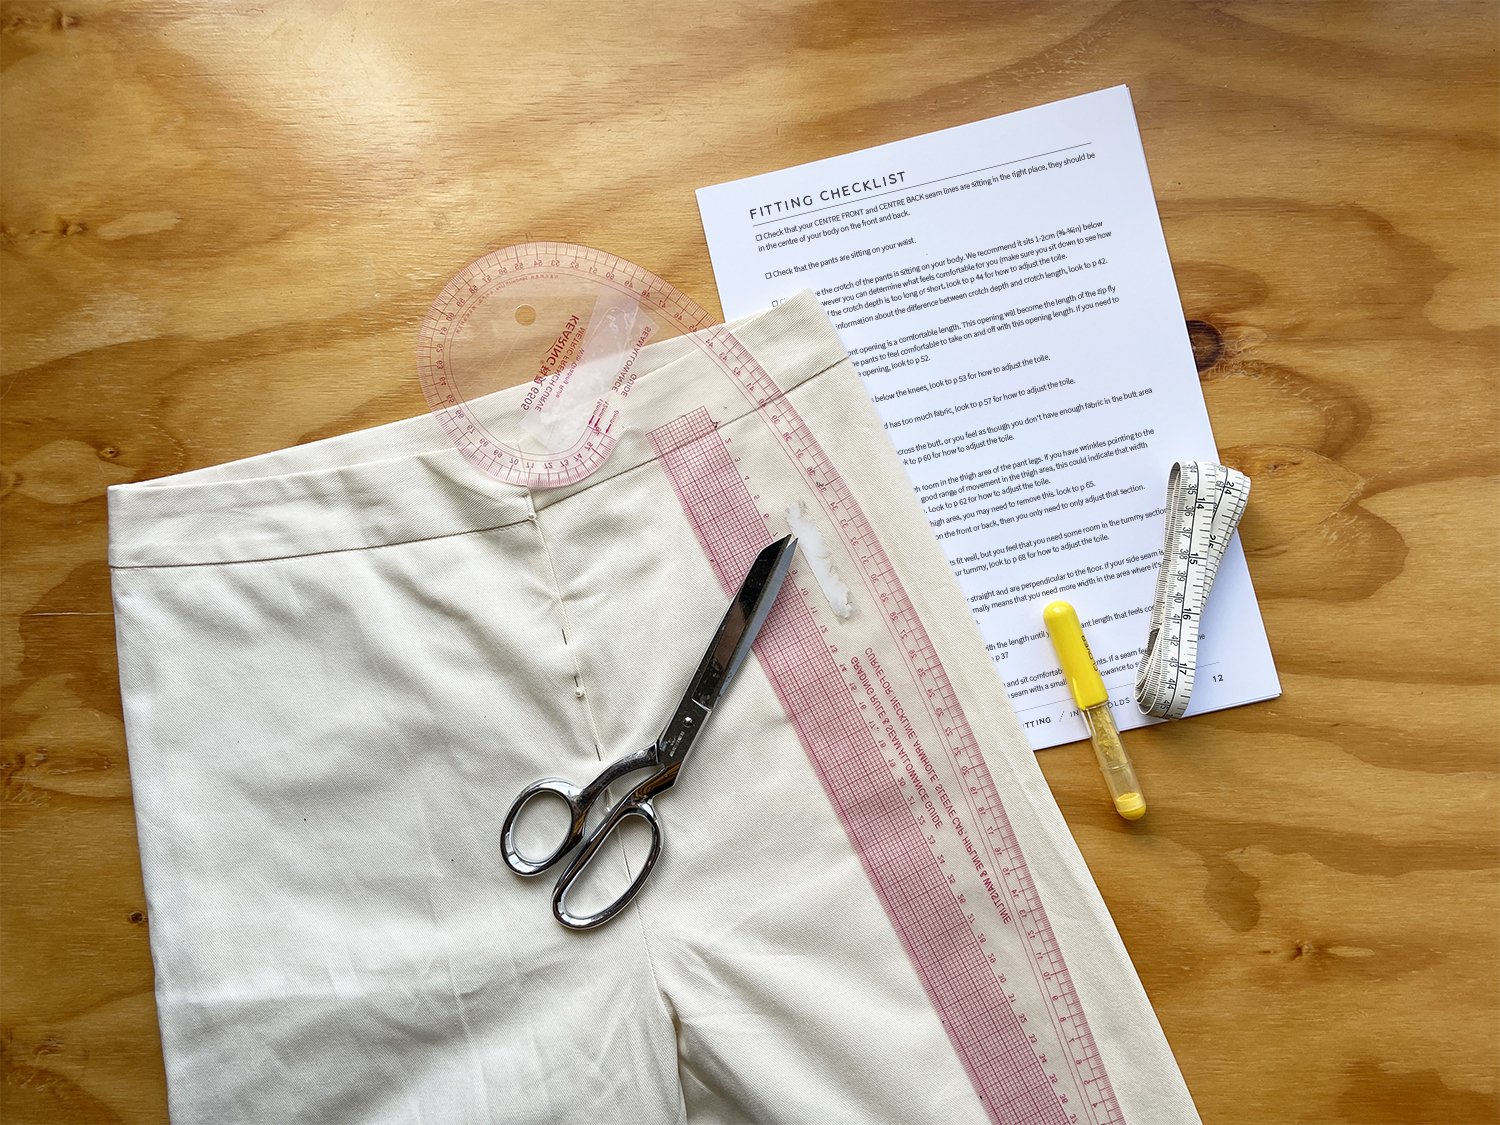
PANTS FITTING CHECKLIST

Our current issue of Curated by ITF includes an extensive Pants Fitting Checklist. We thought we’d share a few of the main things with you so you know where to get started:

  1. Check that your CENTRE FRONT and CENTRE BACK seam lines are sitting in the right place. They should be in the centre of your body on the front and back.

  2. Check that the pants are sitting on your waist (or where they are supposed to be sitting).

  3. Check where the crotch of the pants is sitting on your body. Where this sits will depend on the pattern and how it has been designed.

  4. Check that the opening is a comfortable length and you can get in and out of the pants easily. For example, with our pants fitting pattern it has a front opening for a zip fly front.

  5. Check for drag lines on your toile. Drag lines are lines in the fabric that form when fabric is being pulled across a part of the body. It may indicate that there is not enough length or width in a certain part of the garment. Sometimes it can be easier to spot drag lines by taking a photo of your toile. Ask a friend or family member to take the photos or use a tripod or balance your phone on something and use a self-timer to take photos of yourself. Be sure to take photos from all angles. 

  6. Check that you have enough room in the thigh area of the pant legs. It’s a good idea to check while sitting too.

  7. Check that you have enough room in the tummy area. If the waist and hips fit well, but you’re experiencing pulling across the front, you may need some extra room in that area. 

  8. Check that your side seams appear straight and are perpendicular to the floor. If your side seam is pulling towards the front or the back, this normally means that you need more width in the area where it's pulling.

  9. Check the hem length. Have a play with the length until you get a pant length that feels comfortable for you.

  10. Check that you can move and sit comfortably in the pants. Move around. If a seam feels tight, let out the seam with your seam ripper and re-pin the seam with a smaller seam allowance to see if this helps.

We hope this helps you get started on your pants fitting journey. If you feel like you still need a bit of extra support and encouragement, be sure to sign-up to Curated by ITF this month and work alongside our community!

Happy fitting,

Emily


RESOURCES MENTIONED IN THIS ISSUE

  • The Pants Fitting pattern & Fit Kit is the second part in our Pants Sewing project series, which is available through our Curated by ITF subscription. Past issues are also now available for purchase by subscribers. More information can be found here.

  • How to (and why) make a toile - read the tutorial here.


For more issues of the Q & A series, you can check out the archive here.


WHAT YOU’VE BEEN MAKING


MORE POSTS IN THE SERIES

ISSUE 131 - MAKING PANTS USING A PATTERN BLOCK

THE Q & A SERIES

Learning patternmaking using pattern blocks

I would love to make my own patterns but I get so confused. Do you have a basic pants block that is easy to follow?

Lucille
Chatsworth, South Africa


Hi Lucille,

Making your own patterns can be a little bit confusing when you’re getting started, but you’ve got the right idea - using a block helps a lot!

WHAT IS A PATTERN BLOCK

A pattern block is a foundation pattern that patternmakers use as a base or foundation when drafting patterns.

In the US, a block is referred to as a ‘sloper’ so you may see these terms used interchangeably in books and blocks, depending on where the author is from. We have a whole article about pattern blocks and how you use them that you can read here.

THE IN THE FOLDS PANTS BLOCK

Over the years we have had A LOT of requests for a pants block, so we are excited to say that we’ve just released one as part of our Pants Making Project Series.

This project has been in the works for a very long time. We really wanted to create a pattern that would assist makers to make a pair of pants that fit well, but also one that gave them a base to springboard off when drafting new designs. 

The problem with pattern blocks is that they are often drafted to be quite fitted, with minimal ease. Although this can be great as an exercise in fitting, makers often find it difficult to then know what to do with the block and how to use it to make the style of clothes they want to wear.

For this reason we designed our Pants Fitting pattern with a comfortable amount of ease in the waist, hip and through the leg. Once you’ve mastered the fit (with the Fit Kit that we released along with the pattern) you will have a solid starting point to design from, without having to think about adding ease… unless of course you want a pant with more volume, and we will show you how to do that too!

Although the shape of our pants pattern isn’t a conventional pant block shape (for the reasons mentioned above), we made sure we stuck with all the other things that make a block handy to use.

The pant has minimal design details - just a back dart for shaping and a shaped waistband. We left out the pockets so that you can quickly and easily do a fitting and then draft the style of pockets you like. We included the fly pieces in case you want them in the future, but when making toiles we suggest you skip the fly so that you can quickly and easily make adjustments.

WHAT DO YOU USE A PATTERN BLOCK FOR?

Once you have altered the pattern to fit your body, you will then be able to use it as a block. It’s a good idea to transfer your pattern onto cardboard for safe-keeping. This will keep it nice and strong and mean you can use it over and over. It also makes it quick and easy to trace a copy onto paper when you’re ready to use it.

 There are two main things you would use a block for as a home sewist:

  1. To check what adjustments you need to make on new patterns. For example, you might be really happy with the crotch shape on your block. When you use another pants pattern you can lay the block onto the crotch to see if you need to make alterations to the other pattern.

  2. To design your own patterns. This is the thing we are really excited about! Once you have a base pattern, there are countless things you can do. Add volume, remove volume, change the leg shape, lower the waist, raise the waist, add panel lines, change the closure type, add any pocket shape you can think of… just to name a few! The options really are endless.

    For this month’s issue of Curated by ITF we’re working on pants fitting with the new pants pattern so that next month we can get you patternmaking, because it’s always a good idea to ensure the base pattern fits you well before making design adjustments.

Happy sewing!

Emily


RESOURCES MENTIONED IN THIS ISSUE

  • The Pants Sewing project series is available as part of our Curated by ITF subscription. More information can be found here.

  • What is a pattern block? - read the tutorial here.


For more issues of the Q & A series, you can check out the archive here.


WHAT YOU’VE BEEN MAKING


MORE POSTS IN THE SERIES

ISSUE 124 - Choosing the right seam finish

THE Q & A SERIES

Choosing the right seam finish

I am just about to start cutting out the Flynn pattern for the first time. I bought the pattern because I loved the style of the jacket, but was so excited to see the steps on seam bindings when I was looking at the instructions. I am new to sewing and have been wanting to make my mom a quilted vest and jacket, but wasn’t sure how to finish the seams. I am hoping that once I finish the Flynn (in linen) that I will have a better idea of how to do that when I make a quilted pattern :-) 

Thank you!

Julianne


Hi Julianne,

I am pleased to hear you will be making the Flynn jacket!

It is a really fun sew with loads of new skills to learn - especially binding seams. This month we’re working on beautiful finishes with our Curated by ITF community and I thought it would be a great opportunity to talk about seam finishes.

When you’re working with a sewing pattern, you’ll see that a number of finishes are referred to. The application of a seam finish will depend on the garment type, suggested fabric and the seam type. Today I'll run you through the most used seam finishes so you have a little reference the next time you’re trying to decide between two different seam finishes.

Different seam finishes and what they're for...

Zig-zag finish

Zig-zag finish is one of the quickest and simplest ways to finish raw edges as you can do it on your regular sewing machine (as long as it has a zig-zag stitch function).

What's a zig-zag finish for?

This finish is best suited to mid-weight, stable fabrics.

On certain light-weight fabrics you run the risk of the fabric being pulled into the teeth or bobbin opening on your machine. To check this you should always do a test run before trying it on your garment. 

One thing to keep in mind is that fabrics can still fray when finished this way, so after washing the garment a few times you might notice the seams not looking as neat as they did originally (although this will depend on the fabric type and the way the seams have been cut).

Turn and straight stitch

One of the simplest ways to finish a seam is to turn back the raw edges of the seam allowance and stitch.

This is a good finish to try if you don't own a serger/overlocker and don't have a zig-zag stitch on your regular sewing machine. It's also a great alternative if you would like a cleaner finish.

What's this finish for?

This finish is suitable for almost all fabrics, although it works better on straight seams, rather than curves. If working with light-weight or sheer fabrics, it is suggested that you consider French seams before choosing this option.

This finish will work best for seams that will be pressed open. Be careful applying this finish to heavy-weight fabrics as it will add bulk to the seams.

More details on this technique can be found here.

French Seams

French seams are great for light to mid-weight fabrics, especially those that are prone to fraying. French seams are also the best choice of finish if you are using a sheer fabric.

French seams will give you a beautiful, clean finish, without the need for an overlocker/serger. Although French seams can be a little time consuming, they are very satisfying and give one of the most beautiful finishes possible.

What's this finish for?

This finish is suitable for light-weight to mid-weight fabrics or sheer fabrics.

Tips on sewing French seams can be found here.

Did you know you can even sew in-seam pockets with French seams? More info on how to do that can be found here.

Flat felled seams

Flat felled seams are one of the strongest seam finishes. The raw edges are enclosed inside the seam (like French seams), but it's pressed flat and stitched to keep the seam nice and flat.

What's this finish for?

Flat felled seams are suitable for hard wearing items such as jeans and jackets. You may also use this finish for making shirts.

Bias bound seams

Bias bound seams are strong and hard wearing. This finish gives you a beautiful, clean finish on the right and wrong side of the seam, by wrapping binding around a raw edge. Bias bound seams also add visual interest to the inside of garments. 

What's this finish for?

Great for seams that will be exposed (such as in unlined jackets), formal wear and also centre back seams (it can be a really nice finish either side of a zip opening).

Hong Kong bind

A Hong Kong binding is strong and hard wearing. This seam finish gives you a beautiful, clean finish and adds visual interest to the inside of garments.

From the right side, a Hong Kong bind looks the same as a bias bound seam. The difference is that a Hong Kong bind is finished differently on the unexposed side of the seam.

What's this finish for?

Great for seams that will be exposed (such as unlined jackets). A Hong Kong bind is an alternative to bias bound seams and is especially suited to thick or bulky fabrics.

It is an ideal finish to use when the back of the seam will not be exposed and you would like to minimise bulk, such as the edge of facings and waistbands.

More details about sewing bias bound seams and Hong Kong binding can be found here.

We’ve shared quite a few posts about bindings in the past, so if you’d like to know more about making your own binding, finishing armholes or necklines, attaching single fold bias binding or attaching double fold binding click on the links to learn more.

Happy sewing,

Emily


RESOURCES MENTIONED IN THIS ISSUE

  • Flynn jacket pattern can be found here.

  • More information about Curated by ITF can be found here.

  • Alternate finishes for the wrap top - tutorial here.

  • Tips for sewing French seams - tutorial here.

  • How to sew in-seam pockets with French seams - tutorial here.

  • How to sew bias bound seams - tutorial here.


For more issues of the Q & A series, you can check out the archive here.


WHAT YOU’VE BEEN MAKING


MORE POSTS IN THE SERIES

ISSUE 123 - Sewing a hem split and French seams

THE Q & A SERIES

Sewing a hem split and French seams

Firstly thank you so much for creating such patterns that allow a novice to create their own handmade wardrobe and learn the intricate techniques through your instructions and guidance.

My question regarding the everyday dress is that instead of finishing the edges using zigzag stitch (I do not own a serger) and then just hemming it as usual, can I use the french seam method for the sides like you've shown in the wrap top pattern instruction? This way my dress would not fray in wash and will always be neat from inside. I am not sure if it will take up a lot of seam allowance or if it was at all possible due to the side pockets. Hence I wanted to know from your end regarding this. 

Looking forward to hear from you soon. 

Thanks,

Sharvari


Hi Sharvari,

Great to hear you'll be giving the Everyday dress pattern a go and would like to get those insides looking as beautiful as the outside!

This is the perfect question for us to answer this week as we have just released our latest Curated by ITF pattern - the Rennie dress. This pattern (and all the resources we will be sharing throughout the month in our online sewing community) is all about beautiful finishes to elevate your handmade wardrobe.

The reason the side seams for the Everyday dress pattern are sewn with a regular seam (zig-zag or overlocked to finish) is because of the hem splits.

You could do a french seam along the side seam, it’s just when you get to the split you wouldn't be able to press those seams open. When we were designing the Rennie dress this is something we wanted to find a solution for! We wanted both French seams and a hem split, so we got to work figuring out how we could have both… and we did! So in today’s post we will be showing you how to sew French seams when you also have a hem split.

What is a French seam?

French seams are a technique used to finish seam allowances to prevent fraying. We love them at ITF because they give a beautiful, clean finish without the need for an overlocker (serger).

It's a great option if you do not have one of those machines and want a better finish than you can get with a zig-zag stitch. In fact, I'd even go as far as to say, it's far preferable to a regular overlocked or zig-zagged finish and you should use it wherever you can!

French seams are great for light to mid-weight fabrics, especially those that are prone to fraying. French seams are also the best choice of finish if you are using a sheer fabric because it prevents unsightly overlocking being visible through the fabric.

Although French seams are more time consuming than using an overlocker (serger), they are very satisfying and give one of the most beautiful finishes possible.

How to sew a French seam

I'm not going to go into how to sew French seams right now, but you can find a step-by-step of how to sew a French seam in a past issue of the Q&A series here.

How to sew a French seam and a hem split in the Everyday dress

Step 1

With wrong sides together, pin the FRONT [1] to the BACK [2] on both sides. Pin down from the armhole, around the pocket and down to the upper drill hole. Take a ruler and chalk and mark a point 1.2cm (½in) above the upper drill hole on the side seam edge. From this point, draw a diagonal line to the first upper drill hole.

(For these instructions we already have attached the pocket bags. To see how to attach the pockets with French seams read this past issue of the Q&A series.)

Stitch the side seams with a 6mm (¼in) seam allowance. Stop stitching when you get to the diagonal guideline and put your needle down. Lift your machine foot and turn towards the drill hole. Put the foot down and stitch along the guideline towards the drill hole. Stop stitching on the drill hole (you may need to walk your last few stitches in) and then back stitch.

Step 2

Clip into the corners between the IN-SEAM POCKET [3] and the body of the dress, before trimming back the whole seam by half.

Snip into the seam allowance towards the upper drill hole at a right angle. Then cut in again, parallel to the line of stitching, removing a small triangle from the seam allowance.

Step 3

Turn the dress inside out and press the seams with right sides together. Use a corner turner to get a nice sharp corner at the bottom of the seam.

Mark the stitch line from the bottom of the IN-SEAM POCKETS [3] down to the lower drill hole that marks the top of the hem split on each side. Pin the seam from the armhole, around the pocket and down to the lower drill hole.

Stitch the seam with a 6mm (¼in) seam allowance, sewing down to the lower drill hole. Press the seams and IN-SEAM POCKETS [3] towards the FRONT [1].

You have now finished the side seam with a French seam, but can press the hem split open.

If you’ve been wanting to up your game when it comes to seam finishes, now would be a great time to join Curated by ITF. You can give these techniques a go (along with many more) along with the support of our incredible online community, and our ITF team are available to answer any questions you might have!

Happy sewing,

Emily


RESOURCES MENTIONED IN THIS ISSUE

  • Everyday dress pattern can be found here.

  • More information about Curated by ITF can be found here.

  • Rennie dress pattern can be found here.

  • Tips for sewing French seams - tutorial can be found here.

  • How to sew in-seam pockets with French seams - tutorial can be found here.


For more issues of the Q & A series, you can check out the archive here.


WHAT YOU’VE BEEN MAKING


MORE POSTS IN THE SERIES

ISSUE 92 - Give the gift of sewing

The Q&A Series

Give the gift of sewing


Hi Emily,

My 16 year-old niece recently started sewing. It's her birthday coming up and I'd like to give her one of your patterns but I don't know which one to choose. I'm wondering if you have gift cards available so she can pick the right one for her?

Thanks,

Dave


Hi Dave,

What a great hobby for your niece! It's such a fantastic time to learn to sew as there are so many fantastic patterns and resources available. I love the idea of gifting patterns as they not only get the pattern itself, but the making experience that goes along with it!

I have been meaning to add gift cards to my website for a long time. Thank you for your question as it prompted me to finally get around to it! You can purchase a gift card here. You will be sent an email that you can forward to your niece or you can use the digital gift card template that will be sent to you too so you can add a gift message.

I hope your niece enjoys using our patterns!

Kind regards,

Emily


Hi Emily,

I am a member of Curated by ITF (which I love by the way) and would love to gift a subscription to my daughter-in-law for Christmas as she is also a maker. I think it would be fun to sew the projects together! How would I go about this?

Thanks,

Sue

A pattern sits on a table with various sewing tools.

Hi Sue,

What a fantastic gift idea! I am sure your daughter-in-law will be thrilled! There are two options - you can sign-up for here with a regular membership and pay the recurring charge, or you can purchase a 3 month, 6 month or 12 month Curated by ITF membership here. It's a prepaid membership, so you don't need to worry about a recurring charge each month.

With a Curated by ITF membership she will receive first access to new projects each month. This includes new patterns, fitting resources or hack kits - resources that will empower makers on their sewing, pattern making and fitting journey.

Subscribers will gain access to:

  • New monthly projects: Gift recipient will receive their first project right away and then a new project on the first of every month, straight to their inbox. Each project will teach new skills and build on what the community has been learning each month. New projects will be sent straight to the gift recipient for either 3, 6 or 12 months - depending on the gift selection. Would you like to see what we're making this month? You can see the current project here.

  • Access to our ITF community platform: Gift recipient will be able to connect with other makers by gaining access to our online community platform. A place to share ideas, inspiration and questions. Makers will feel supported as they can work on the same project as other makers.

  • Community-centred content: Sew-alongs, tutorials and sneak peeks of upcoming patterns and projects that we’re working on for you.

Happy sewing,

Emily


RESOURCES MENTIONED IN THIS ISSUE

  • In the Folds gift cards can be found here.

  • Curated by ITF Gifted membership can be found here.


For more issues of the Q & A series, you can check out the archive here.


What you’ve been making


more posts in this series