ISSUE 82 - How to draft a facing

THE Q & A SERIES

How to draft a facing

Hi Emily,

Really loving your question and answers.

I would love to know any tips you have for altering the back and front of necklines and how they blend back into the shoulders. How you go about drafting the facing?

Thank you in advance

Love

Emma xx

- Hackney, United Kingdom


Hi Emma,

Lovely to hear that you are enjoying the Q&A series!

Last week we tackled the first part of this question (how to alter the neckline on a pattern), and today we're back to show you how to draft a facing for your newly altered pattern.

What is a facing?

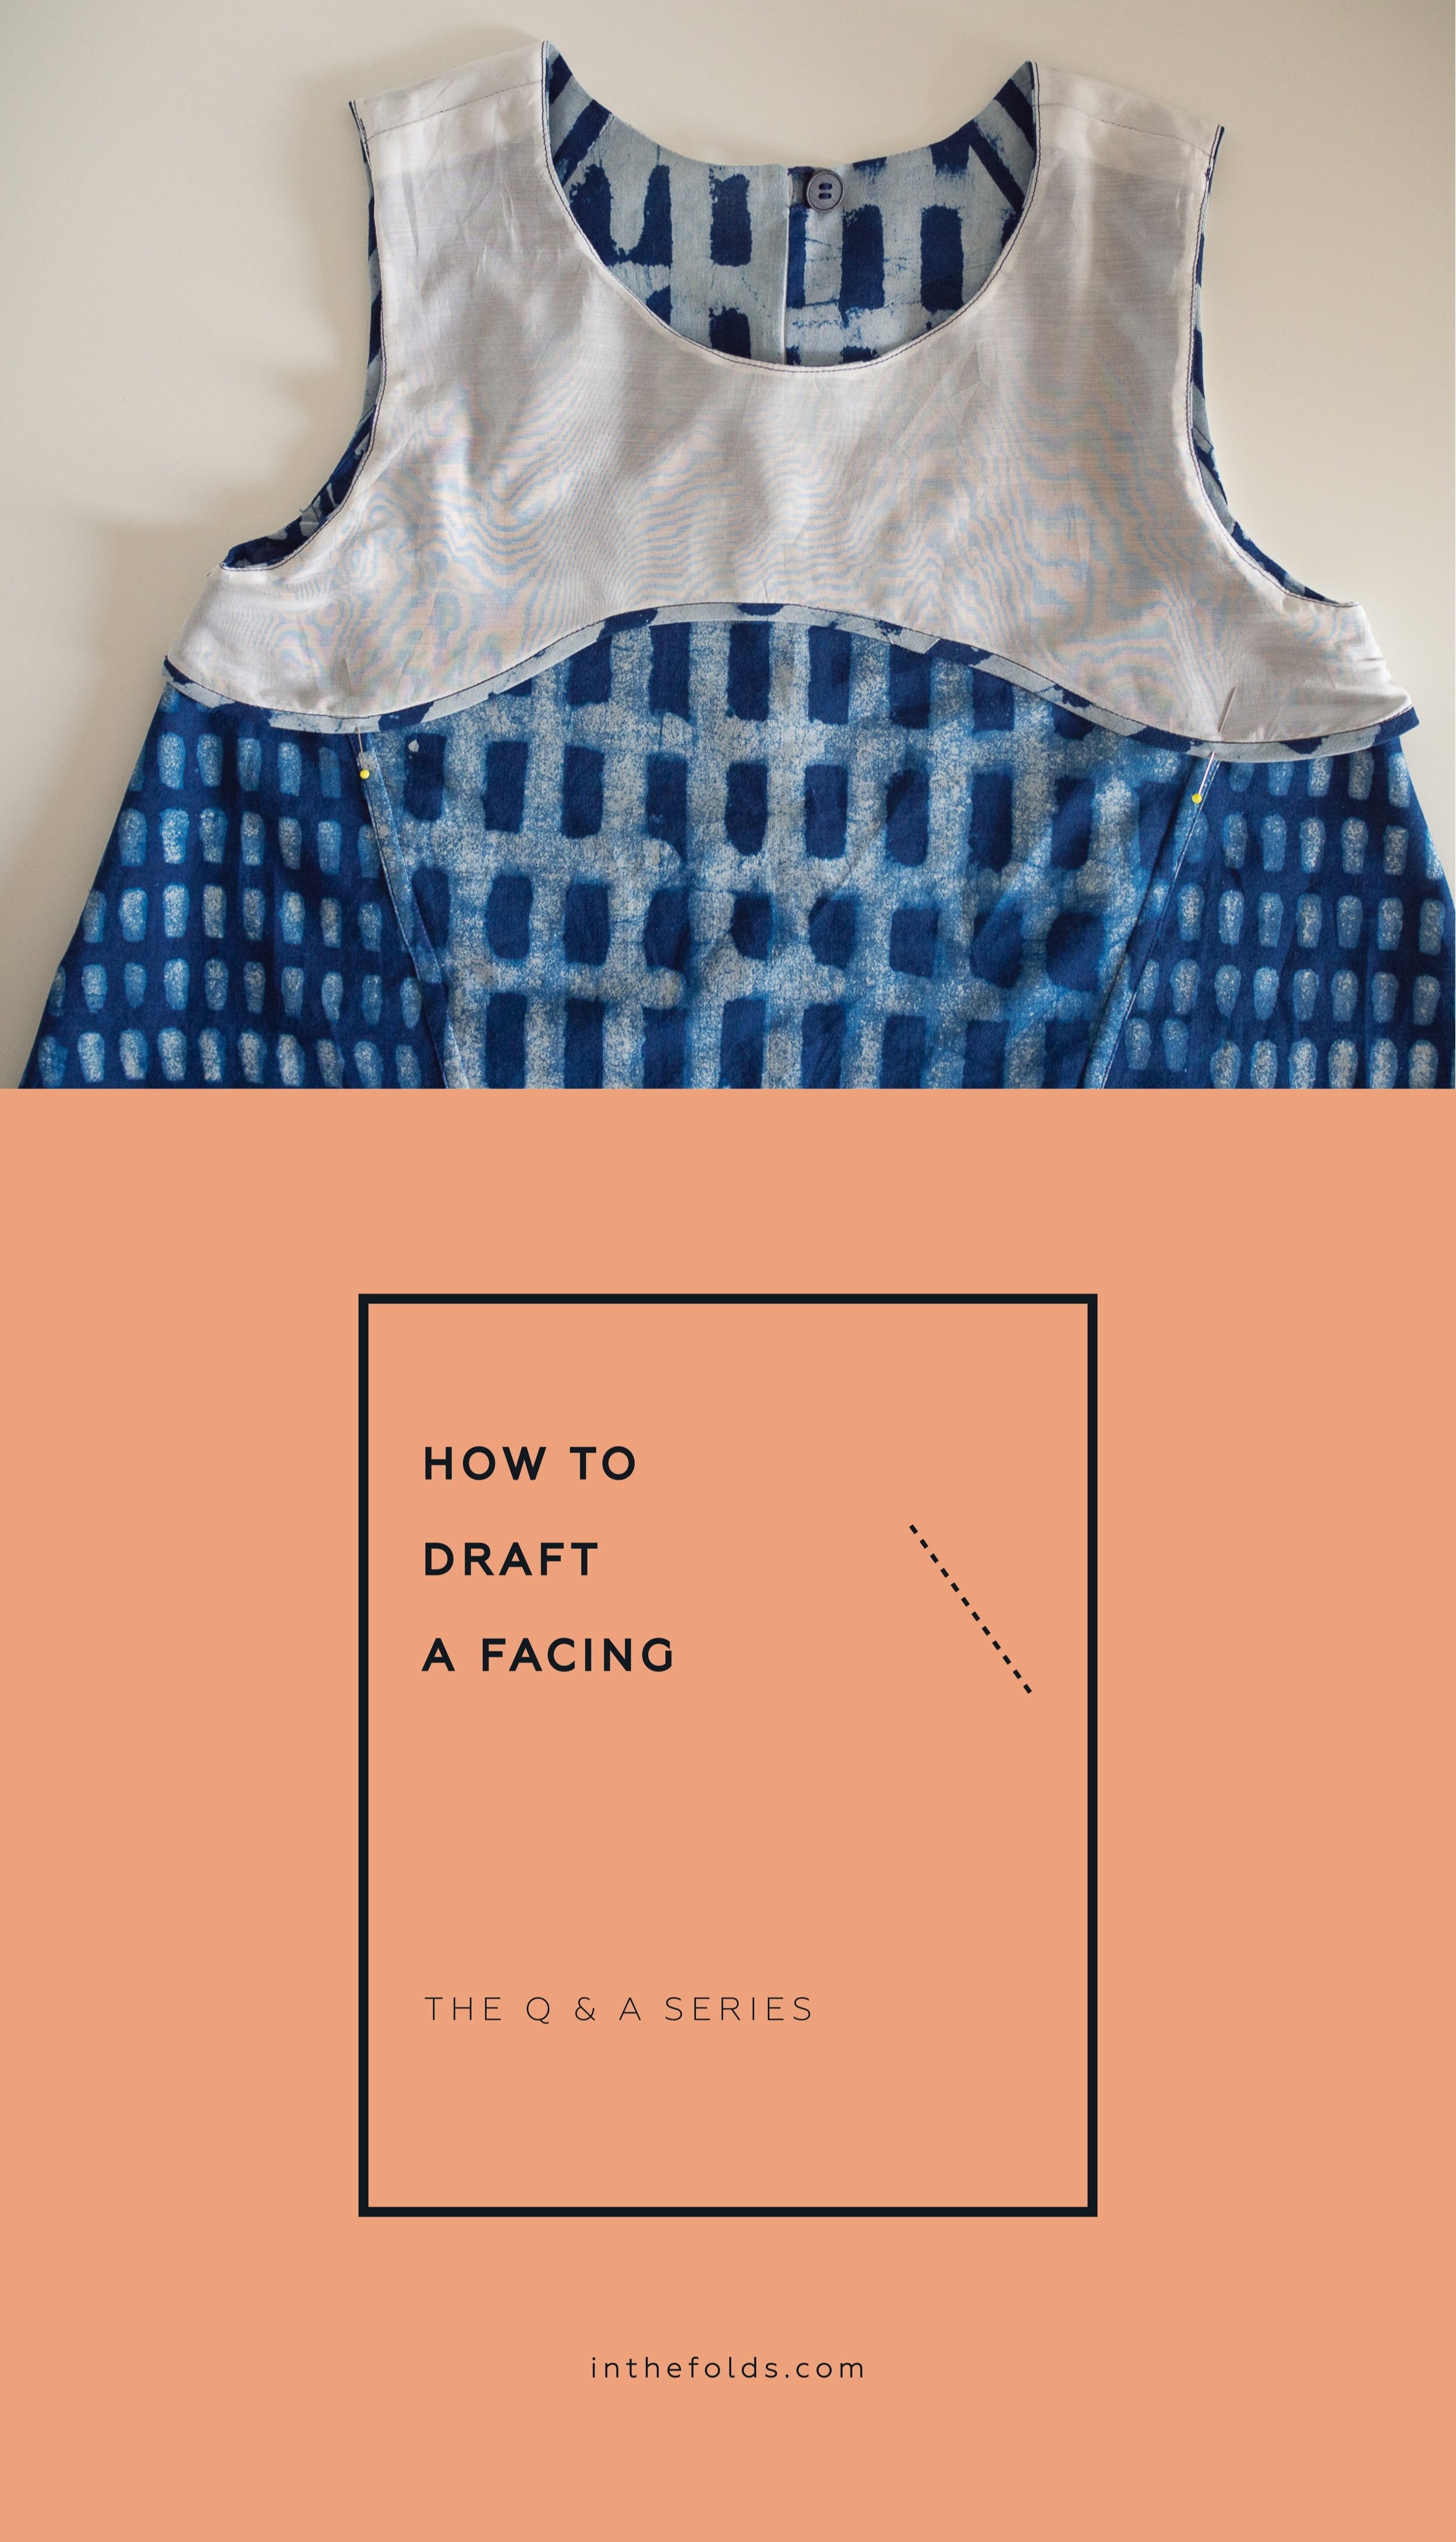
A facing is a way to finish raw edges of a garment in a way that is really clean (and often almost invisible) from the outside. It is like lining a certain section of a garment and finishes the edges as well as provides stability in the area that has the facing.

Facings are most often used on armholes and necklines, but you can also use a facing to finish a hemline.

Why draft a facing?

You may need to draft a facing if you have hacked a pattern (for example, changed the neckline) and the original facing pieces no longer fit the pattern. The other reason you may need to draft a facing is because your pattern suggests using bias binding for finishing the armholes and neckline, but you would prefer the finish of a facing.

Facing considerations

It is a good idea to have as few design details or seams as possible on a facing. This is because the facing will be on the inside of the garment, and will be backing the outer layer of the garment. The aim is to create as little extra bulk as possible. For this reason, we will be removing the centre front and centre back seams when creating the facing pieces for the hacked jumpsuit. We will also be removing the dart - just like the front facing from the original Neale jumpsuit pattern.

Draft front facing

Step 1
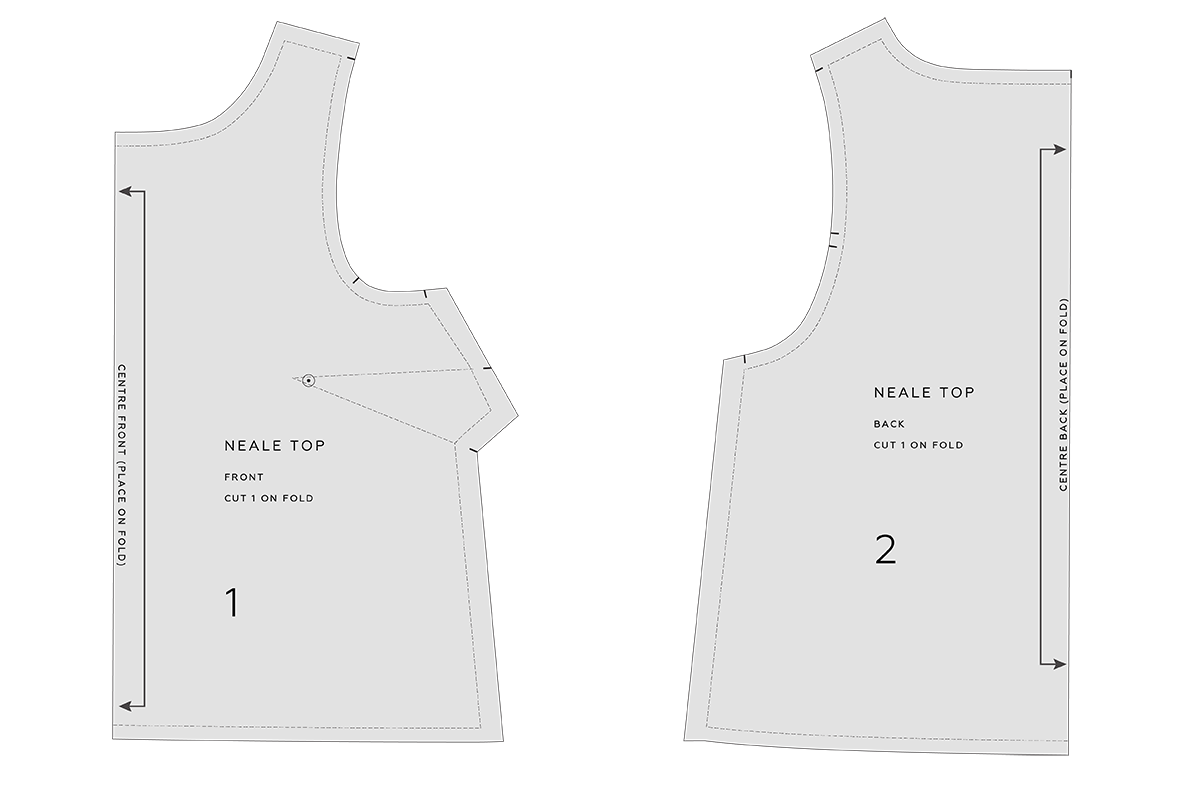
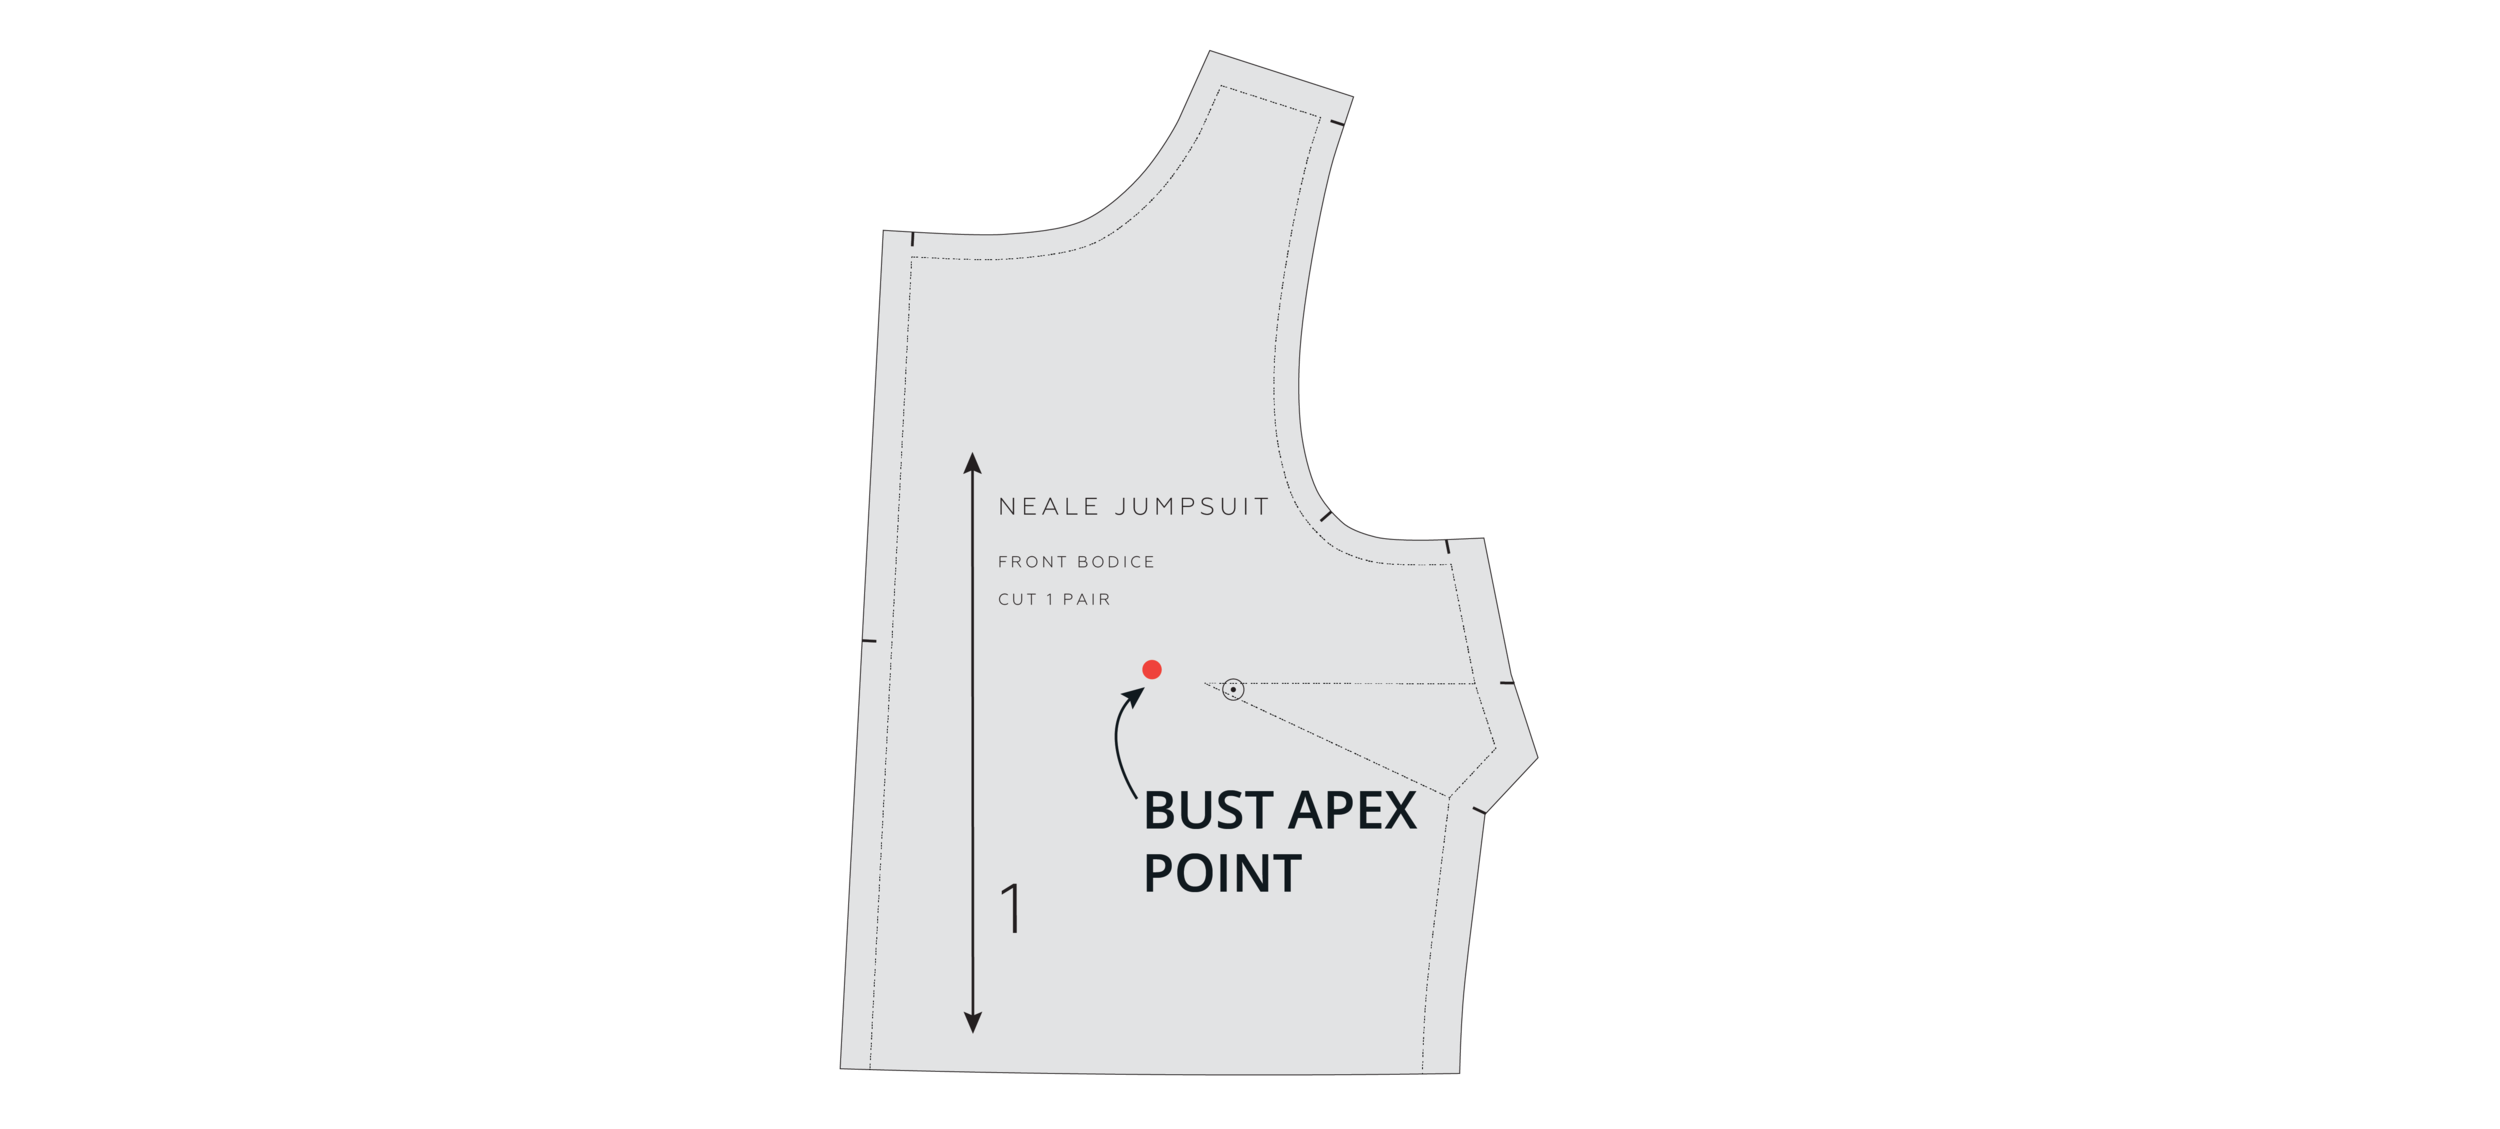
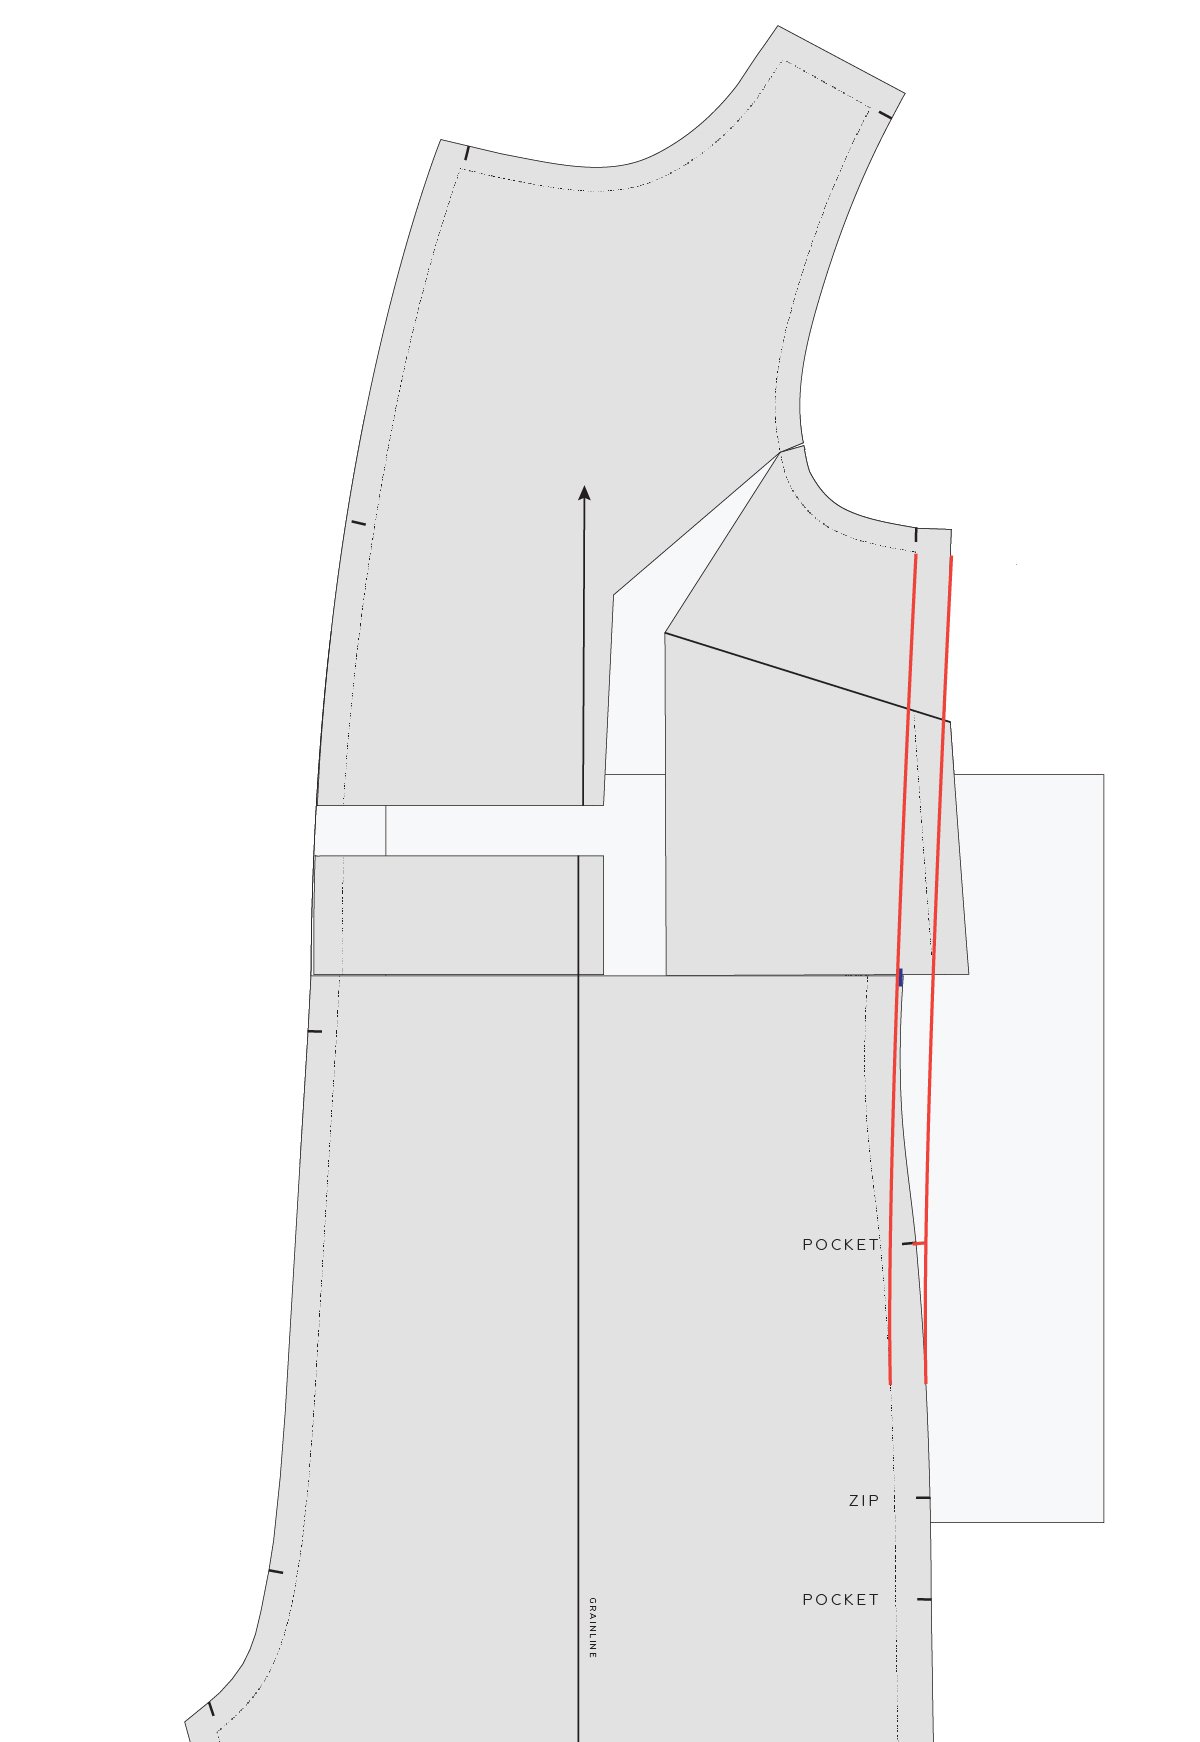
Take the altered FRONT [1] pattern piece and trace a copy of the upper section only - approximately 35cm (13¾in) down the centre front will be fine. Be sure to transfer the STITCH LINE, cutting line, dart point and notches.

Mark the bust apex point on the piece (more info about how to do this can be found in Issue 2 of Curated by ITF). If you have already found your specific BUST APEX POINT, mark it on the pattern.

Re-draw the dart, using the BUST APEX POINT as the tip.

Step 2
Draw a line from the bust apex point down to the bottom of the pattern piece - parallel to the grainline.

Step 3
Cut up from the bottom of the pattern piece, through the line marked in STEP 2. Stop when you get 1-2mm from the bust apex point.

Cut along the lower dart arm towards the bust apex point. Again, stop 1-2mm away from the tip of the dart. This will create a small 'hinge' of paper. This will be used to manoeuvre the pattern, whilst keeping the seam lines intact.

Step 4
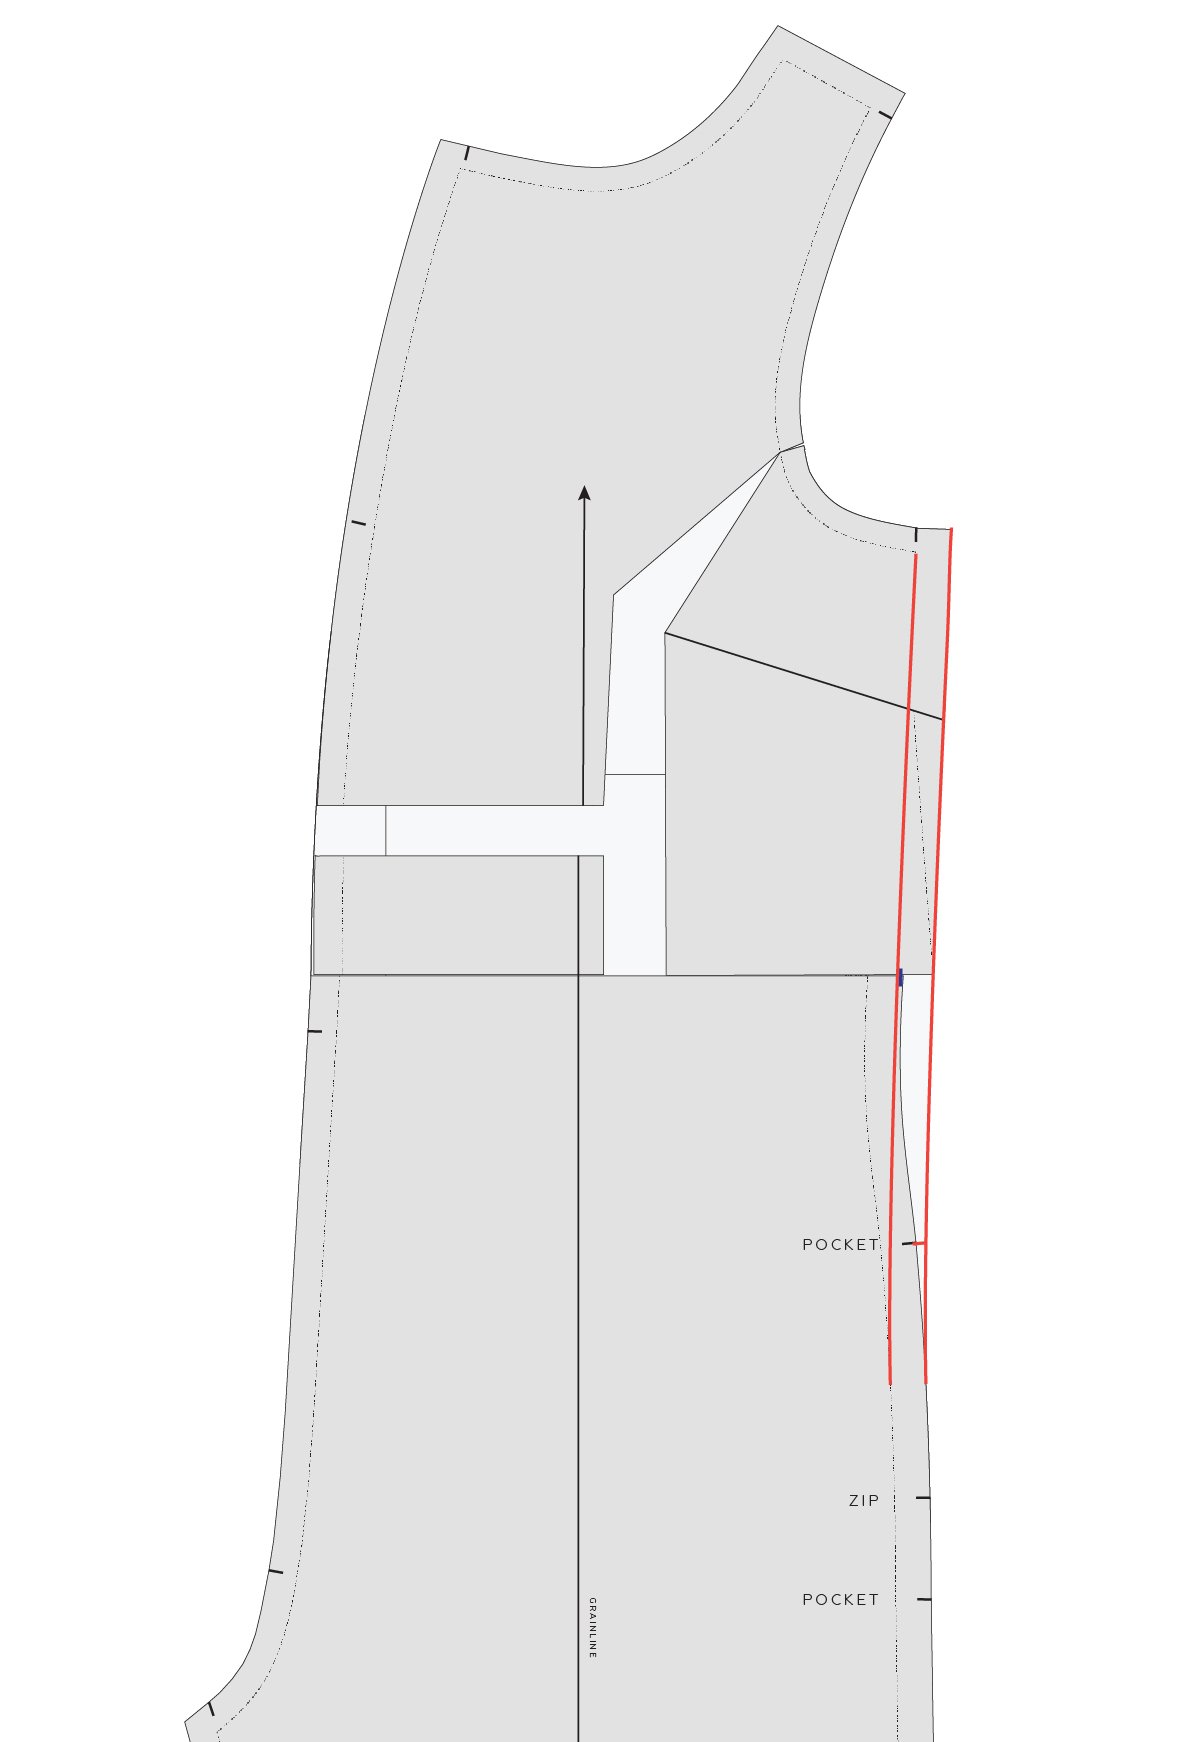
To remove the dart, rotate the lower dart arm (the cut line) so that it meets the upper dart arm. Tape or glue in place.

You will notice that this has relocated the fullness of the dart to the bottom of the pattern. Rather than creating a new dart, we will leave this fullness here. The facing will fit the FRONT [1] and the fullness in the lower section of the piece will create the room required for the bust..

Step 5
Fill the opening in the lower part of the pattern by taping or gluing a scrap piece of pattern paper behind the opening. 

True the side seam by redrawing the STITCH LINE and cut line with a straight line.

Step 6
Consider the length you would like your facing to be. You may like to check some garments in your wardrobe to get an idea of your preference.

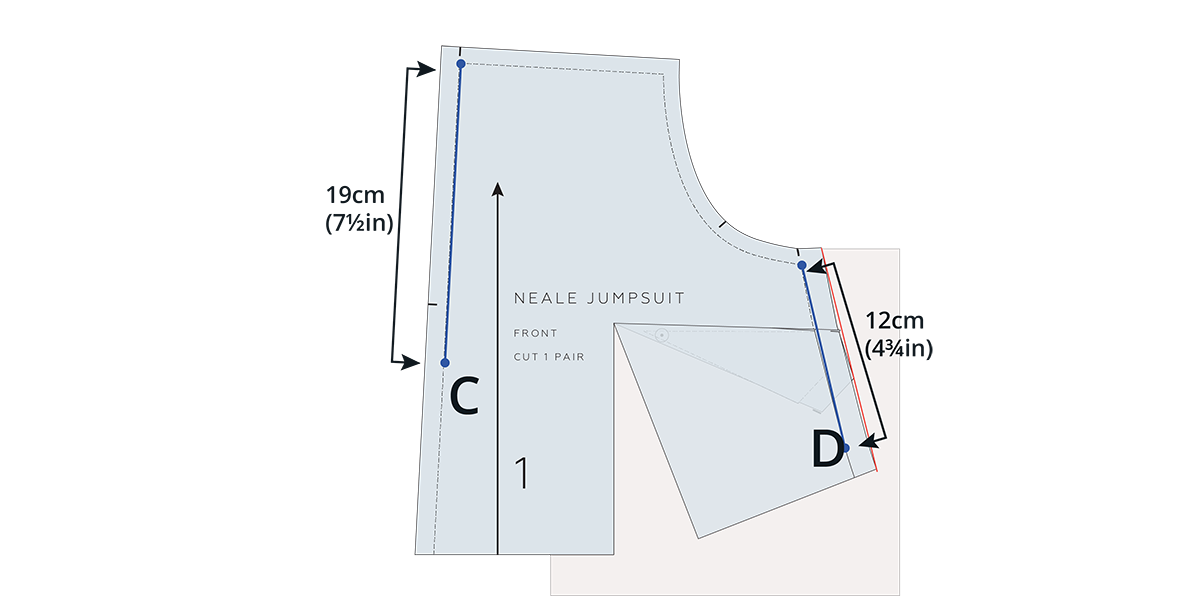
For the example, we will be making the facing 19cm (7½in) at the centre front and 12cm (4¾in) at the side seam.

Take a ruler and measure down the centre front STITCH LINE, to mark facing length. We will call this point C. On the side seam, measure down from the armhole and mark facing length. We will call this point D.

Step 7
Draw in a short (2.5cm / 1in is fine) line from point C - perpendicular to the centre front line towards the side seam. This will help when you are drawing in the bottom edge of the facing. You need the hem line to meet the centre front and centre back at a 90 degree angle.

Set the front facing piece aside for a moment.

Draft back facing

Step 8
We will now mark guidelines on the BACK [2] pattern piece to create the back facing piece. The guidelines should be the same length as the guideline you marked on the side seam on the front facing, as these two pieces will be joined at the side seam. In the example, this is 12cm (4¾in).

Take a ruler and measure down the side seam STITCH LINE, from the STITCH LINE at the top, the length of your facing. We will call this point E. On the centre back STITCH LINE, measure down the same amount and mark another point. We will call this point F.

Mark in a perpendicular guideline from point F.

Step 9
To create the bottom edge of the front and back facing pieces, we want a nice smooth curve that transitions smoothly at the side seam between pieces. To do this, take your front facing draft and place it on top of your BACK [2]. Line up the top sections of the side seam - STITCH LINE on STITCH LINE - as if it has been sewn together. Hold in place with a pattern weight.

Step 10
Draw a line from point C through point D and then over to point F. You need this line to be a nice smooth curve. At In the Folds, we like using a straight ruler to draw curves, by pivoting the ruler and drawing a broken line. Alternatively you can use a Patternmaster or French curve.

Use a tracing wheel to transfer the new line onto the overlapping section of the pattern.

Finalise facing pieces

Step 11
a Remove the pattern weight and separate the front and back pieces. Take the front facing piece and cut along the bottom line to create the shape of the piece.

b Remove the centre front seam allowance, by cutting along the centre front STITCH LINE. We are removing this as we do not need this seam in the facing and it will minimise bulk.

c Add a new grainline to indicate this piece is cut on the fold. Add cutting instructions. The new cutting instructions will be: FRONT FACING, CUT 1 ON FOLD.

Step 12
a Take a piece of pattern paper and trace off the back facing piece from the BACK [2], by following the line marked in STEP 10. 

b Remove the centre back seam allowance, by cutting along the centre back STITCH LINE. We are removing this as we do not need this seam in the facing and it will minimise bulk.

c Add a new grainline to indicate this piece is cut on the fold. Add cutting instructions. The new cutting instructions will be: BACK FACING, CUT 1 PAIR.

We hope this has given you confidence to try adding a facing to your next top pattern!

Happy sewing,

Emily


resources mentioned in this issue

  • How to alter the neckline of a pattern. Tutorial can be found here.

  • Why use a hem facing? Tutorial can be found here.

  • Issue 2 of Curated by ITF can be found here.


For more issues of the Q & A series, you can check out the archive here.


What you’ve been making

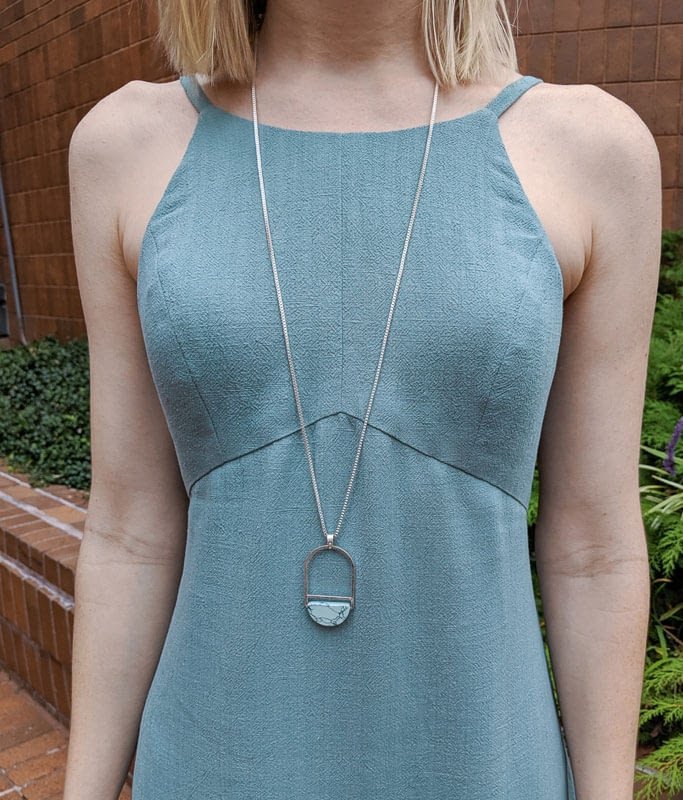
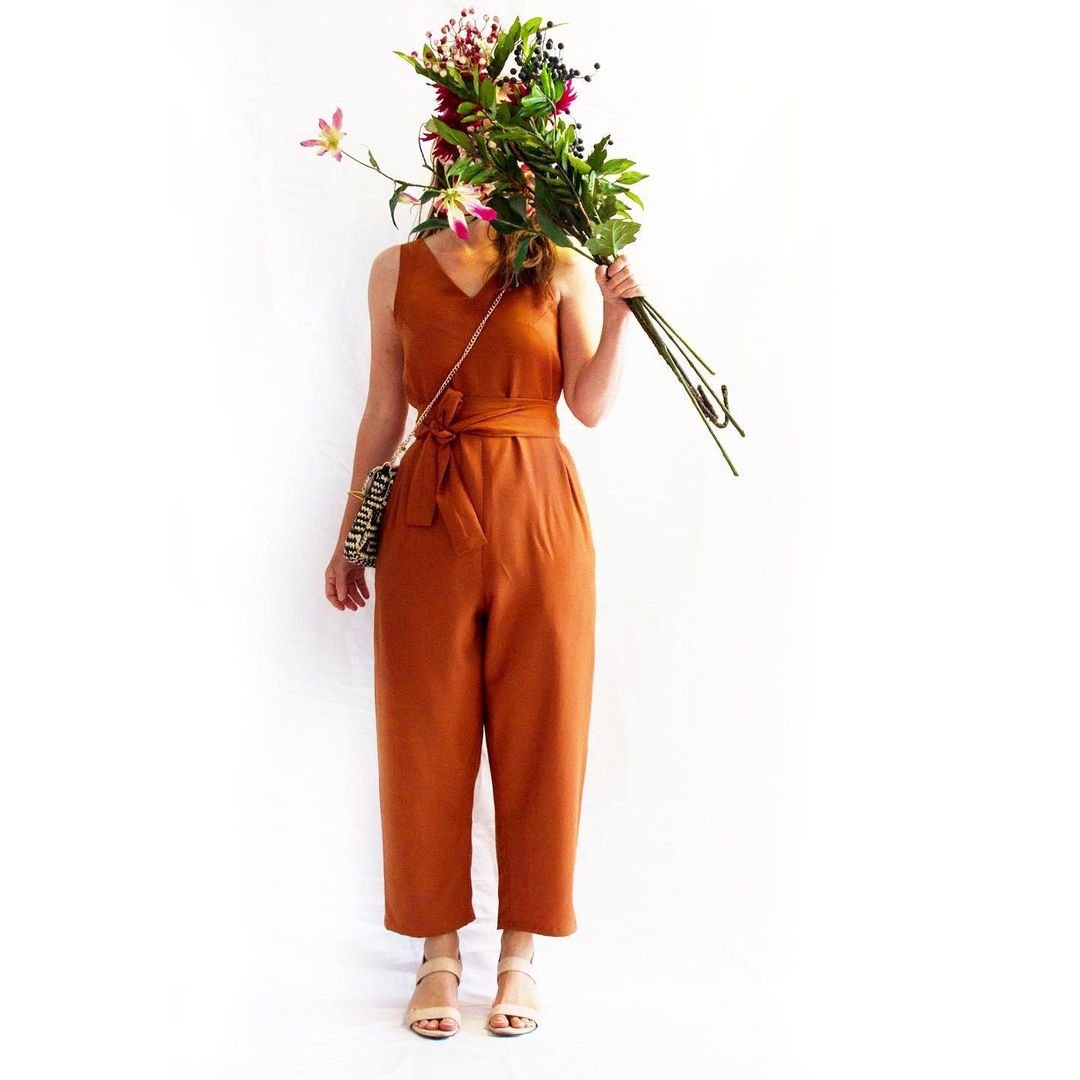
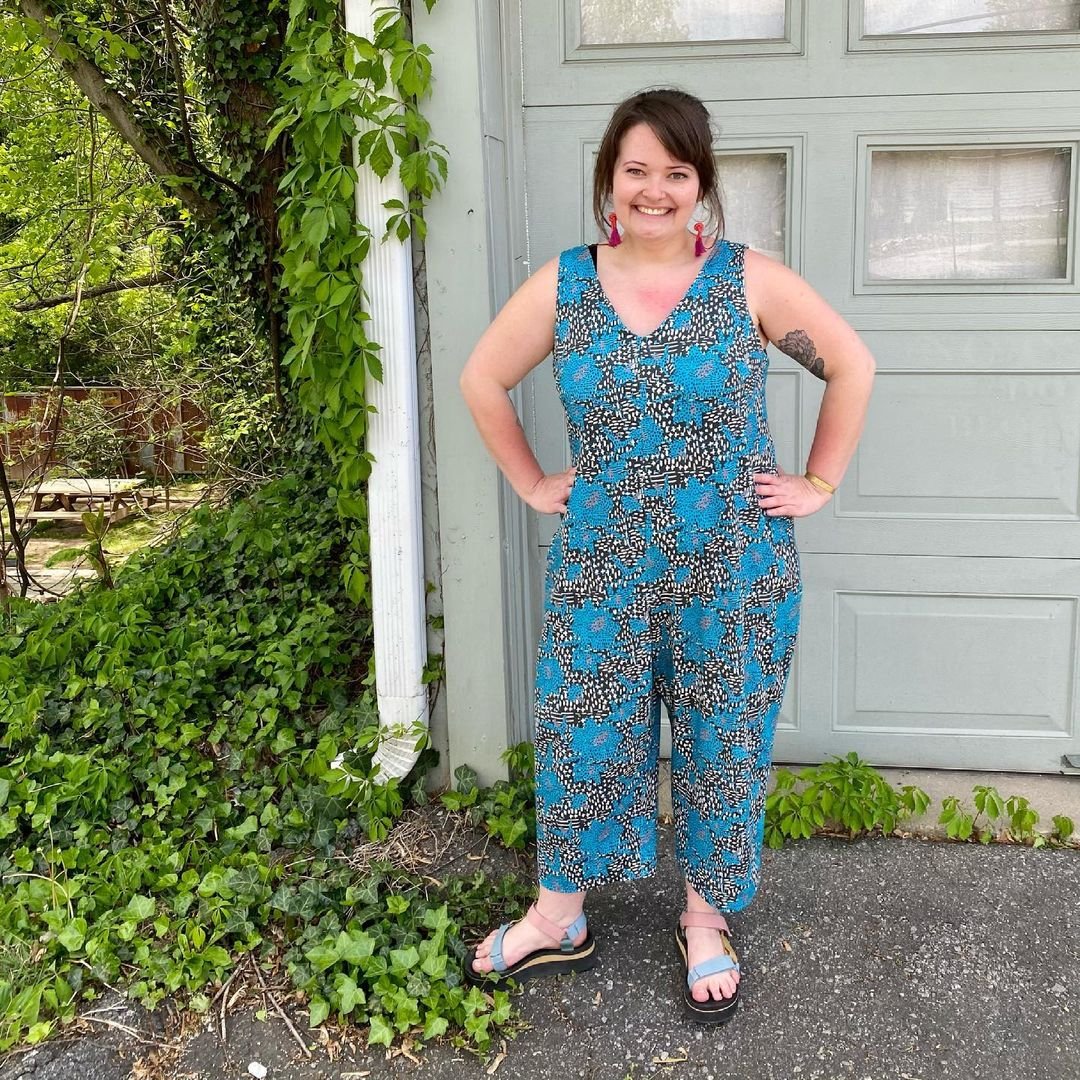
Neale jumpsuit made by @sideshow_ali

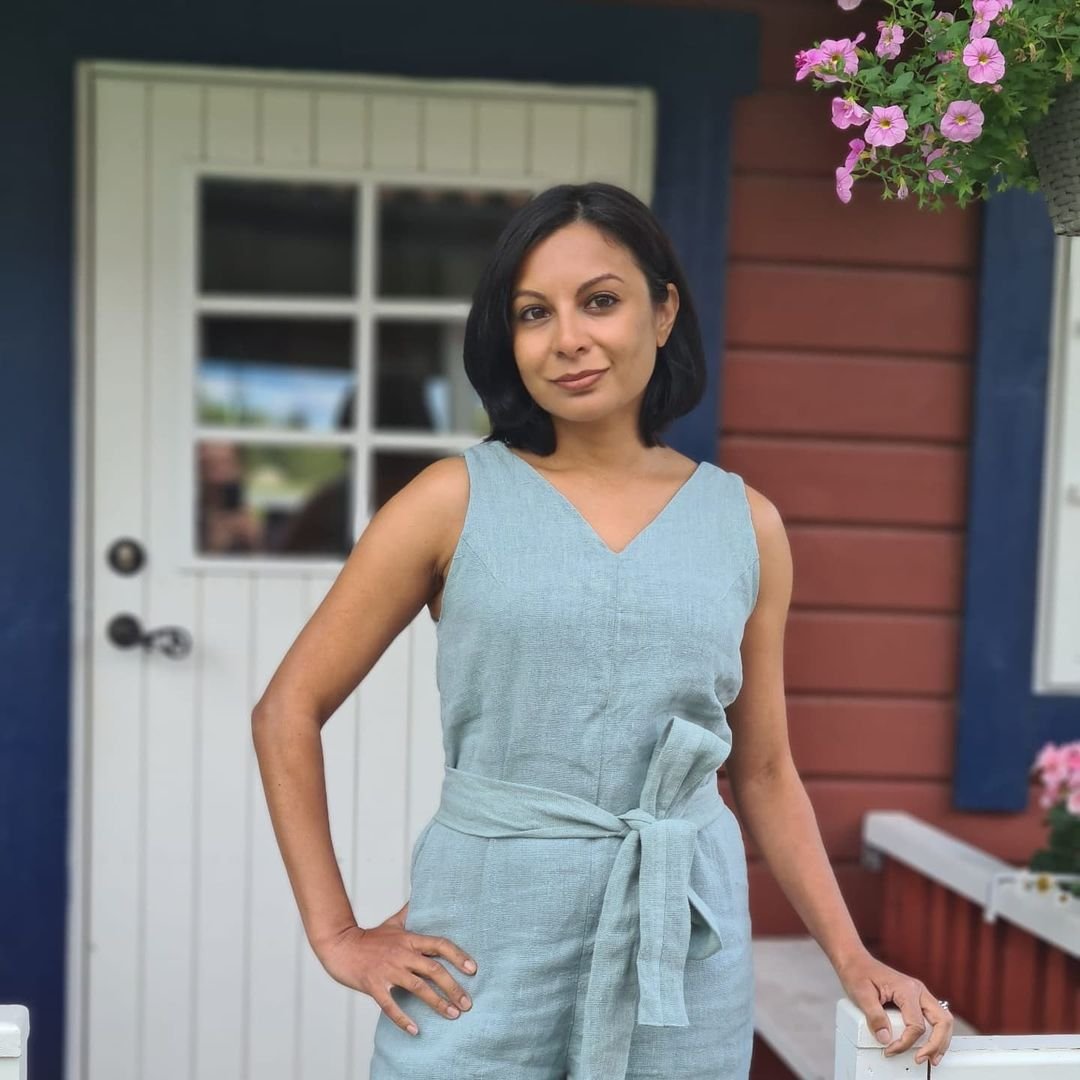
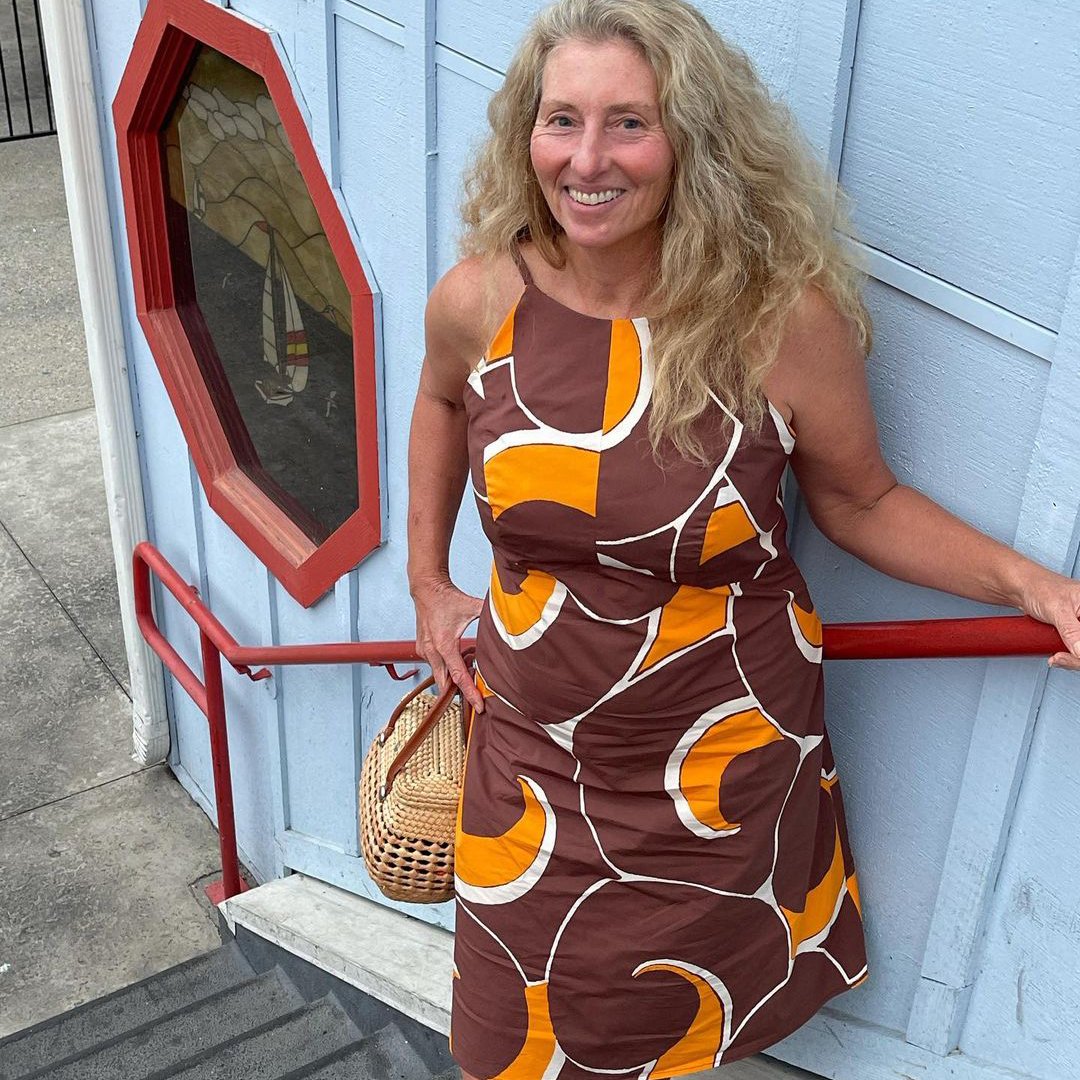
Neale jumpsuit made by @greenstitchwitch


More posts in the series

ISSUE 81 - Altering the neckline on a pattern

THE Q & A SERIES

Altering the neckline on a pattern

Hi Emily,

Really loving your question and answers.

I would love to know any tips you have for altering the back and front of necklines and how they blend back into the shoulders. How you go about drafting the facing?

Thank you in advance

Love

Emma xx

- Hackney, United Kingdom


Hi Emma,

Lovely to hear that you are enjoying the Q&A series!

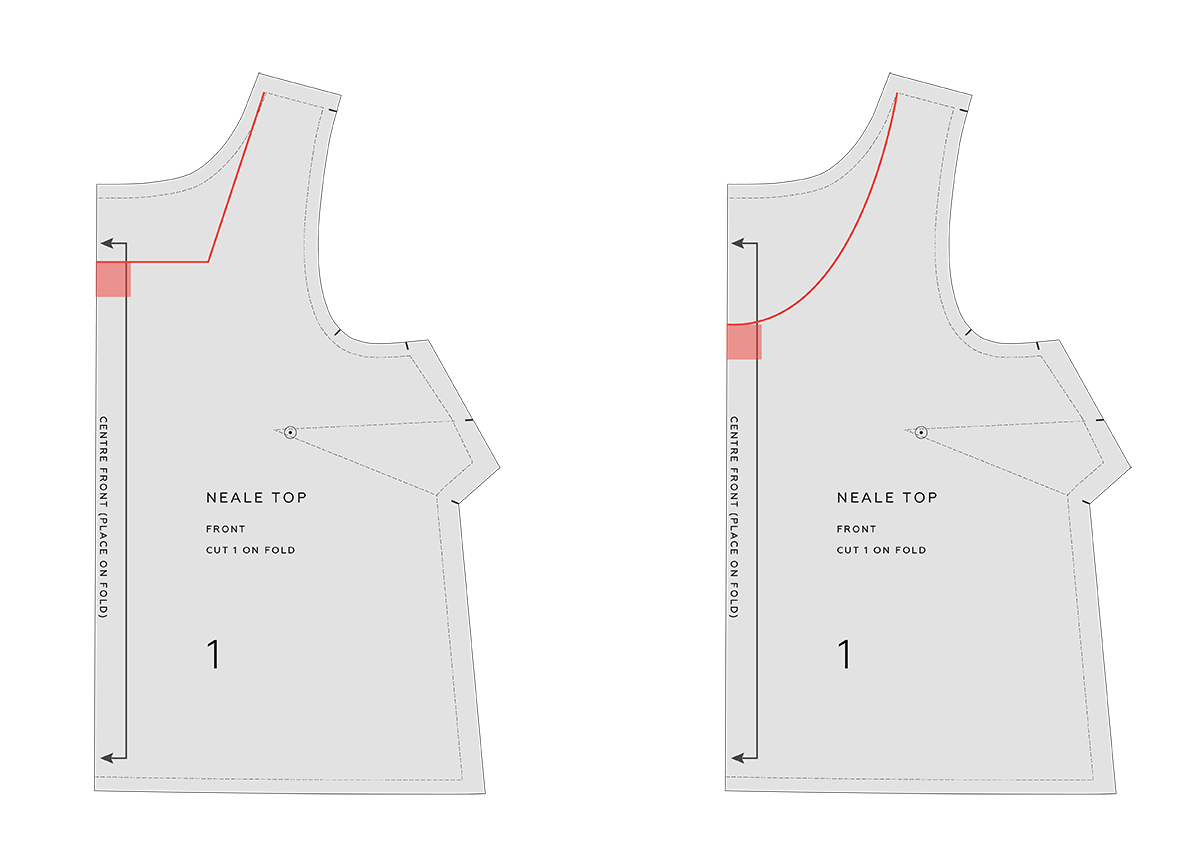
This is a great question. Being able to alter the neckline on a garment offers a lot of possibility. You will be able to create garments that better suit your needs and preferences and it also gives you a chance to extend the lives of patterns you already have in your stash.

I thought I'd demonstrate how to do this on a specific pattern (a hacked version of the Neale jumpsuit), but you will be able to apply this technique to any pattern.

What shape neckline to draft?

I will show you how to change the round neck to a v-neck, but you can choose the shape you would like to draft. I'll show you a couple of examples at the end of the tutorial that might  give you some other ideas.

If you're not sure how you would like your new neckline to look, you can have a look through your wardrobe for some inspiration or print a copy of the garment technical drawing and try drawing in some different neckline options until you come up with one you are happy with.

Step 1
Trace a copy of your pattern. Mark in both the stitch line and the cutting line. If your pattern doesn't have the stitch line printed on it, you can take a clear ruler and mark in the stitch line, by marking the lines as if the seam allowance has been removed from the pattern.

Step 2
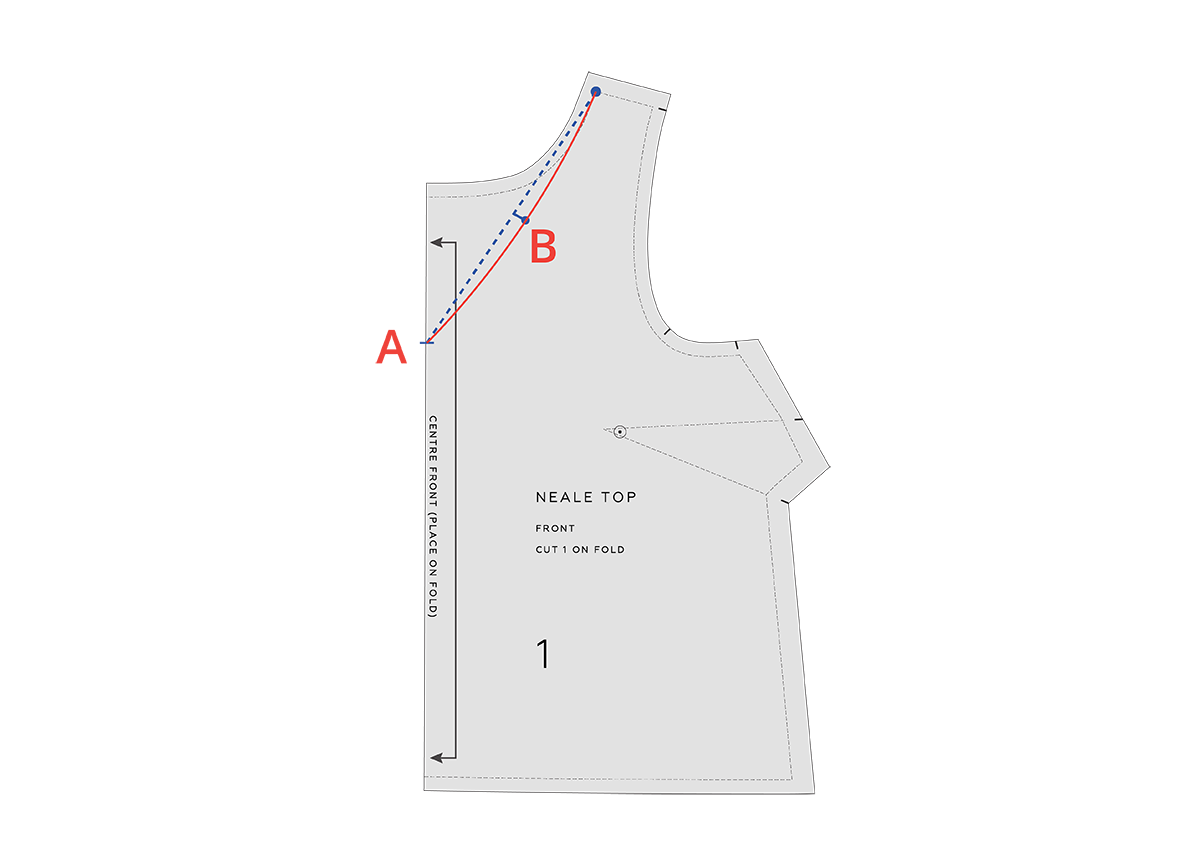
Measure 10.5cm (4 1/8 in) down from the neck STITCH LINE, on the CENTRE FRONT line.

This will be the finished depth of your v-neck. Hold the pattern up to your body to check the depth. You can also reference other patterns or garments in your wardrobe if you have a v-neck you love and alter the depth accordingly.

We will call this point A.

Step 3
With a ruler draw a faint broken line from point A to the point where the shoulder STITCH LINE intersects with the neck STITCH LINE. We will use this as a guideline when drawing our v-neck.

Step 4
Find the halfway point of the line marked in STEP 3 and mark a point. From this point, draw a 1cm (3/8in) line towards the armhole, perpendicular to the line. We will call this point B.

Step 5
Draw a new curved line from the inside shoulder point to point A, intersecting through point B. The line should be a gentle curve.

If you have one, a French curve will help you get a nice smooth line.

Step 6
Add 1cm (⅜in) seam allowance to the neckline (or the amount of seam allowance required to match the back neckline on your pattern). Cut away excess paper.

Check flow-through between front and back neckline

Before cutting any pattern you have altered from fabric, be sure to check the alteration against the pieces it will be attached to.

In the case of the example, we need to check how the new neckline connects to the back neckline.

Step 7
Place the FRONT on the BACK, lining up the STITCH LINES as if the two pieces have been sewn together. Check that the seam lines are the same length and that there is nice flow through from front to back. In the example, I am happy with the shape of the line, so would not need to alter it.

If you do need to alter it, draw a line of best fit through the transition point. This might mean adding a little bit to one side and removing some from the other.

If you would like to know more about checking and truing patterns, you can see this post or this post (checking curved seams).

Create a new facing

You will need to draft a new facing to fit your new neckline. I'll show you how to do that next week!

Try other neckline shapes

Use this method to draft other shapes of necklines. If you are drafting a straight or curved neckline (such as the above neckline shapes), you need to make sure your new neckline meets the centre front (and centre back, if you are altering the back) at a 90 degree angle. This will allow you to get a nice and smooth line at the centre front / centre back with no dips or bumps in your neckline.

I hope you are feeling confident to try this technique on your next garment!

Happy sewing,

Emily


resources mentioned in this issue

  • Neale jumpsuit pattern can be found here.

  • How to check patterns. Tutorial can be found here.

  • How to check curved seams. Tutorial can be found here.

  • How to draft an all-in-one facing. Tutorial can be found here.


For more issues of the Q & A series, you can check out the archive here.


What you’ve been making


More posts in the series

ISSUE 80 - Fabric recommendations for the Flynn jacket

THE Q & A SERIES

Fabric recommendations for the Flynn jacket

Hi there,

Love your Flynn jacket pattern, I am looking into purchasing it. I did want to know what kind of fabric weight would you recommend for the pattern? Also what fabric are you using in the pictures for the green and the blueish gray jacket? Would love your help in that regard. Thank you so much.

Ambreen


Hi Ambreen,

I'm thrilled to hear that you'd like to give the Flynn jacket pattern a go!

I suggest bottom-weight fabrics such as: denim, cottons like canvas, duckcloth and drill, and heavyweight linens. In the photos, the green is a brushed cotton drill and the grey is a heavyweight linen. You want a fabric that will support the shape, but won’t be overly boxy or stiff. I once made it in a lightweight wool and wasn’t happy with the way the centre front opening hang. If I made it again in a fabric like that, I’d add lightweight fusing strips down the centre front opening to give it a bit more stability.

Happy sewing,

Emily


resources mentioned in this issue

  • The Flynn jacket pattern - can be found here.


For more issues of the Q & A series, you can check out the archive here.


What you’ve been making


More posts in the series

ISSUE 79 - Selecting a size for the Peppermint wrap top

THE Q & A SERIES

Selecting a size for the Peppermint wrap top

Hi Emily,

I think I'm being a bit thick.. I made the wrap top in what I thought was the right size..but it came out voluminous.

What size should I print for high bust 89cm, bust 93.. Please? I have to do some adjustments because I'm 5'0" with narrow shoulders and a short body.. But I got the sleeves in beautifully!!

Hope you can help. 

Thank you in advance.

Vivien


Hi Vivien, 

I am pleased to hear you are making the Peppermint wrap top!

I'm sure you're not being thick! Based on your measurements, I'd suggest a size D. In saying that though, there is quite a lot of ease in the pattern, so you could potentially size down one size if you prefer a closer fit. It is a good idea to checkout the hashtag of the pattern and see if you can find some makers with similar measurements to you - this way you can see what size they have chosen and if they have made any alterations.

I can imagine that it might be hard to tell if you need to size down if you also need to make a narrow shoulder adjustment and shorten the length of the top. If you have made it in a size D, I'd suggest pinning your top to make the adjustments (as much as you can) to get an idea of how it will look when the adjustments are made. Fold up the mid section of the top and pin, as if it has been shortened. Pull up the top of your sleeve cap and pin, to see what a narrower shoulder will look like.

When it comes to making these adjustments on the pattern, you can find some tutorials here that might be of assistance:

Happy sewing,

Emily


resources mentioned in this issue

  • The Peppermint wrap top pattern - can be found here.

  • Lengthening the wrap top - tutorial can be found here.

  • Narrow shoulder adjustment - tutorial can be found here.


For more issues of the Q & A series, you can check out the archive here.


What you’ve been making


More posts in the series

ISSUE 78 - Rotating a dart on a bodice

THE Q & A SERIES

Rotating a dart on a bodice

Hi Emily,

I recently made a top with a side bust dart and I'm wondering how tricky it is to move this dart to the armhole? Will the fit still be the same? I like the look of armscye darts, but they don't seem to be as common in patterns as regular side seam bust darts.

Thanks,
Catherine


Hi Catherine,

Darts are on our minds at the moment after the release of our new pattern, the Neale jumpsuit. To answer your question, we thought we'd share with you one of the (many) tutorials from the Neale jumpsuit Fit Kit.

Bust darts can be moved around a pattern. You might choose to do this to change the look of a garment, due to your personal preference or to split a dart value. As long as the BUST APEX POINT remains in the correct position, the fit will remain the same - only the design will change due to the moving dart line.

In the illustration, you can see a number of places where you could move the side dart on the jumpsuit to. You can use this technique on any pattern. The dart position options may vary depending on the design. For example, if you have a waist seam, you can move the dart to the waist seam.

STEP 1
Mark the BUST APEX POINT onto the FRONT BODICE [1]. If you have already found your specific BUST APEX POINT, mark it on the pattern.

STEP 2
Re-draw the dart, using the BUST APEX POINT as the new dart tip.

Measure and record the distance between the original dart tip and the BUST APEX POINT. You will use this later on when you mark in the new dart.

STEP 3
Draw a line to indicate where you would like your new dart to be positioned. Use the diagram at the beginning of the tutorial as a guide. The line needs to meet the BUST APEX POINT.

STEP 4
Cut along the lower dart arm from the side seam towards the BUST APEX POINT. Do not cut all the way to the dart point - leave a small 1-2mm 'hinge' to keep the two pieces together.

Cut along your new dart position line towards the BUST APEX POINT. Again, stop cutting 1-2mm from the point.

STEP 5
Close out the original dart by moving the upper dart arm down to meet the lower dart arm. You will see that by closing the side seam dart you have opened a new dart in the new position. If you only want to move part of the dart, you can do so. Use tape to close the original dart permanently.

As you can see in the example, the new dart is smaller than the original dart. This is because the seam that we moved the dart to (armhole) is closer to the BUST APEX POINT than the seam it was originally on (side seam). You can think of darts as rotating around a circle (the centre of the circle being the BUST APEX POINT). The further the seam is from the BUST APEX POINT, the larger the dart width at the seam will be.

STEP 6
Take a piece of paper and glue / tape underneath the dart opening. Draw a line from the top of one dart arm to the other on the CUT LINE. Mark the centre of this line. Draw a straight line from the centre point through to the BUST APEX POINT.
Mark the new dart point by looking at the distance recorded in STEP 2.

Mark this amount back from the BUST APEX POINT within your new dart.
Add dart shaping - you can use this tutorial as a guide. Mark drill hole 1.2cm (½in) back from the new dart tip.

I hope this helped you and you're excited to alter some patterns to better fit your preferences. If you would like to learn more techniques like this, you might be interested in our Neale jumpsuit pattern and Fit Kit.

Happy sewing,

Emily


resources mentioned in this issue

  • The Neale jumpsuit and fit kit can be found here.

  • How to add dart shaping. Tutorial can be found here.


For more issues of the Q & A series, you can check out the archive here.


What you’ve been making


More posts in the series

ISSUE 77 - How to find the straight grain on fabric

THE Q & A SERIES

How to find the straight grain on fabric

Hi Emily,

I love the idea of a Q&A series! Thank you for taking the time to answer individual questions - that is very generous of you, and I’m sure it’ll be very valuable for the sewing community.

My question is to do with finding the straight of grain on a piece of woven fabric with no selvedges. I realised my wrestling with the back neck facing on my Peppermint Everyday Dress might have been due to me cutting it out of irregularly shaped scrap fabric pieces with no consideration of grainline.

I like the idea of repurposing scraps but am wary of it making the garment sit weirdly later on. Any tips would be appreciated!

Thanks,
Chloe


Hi Chloe,

I'm thrilled you are enjoying the Q&A series! It has been such a fun way to connect with the community.

There are a couple of ways you can find the straight grain, and it will depend on the fabric you are using. For a fabric like linen that often has a very clear weave structure, just get nice and close under some good light and take a look - you should be able to see the weave. Then you can give it a stretch - if it has some give, it's likely the cross grain (perpendicular to the grain) and if it stays firm it is likely the lengthwise grain (the grainline). Most of the time, if you accidentally cut something on the crossgrain instead of the straight grain, it shouldn't cause any major issues (unless your fabric has some stretch or too much give in that direction), it's only if you cut something on the bias, (or close to the bias) that things can get really wacky).

Another thing you can do is snip into your fabric and tear it to straighten up the sides - if you are worried about tearing your fabric (as it doesn't always work nicely), you can snip in and pull a fibre to create a line through the weave, like it's shown here

I have never done this, but I just had a thought while writing to you, maybe you could mark the grain with an erasable fabric marker or masking tape on bigger scraps like (when you still have the selvedge so you can mark it accurately) and then it will be ready to use when you go back to it. Just an idea!

Happy sewing,

Emily


resources mentioned in this issue

  • Finding the grain. Article can be found here.


For more issues of the Q & A series, you can check out the archive here.


What you’ve been making


More posts in the series

ISSUE 76 - How to make the Acton dress bra friendly

THE Q & A SERIES

How to make the Acton dress bra friendly

Love the look of the Acton dress but don’t love wearing a strapless bra.

How could it be modified to be more of a “racer tank” style. I still want to keep the high neckline and not broad across the shoulders. Just be able to wear a racer/convertible/ cross back bra? Does that all make sense?

- Donna, Tingalpa QLD


Hi Donna,

I'm thrilled to hear you are thinking about making the Acton dress! This is a concern for quite a few people when making this dress, so I think many people will be interested in reading this week's email. 

I'll show you two options - the first is to alter the pattern to make it more bra friendly, while the other option is to sew bra cups into the bodice so that you can avoid wearing a bra all-together. I know this isn't a suitable option for many people, but thought I'd include it for those of you would like to give this option a go.


Option 1 - Alter bodice armhole shape for more bra coverage

STEP 1
Take the CENTRE FRONT BODICE [1] and SIDE FRONT BODICE [2] pieces. Trace a copy of the pieces if you think you'd like to go back to the original. You could also re-print these pieces if you are working from the PDF version of the pattern.

Place STITCH LINE on STITCH LINE (grey line on the pattern), as if the two pieces have been sewn together. As you can see, you can only line up the top section of the princess seam, due to the shaping in the panel. Hold in place with a small piece of tape (I like to use magic tape as it is easy to remove when you need to) or a pin.

STEP 2
We will be extending the section where the strap attaches to the bodice to accommodate the width of a bra strap and to create some more coverage for a bra in the top section / upper armhole of the bodice.

If you have made a toile of the Acton bodice, put on the bra you plan to wear with your Acton, and try on your toile. You can then measure how far you need to extend this section of the bodice to cover the bra. You may also like to check how far the princess seam needs to be extended by to cover your bra.

Slide a piece of pattern paper under your bodice - you will only need the extra paper in the top section. Tape in place.

Extend the top of the bodice (the section that will join to the strap), to the width you  would like for your new strap. The original strap width is 1cm (3/8in) and for the example we are extending for a 3cm (1 1/4in) strap, which means we are extending the line by 2cm (3/4in). Extend on the armhole side of the FRONT BODICE [1] as that is the area where more coverage is required.

If you don't want to increase your strap width by too much, the other option is to change the neckline slightly. This way, you can have a narrower strap (I'd suggest still making it wider than 1cm to cover a regular bra strap), but have the top of the bodice in the correct position to cover the top of your bra. Again, this is a great time to look at your toile to work out the exact positioning.

STEP 3
Re-draw the armhole, starting at the new outer point on the top of the bodice. Draw a gradual curve that reconnects with the original armhole STITCH LINE before you get to the side seam. It might take a couple of tries to get an armhole curve you are happy with.

If you would like to raise the armhole at the side seam, before marking the new line, extend the side seam up and join the new armhole line to the new side seam.

STEP 4
Take a tracing wheel and trace over the new armhole line in the section that is overlapping. This means that when you take the pieces apart, you will have the correct shaping on both pieces.

STEP 5
Seperate the pieces and use a pencil to trace over the tracing wheel markings. Add the seam allowance back onto the new stitch line. The seam allowance on this seam is 1cm (3/8in). For a tutorial on how to add seam allowance, see here. You may need to add paper to the SIDE FRONT BODICE [2] as we have done in the example.

You will see that the seam allowance on the CENTRE FRONT BODICE [1] kicks up at an angle, we will show you how to recreate that shape for the new line in the following step.

STEP 6
The reason the seam allowance kicks out like this on the CENTRE FRONT BODICE [1] is because when the princess seam is pressed open, this will allow the seam allowance to sit flush with the armhole. To do this:

Extend the STITCH LINE on the princess panel side of the piece, up onto the paper - following the angle of the line.

Fold along the line marked in part a. Trace the section of the new seam allowance line that is close to the fold - transferring it onto the paper underneath.

Unfold the paper and mark in the lines created by the tracing wheel - joining it back to the original CUT LINE (edge of pattern) of the princess seam.

For more information on this technique, you can see this tutorial.

STEP 8
Cut along new CUT LINE to remove excess paper. 

Repeat for the back pieces.

Alter your strap width to match the altered bodice.


Option 2 - Alter bodice armhole shape for more bra coverage

The other option is to sew bra cups directly into your bodice and avoid the need to wear a bra. I know this isn't an option for everyone, but for those of you interested, I have added some details below.

This is a great example of how to do it by Miranda from Stitching in Space.

Miranda attached the cups to the inner layer of the bodice (the bodice is fully lined) by stitching through the princess panels. You could also hand stitch to the seam allowance if you would prefer this over stitching in the ditch.

As you can see, this avoids the need for a bra and gives a really beautiful finish from the outside of the bodice, as the cups have been attached to the inner lining only.

I hope that helped you and makes you feel more confident to tackle the Acton dress.

If you have any more questions about this pattern, we have a sew-along that you can find here.

Happy sewing,

Emily


resources mentioned in this issue

  • The Acton dress pattern can be found here.

  • The Acton dress: How to make a toile. Tutorial can be found here.

  • How to add seam allowance to a sewing pattern. Tutorial can be found here.

  • Notes on adding seam allowance. Tutorial can be found here.

  • The Acton sew-along can be found here.


For more issues of the Q & A series, you can check out the archive here.


What you’ve been making


More posts in the series

ISSUE 75 - Full bust adjustment on a jumpsuit pattern

THE Q & A SERIES

How to do a Full Bust Adjustment (FBA) on a jumpsuit pattern

Hi Emily,

How would you do an FBA on the Peppermint Jumpsuit?

Kindest Regards
- Kacy


Hello!

Thanks so much for the lovely Playsuit pattern. It’s super comfy and is all things happiness. It took forever to make with small people around, but a lovely therapeutic process. One question though, how do you do a FBA for a playsuit or the jumpsuit? They’re all in one and I can’t quite figure that. Probably simple and mama brain is getting stuck sorry!

Thanks again! (Hitting up the wrap top and the pleated dress for mum next)

Kind regards,
- Kate


Dear Emily,

I love the Peppermint jumpsuit and decided to try out my first In the Folds pattern. I purchased some beautiful  black linen and a small amount of cotton to add in-seam pockets (thank you for Issue 18 of the Q&A series!) I am quite small but I have a curvy figure with a small waist. My problem with dresses and jumpsuits is my generous bust measurement (F cup).

In preparation I modified the pattern by shortening size C (I’m 160cm) and tested it out by just making the bodice section in calico. I’m so glad I did as the darts were totally wrong (much too high) and my breasts were squashed! If I make the bigger size it gapes under the arms and the neckline is baggy and too revealing. 

I’ve done some online research about armhole darts but it looks tricky - I’d love some assistance.

Many thanks,
- Karen


Hi Kacy, Kate and Karen,

As you can see, this is a question that I have been asked quite a few time and I thought it was about time I answer it in the Q&A series!

As we have a jumpsuit pattern due to launch next weekend (as the first project in our new offering Curated by In the Folds), we thought it would be fun to give you a first look at one of the tutorials that will be coming with the jumpsuit Fit Kit, How to do a Full Bust Adjustment (FBA) on a jumpsuit pattern.

In the tutorial, we will use the example of changing the pattern from a B cup to an D cup. This means we will be adding 5cm (2in) - or 2 cup sizes in total and therefore half of this - 2.5cm (1in) to the FRONT [1] pattern piece. When the piece is cut as a pair, the full amount required will be added. You will need to adjust this measurement in relation to your particular body measurements. In the Fit Kit, we've got a step-by-step PDF that guides you through this process.

GET STARTED
Trace a copy of the FRONT [1] pattern piece. We suggest that you trace a copy of the pattern, so if you make a mistake you always have the original to go back to. Be sure to include all pattern markings. This includes: grainline, notches and drill hole. It is important to make sure you trace off the stitching line (the grey line on the pattern).

STEP 1
Cut through the LENGTHEN / SHORTEN line in the waist section of the pattern - so that you have the bodice and pant sections as two independent pieces. We will be altering the bodice section and then joining the pieces back together. For the moment you can set the pant section of the pattern piece aside.

STEP 2
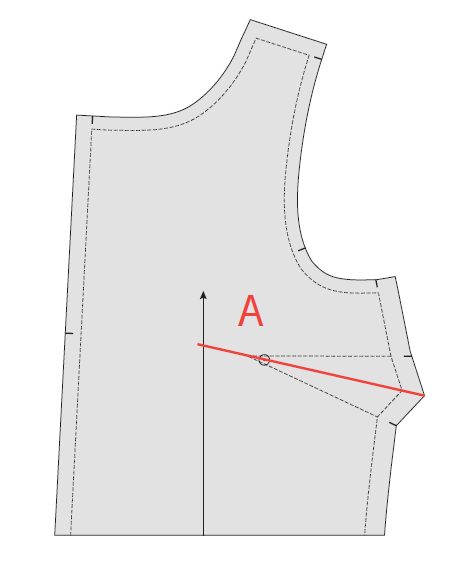
Take a ruler and draw a line through the centre of the dart. Extend the line beyond the tip of the dart. This line will be referred to as line A.

STEP 3
Mark the bust apex point on the line. The BUST APEX POINT is the peak of your bust (otherwise known as your nipple). On In the Folds patterns this is normally 2.5cm (1in) beyond the tip of the dart point.

Please note: If you are making this alteration on the Peppermint jumpsuit, you will need to rotate the dart from the armscye to the side seam before making this adjustment (we will move it back once the alteration is done). We will show you how to rotate bust darts in a future issue of the Q&A series, or you can find it in the Neale jumpsuit Fit Kit that will be released to email subscribers on August 15th.

STEP 4
Draw a line straight down from the BUST APEX POINT, parallel to the grainline. Extend to the CUT LINE. This line will be referred to as line B.

STEP 5
Draw a line from the BUST APEX POINT through to the notch on the armhole. This line will be referred to as line C.

STEP 6
From the bottom of the piece, cut along line B. When you get to the BUST APEX POINT, turn and cut along line C. Slow down as you approach the STITCH LINE (grey line on the pattern). Stop about 1mm from the STITCH LINE. Cut in from the seam allowance on the armhole towards the point you stopped cutting on line C. Don’t cut through to the point - leave a small 1-2mm ‘hinge’ of paper that keeps the two parts of the pattern piece intact.

STEP 7
Cut along line A from the side seam. Leave a small paper hinge at the BUST APEX POINT.

STEP 8
The alteration so far is preparing the pattern to add width to the bust line. You will also need to add length to the bodice over the bust. This is because the projection of the bust requires more fabric in terms of both length and width.This ensures the waistline remains straight and in the correct location. Mark a line 5cm (2in) from the bottom (parallel to the CUT LINE). Start at line B and mark through to the CENTRE FRONT. We will refer to this as line D.

STEP 9
Cut along line D. Label the top of the piece that you remove so that you don't get confused when you put the pieces back together.

STEP 10
Take a piece of pattern paper that is larger than the bodice section of the jumpsuit. Draw a vertical line in roughly the centre of the paper. We will refer to this as line E. By this stage you should know how much width you need to add to the bust. Draw a second line - parallel to the first - the distance you plan to add away from the first line. For example, if you need to add a total of 5cm (2in) to the bust, you will be drawing the line 2.5cm (1in) away from the first line. We will call the second line F.

STEP 11
Now that you have cut through the lines on the front pattern piece, you will be able to manoeuvre the piece so that you can add the extra width you need at the bust. Carefully place the pattern piece onto the guidelines you drew in the previous step. To start, align line B on the pattern (the side of line B that is closest to the dart) with line on the paper. Tape or glue this section of the pattern piece in place.

STEP 12
Carefully move the other side of the pattern piece until the side closest to CENTRE FRONT of line B lines up with line E on the pattern paper. When everything is lined up, tape in place, ensuring all parts of the pattern remain flat.

STEP 13
Take a ruler and extend the CENTRE FRONT line (the outer edge) onto the paper underneath. Do the same for the CUT LINE at the waist. The two lines will intersect.

STEP 14
Take the section of the pattern you cut off in STEP 9 and line up the corner with the lines marked in STEP 13. When it’s in place, tape or glue in place.

STEP 15
Draw in your dart arms by joining the dart notches to the original dart point and extending the lines until they intersect.

Check that this is the correct dart point positioning for your body. 

Please note: Due to the FBA, you may end up with a very large dart. It can be difficult to achieve the shaping you need for the bust with a very large dart. Consider rotating part of the dart to become a second dart using some of the volume of the side seam dart. We would suggest a French dart. We will show you how to rotate bust darts in a future issue of the Q&A series, or you can find it in the Neale jumpsuit Fit Kit that will be released to email subscribers on August 15th.

STEP 16
Join the pant section of the pattern back to the bodice section by lining up the CUT LINES. Check that the grainline is straight and aligned on either side of the CUT LINE. Tape in place.

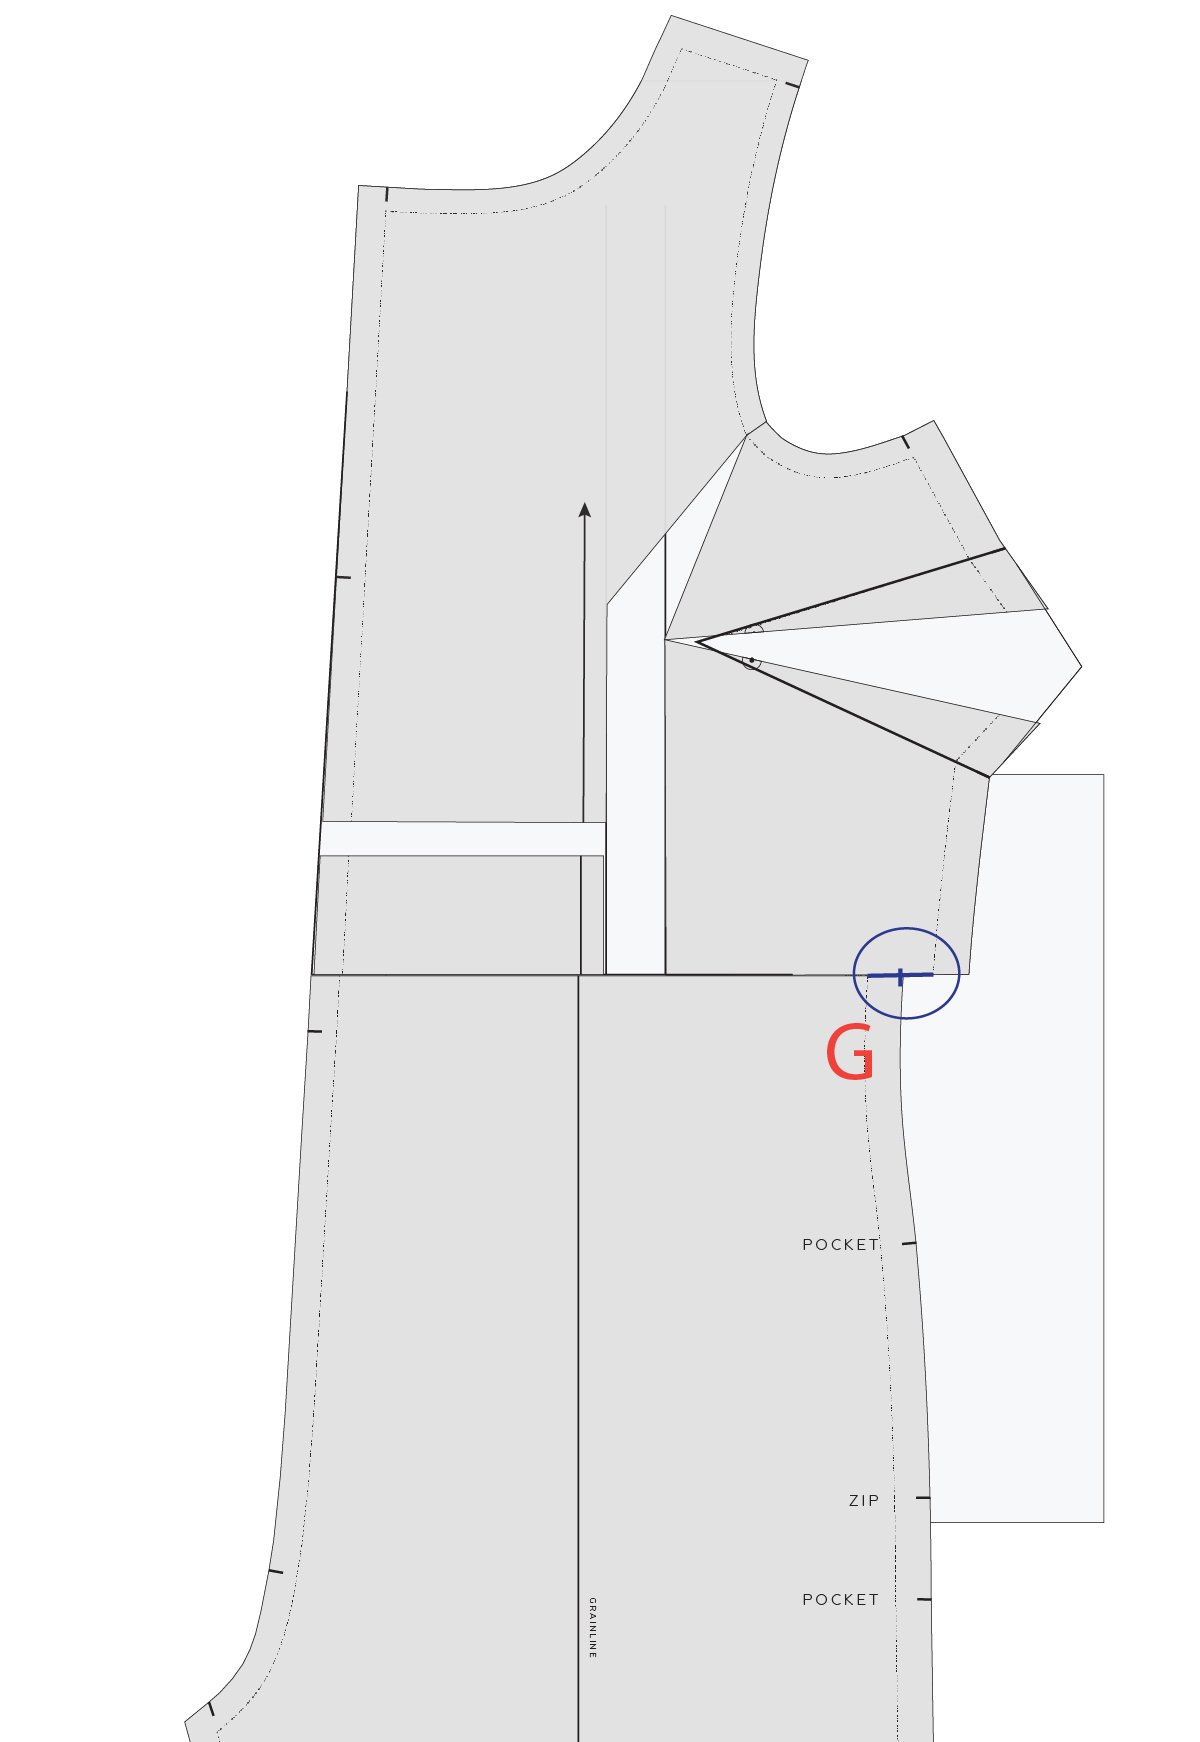
We have cropped the image so you can see what it looks like at the join point. You will notice that the side seam no longer lines up. This is because we have added width to the bodice section to accommodate a larger bust cup size.

Measure the distance between the STITCH LINES on the side seam between the two parts of the pattern where they meet on the CUT LINE. Mark a point in the centre of the two lines. We will refer to this as point G.

STEP 17
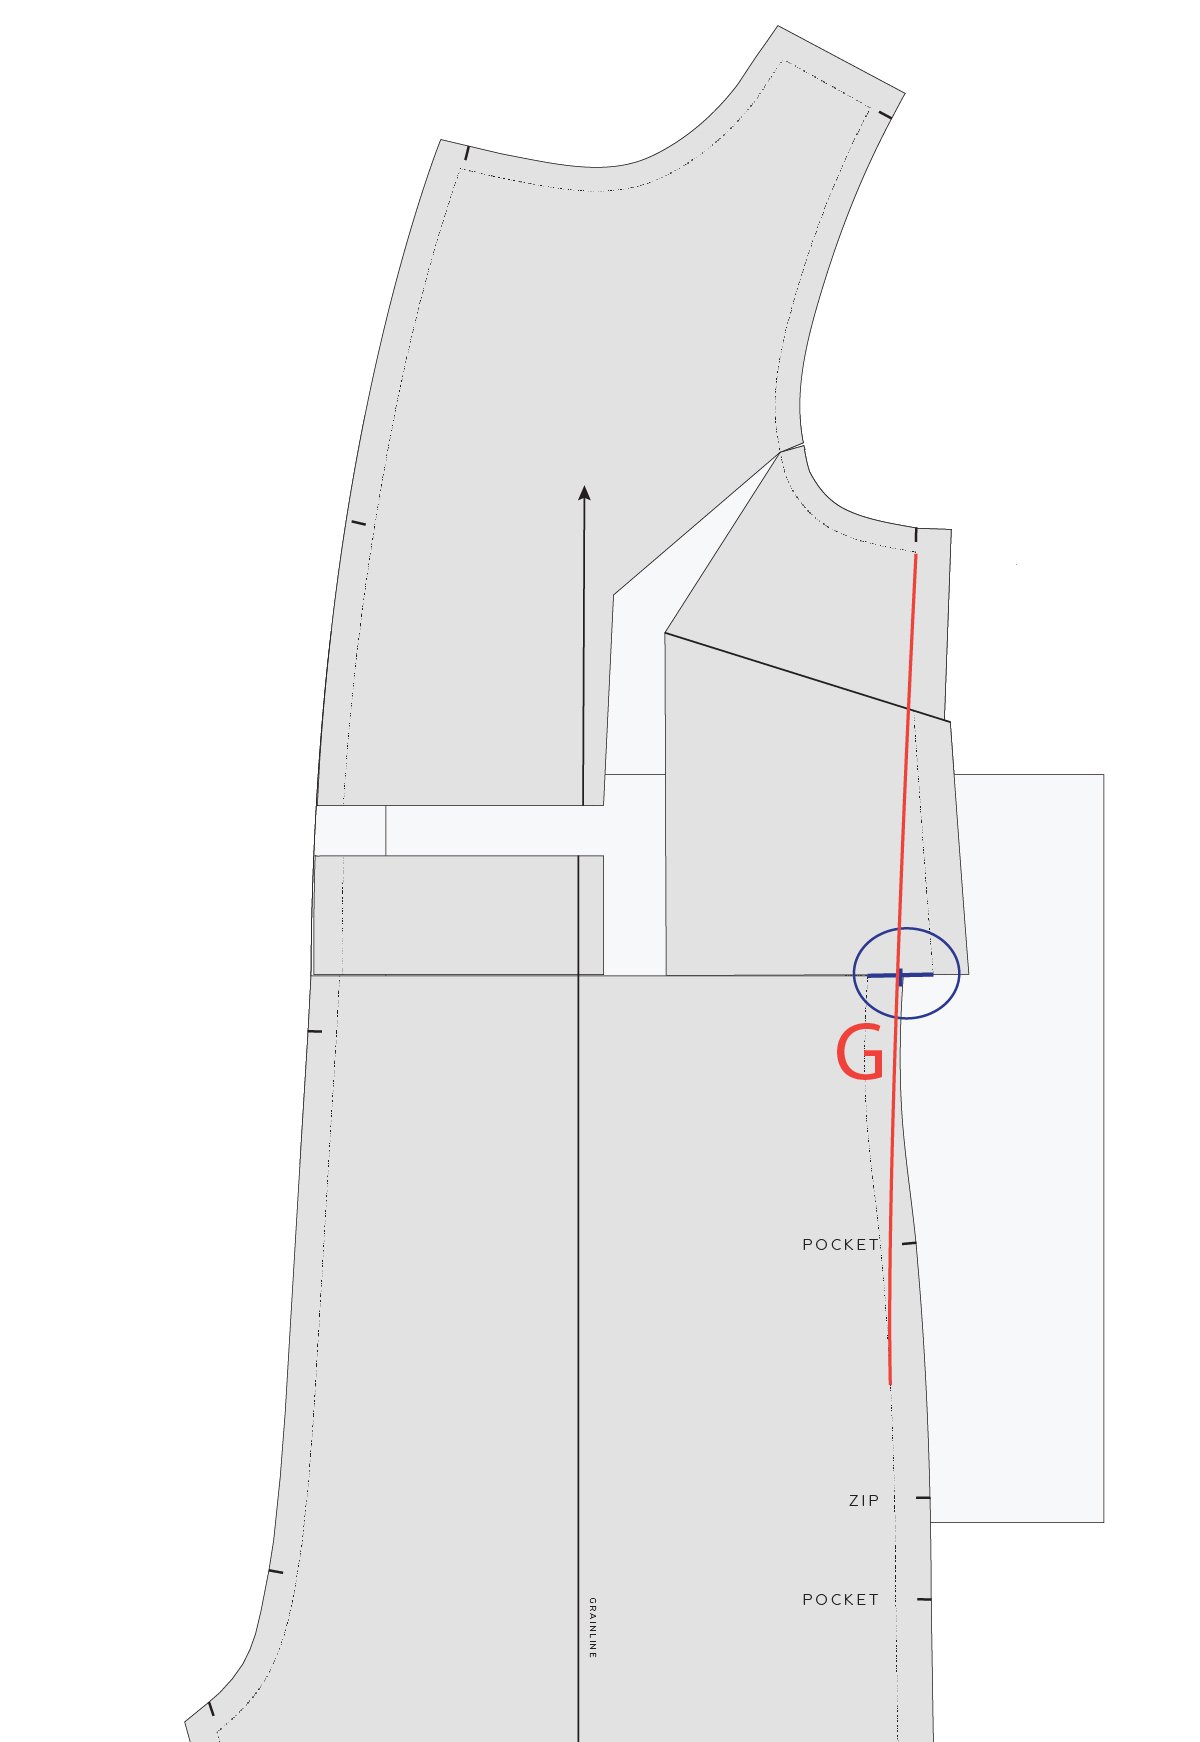
We now need to fold the dart (as if it has been sewn) to true the side seam. Look at this tutorial for guidance on this technique. Create a new side seam by marking a line of best fit from the upper section of the FRONT [1] to the lower, going through point G. Be sure to draw a nice smooth line, with the transition between points as gradual as possible.

As you can see, our line has straightened out the shaping at the waist. You may be able to add some of this shaping back in, but we'd suggest making a toile to check the fit first. 

STEP 18
Re-draw the seam allowance lines (cutting line), by adding seam allowance back on to the STITCH LINE. Smooth back into the original CUT LINES. Move any displaced notches to the new edge of the pattern.

STEP 19
Cut off the excess paper from both side with the dart still folded. When you cut along the folded paper that creates the dart, this will create the dart shaping that you require so that when you sew and press the dart it will line up with the side seam edge for a clean finish.

We hope you enjoyed this tutorial! If you would like to learn more about fitting adjustments for a jumpsuit pattern, keep your eye out for the Neale jumpsuit pattern and Fit Kit that we will be releasing very soon!

Happy sewing,

Emily


resources mentioned in this issue

  • The Peppermint jumpsuit pattern can be found here.

  • The Peppermint playsuit pattern can be found here.

  • How to add in-seam pockets to the Peppermint jumpsuit - tutorial can be found here.

  • How to add dart shaping - tutorial can be found here.

  • The Neale jumpsuit pattern that is featured in this tutorial will be available on August 15th.


For more issues of the Q & A series, you can check out the archive here.


What you’ve been making


More posts in the series

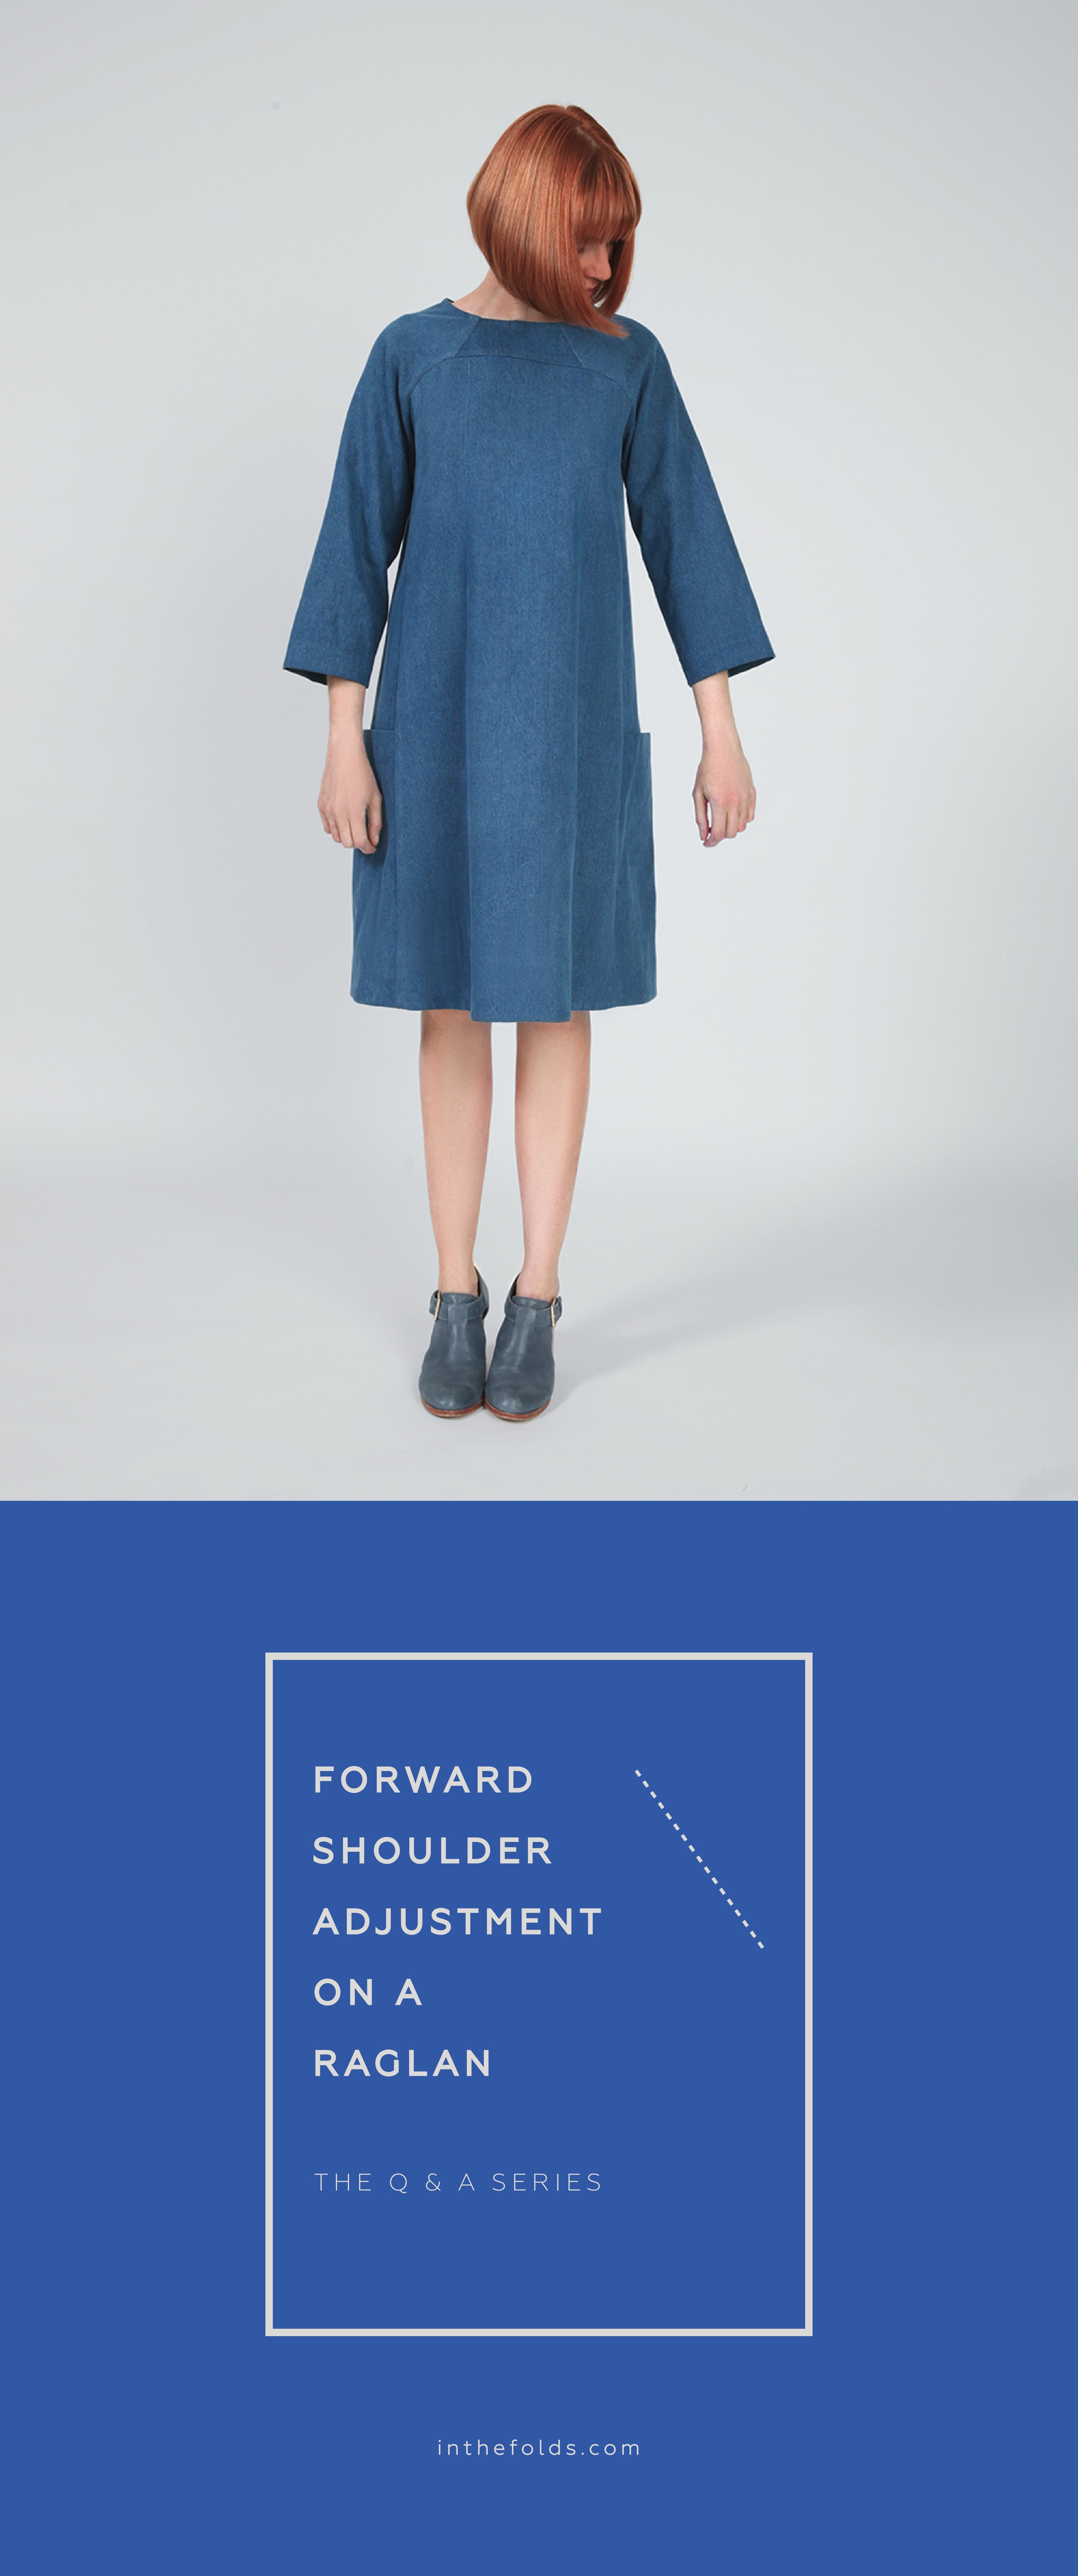
ISSUE 74 - Forward shoulder adjustment on the Rushcutter dress

THE Q & A SERIES

Forward shoulder adjustment on the Rushcutter dress

Dear Emily,

I would like to know how to make a forward shoulder adjustment on the Rushcutter dress. The neckline always slips back, which can be a bit annoying. My Rushcutter is one of my all-time favourite makes, and I'd still rather wear a me-made dress from a pattern and fabric I chose than a rtw one, even with its flaws!

Thanks in advance,

Anna


Hi Anna,

Thank you for getting in touch. I'd be happy to help you with this so that you don't have this problem with your next Rushcutter dress.

The process is a little different on a raglan sleeve, than how you go about it on a regular set-in sleeve, due to the dart.

Step 1

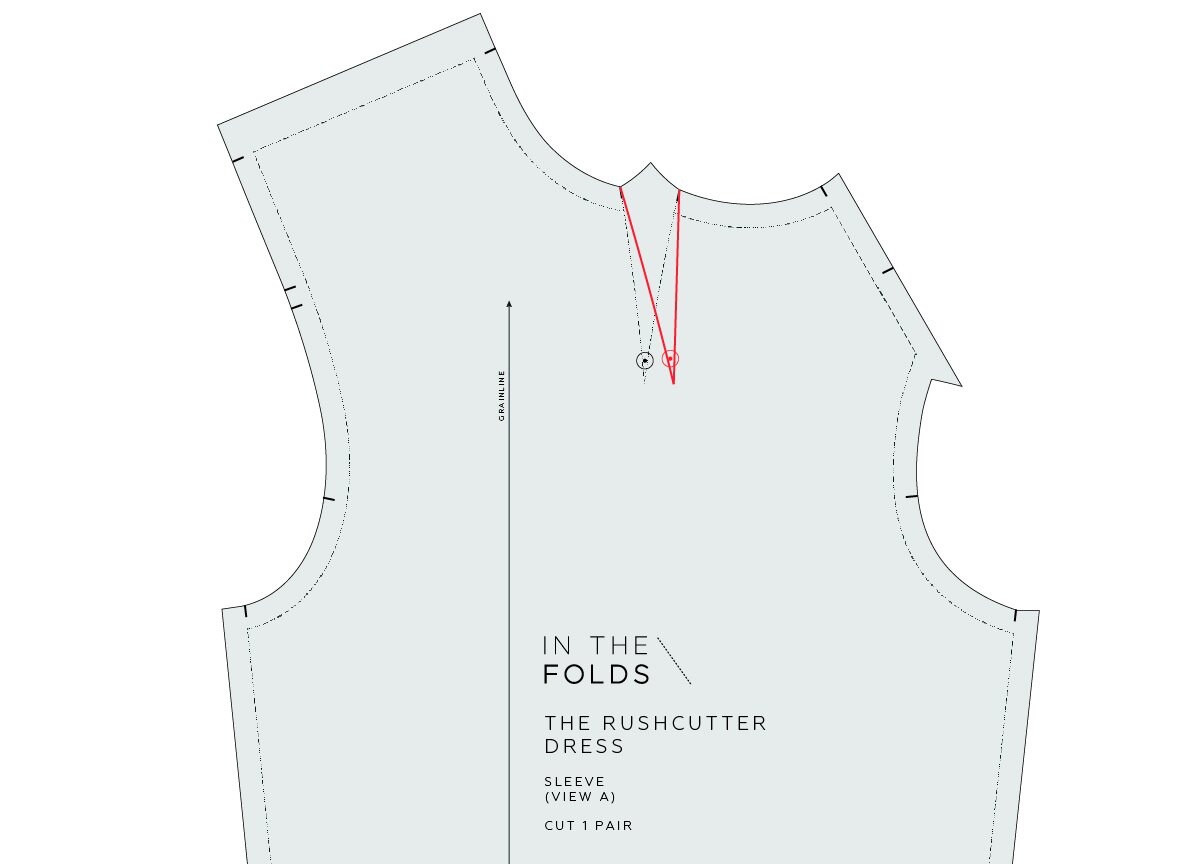
What I'd suggest you do first, is put that Rushcutter dress on and see where the dart is sitting. If the top of the dart (the part of the dart at the neckline) is sitting on your shoulder line, you may only need to move the dart tip forward to suit your shoulder shape. Use a pin to mark your shoulder tip on your sleeve and then transfer this point onto your pattern.

If you don't have a toile made, but a forward shoulder adjustment is a regular adjustment for you, you can hold the sleeve pattern piece on your shoulder to check the dart position.

Re-draw the dart, using the new point as the dart tip. You will need to alter the dart shaping on the neckline to reflect the change of the angle - you can check out STEP 6 for how to do this.

If the entire dart is sitting back from your shoulder line, measure how far forward you would like to move the dart by looking at your toile. Take note of this measurement and move to STEP 2.

Step 2
Trace a copy of the SLEEVE [5] if you think you might like to go back to the original pattern. When tracing, be sure to trace the dart, drill hole and notches.

Draw a box around the dart. The sides of the box should be parallel to the grainline and the bottom of the box should be perpendicular to the grainline. You need these lines to be close to the dart, but not cutting through it at any point.

Step 3
Cut out the box.

Mark the amount by which you need to move the dart, by measuring from the right side of the cut-out box. Mark distance with a line that is parallel to the side of the box / grainline.

Step 4
Take the box with the dart on it and line up the edge of the box with the cut line marked in the previous step. Tape or glue in place.

Step 5
Fill the gap in the pattern with some pattern paper, using tape or glue to hold in place.

As you can see, the dart is now in the correct position for your shoulder line. 

We now need to re-draw the neckline and fill the gap in the neckline.

Step 6
Fold the dart as if it has been sewn. To do this, fold along the dart arm closest to the back and fold towards the front dart arm. As you are trying to make the two dimensional paper into a three dimensional shape, the easiest way of doing this is to place the tip of the dart onto the corner of a table or large book. More detail about this technique can be found here.

Re-draw the neck line STITCH LINE using a French curve or by pivoting a straight ruler. The line needs to start and finish at the original stitch line and be as close to the original line as possible. 

Step 7
Take a tracing wheel and trace the new neckline STITCH LINE so that the line is transferred onto the folded section of the dart.

Step 8
Unfold the dart and trace over the markings created by the tracing wheel.

Add seam allowance on to the new neckline STITCH LINE.

Move the dart notches to the new neckline CUT LINE.

Step 9
Cut along new neck CUT LINE to remove any excess paper.

You are now ready to sew your new Rushcutter sleeve!

Happy sewing,

Emily


resources mentioned in this issue

  • The Rushcutter dress pattern - can be found here.

  • How to add dart shaping - tutorial can be found here.


For more issues of the Q & A series, you can check out the archive here.


What you’ve been making


More posts in the series

ISSUE 73 - Making the Peppermint jumpsuit in a thicker fabric

THE Q & A SERIES

MAKING THE PEPPERMINT JUMPSUIT IN A THICKER FABRIC

Hi there,

I'm quite a new sewist so apologies if this is an obvious question! 

I was wondering if you have any specific tips for making the Peppermint Jumpsuit in a heavier fabric for winter? I was thinking of doing it in needlecord but not sure if that's a terrible idea!

Would also love any tips on how to taper the legs to make it more bicycle friendly!

Thanks for all you do!

Amber


Hi Amber, 

I am pleased to hear you would like to give the Peppermint jumpsuit a go!

No need for an apology for any question. And this one definitely isn't obvious!

You could definitely make the jumpsuit in a heavier weight fabric, but be mindful of the amount of ease in the pattern. I'd suggest scrolling through the pattern hashtag to have a look at versions in heavier weight fabric to make sure you like the look of it. I have seen some great ones in denim, so it definitely can be done! 

The main thing that you need to think about is the finish of the armholes and neckline. The pattern gives you a facing piece, but it can be very difficult to pull the fabric through when using a thicker fabric. I speak from experience! I made a dress, using this pattern as a base, and it was almost impossible to pull the thick denim through the small shoulder seam. Above you can see how much fabric there is that needs to be pulled through the shoulder seams (this method is called the "burrito method").

I'd suggest either using bias binding to finish the armholes and neckline, or to widen the shoulder slightly, so that you have more space for the fabric to pass through. Although, potentially this method would work and it doesn't involve so much fabric passing through the shoulder.  

You can taper the legs by cutting through the lengthen and shorten line at the waist of the pattern (separating the pattern into a bodice and pants) and then following this tutorial. You then need to stick the two pieces back together and draw a nice smooth side seam, drawing a line of best fit through the seam.

Happy sewing, 

Emily


resources mentioned in this issue

  • The Peppermint jumpsuit pattern - can be found here.

  • Sew an all-in-one facing - article can be found here.

  • Tapering or widening pants - article can be found here.


For more issues of the Q & A series, you can check out the archive here.


What you’ve been making


More posts in the series

ISSUE 72 - Using striped fabric on the Collins top

THE Q & A SERIES

USING STRIPED FABRIC ON THE COLLINS TOP

Hi Emily

I'm making my third Collins top and I wanted to try something fun with stripes.

If I change the direction of the fabric like your model picture so some stripes are going different directions, do you have any advice on which pieces don't run parallel with the selvedge or does it not matter once the garment is all together? Should I also need to buy more fabric to allow for direction change?

Many thanks for your help.

Nicola


Hi Nicola,

I am pleased to hear you have been enjoying using the Collins top pattern and have another one in the works.

I would suggest cutting the pieces the same way I did. I think swapping them out, so that the side panels were cut the other way, might look a little strange at the side seams due to the stripes running horizontally and the pieces being A-line. You could swap the way the sleeves were cut if you like, so that the stripes run in the opposite direction to how I cut them. Make sure you are using a fabric that has a consistent amount of give in both directions, so that cutting on the crossgrain doesn't impact the drape. The fabric I used had the stripes running parallel to the selvedge - this is also something to keep in mind when considering using a striped fabric.

If you want to have a play with stripe direction on a technical drawing, you can download a copy here.

I just looked at the cutting plans, and it does look like you might need a little bit more fabric for changing the cutting direction. Potentially though, if you cut the pattern pieces on flat fabric, rather than on the fold, this might limit the amount of fabric you require. 

If you want to know exactly how much fabric you will need, you could print the A0 pattern out on A4 paper and work out what scale the pattern is in by measuring the test square. You could then place the pieces on a table / paper to work out how much fabric you need in relation to the width of fabric you have or want to buy. 

Let me know how you go!

Happy sewing,

Emily


resources mentioned in this issue

  • The Collins top pattern - can be found here.


For more issues of the Q & A series, you can check out the archive here.


What you’ve been making


More posts in the series

ISSUE 71 - Moving pockets on the Flynn jacket

THE Q & A SERIES

MOVING POCKETS ON THE FLYNN JACKET

Hi there,

I've purchased the Flynn Jacket pattern but being 5' 2" tall I'm concerned that the pockets are going to be too low for me.

Do you have a suggestion as to how I can make them higher?

Would appreciate your help.

Steph


Hi Steph,

Thank you for getting in touch.

 I am pleased to hear you will be making the Flynn jacket!

I would suggest shortening the jacket all together - this will bring the pockets up to the position you need them. The jacket was designed for a height of 5'7" - so you might want to take 2" or so out of the length. I'd hold the collar / hem piece up to your body to work out the length you would like the jacket to be. 

There are a couple of other reasons why you might also want to do this adjustment to the Flynn jacket:

  • You might be 170cm (5'7")  but have a shorter torso and longer legs than the pattern was designed for

  • You may prefer more of a cropped style than the original design

THE FIT OF THE FLYNN

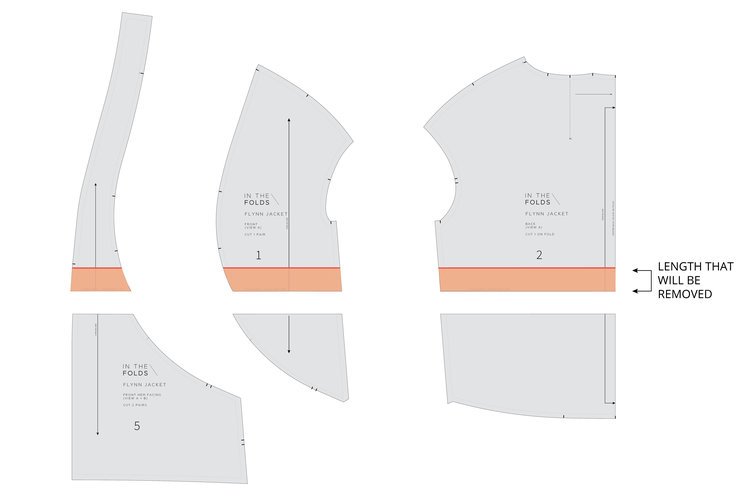
The Flynn jacket is designed to finish at the top of the thighs (and just below your bum at the back). Due to the design of the hem band and curved front panel, you can’t just simply cut length off the bottom of the jacket pattern as it will change the proportions of the jacket. Instead, you need to take length out from the middle of the pattern pieces, so that the proportions remain intact, and today that is what I am going to show you how to do! 

As is becoming quite common with my patterns, the Flynn jacket has some very unique panel lines. This means that making alterations to the pattern is slightly different to what you would need to do with a straight cut jacket. It’s not difficult at all, and the principle is the same, there is just a few extra steps you have to do.

As the Flynn jacket and Hove jacket have style lines in common, you can use this tutorial for shortening the Hove jacket too.

GETTING STARTED

STEP 1

The pieces you will need for this adjustment are the FRONT HEM FACING [5], FRONT [1] and BACK [2] (or the coordinating pattern pieces for View B). You can use the actual pattern pieces, or trace a copy if you would prefer to keep the original pieces intact.

STEP 2

You will need to work out how much length you would like to remove from the pattern. You can do this by looking at your toile / muslin (for more details on making a toile / muslin look at this post from the Rushcutter sew-along), or holding the pattern pieces up to your body and getting an idea of where they will sit on your body. 

If you would like to remove any more than 7.5cm (3in), I’d suggest taking 5cm - 7.5cm (2in - 3in) from the mid-section of the pattern (where the LENGTHEN / SHORTEN lines are) and then removing the remainder from the hem band section so that you don't alter the proportions of the jacket too much.

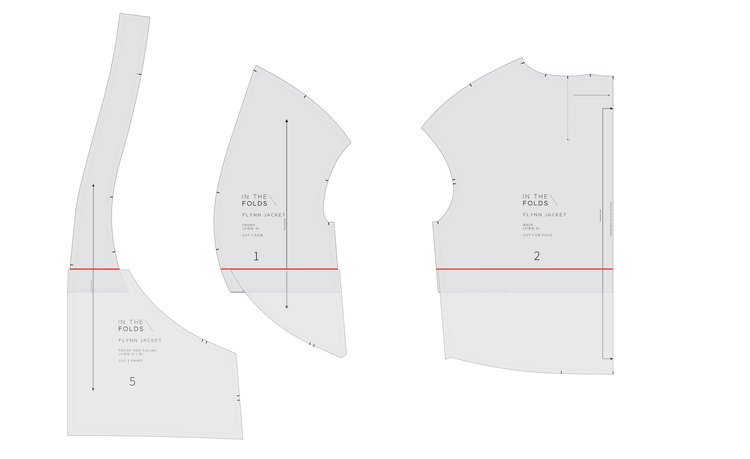
A Cut through the 'LENGTHEN / SHORTEN' line on the FRONT HEM FACING [5], FRONT [1] and BACK [2].

B Measuring up from the cut line, mark a horizontal line on each pattern piece, the distance of the amount of length you would like to remove. In the example, you can see the red line is 5cm (2in) above the cut line and the shaded section shows the amount of length that will be removed from the pattern piece.

STEP 3
A
Move the lower part of each pattern piece up to the line marked in the previous step. Use the grainline to ensure that you line the pieces up correctly.

B Glue or tape in place.

STEP 4
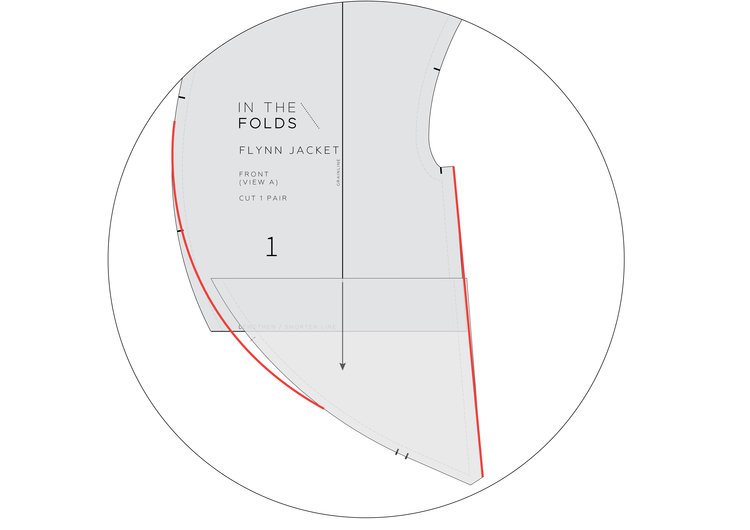
A Re-draw the seam lines with smooth lines over the adjustment. You will notice that in some cases you will be needing to add a little bit on to create the line of best fit, while in other cases you will need to shave a bit off. This will even out as you go around the pattern.

When marking a line over the area that has been altered, there might be a large gap between the two sides of the line. In this case - split the difference by marking a point in the centre of the area and drawing the line across this point. You can choose to trace the pattern on to fresh pattern paper or tape on small pieces of paper / masking tape where you need to fill a small gap to complete the seam line.

Cut off any excess paper that is outside of the new lines.

STEP 5
Check all seams are the correct length by "walking" the pattern pieces, as if you were sewing them together. For more details on how to do this, check out this tutorial.

Transfer / re-draw any notches that have been misplaced. Due to the shape of the pieces, some notches may not line up due to the different points the alteration was made. After checking that the seam is the correct length, transfer one notch to the other piece (and cross out the notch that is no longer in the correct position).

Happy sewing,

Emily


resources mentioned in this issue

  • The Flynn Jacket pattern - can be found here.


P.S. Don't have a question, but found this newsletter helpful? I'd love to hear from you! Get in touch and say hi.

For more issues of the Q & A series, you can check out the archive here.


What you’ve been making


More posts in the series

ISSUE 70 - Alternative seam finishes

HEADING - V1.jpg

Hello,

 I would like to sew the Ruffle Sleeve top but without french seams. 

How many centimetres do I have to consider for side seams and the rest?

Thank you very much,

Monica


Hi Monica,

 I am pleased to hear you are planning to make the Ruffle sleeve top

 The seam allowances on the pattern are 1.2cm (1/2in), which means you can leave them as they are and just sew a regular seam with a 1.2cm seam allowance, rather than two seams of 6mm (1/4in) which make up the French seam. You can then finish the seam allowance with overlocking or a zig-zag stitch.

If you were working on a different pattern and wanted to alternate seams that didn't need the same seam allowance, you can add or remove the required amount. For example, if you have a pattern that has 1cm (3/8in) seam allowances and you want to sew it with French seams, you can add 2mm to the edge of each seam. Alternatively, you could sew the French seams with smaller seams (5mm), although keep in mind sewing with this small of a seam allowance can be difficult.

If you would like to see some of our past posts about seam allowance, you can find them here:

Happy sewing,

Emily

Happy sewing,

 Emily


resources mentioned in this issue

  • The Ruffle Sleeve top pattern - can be found here.


P.S. Would you like to know what the Q & A series is all about? This page tells you a little bit more about the motive behind the series. Past issues from the Q & A series can be found here.

Don't have a question, but found this newsletter helpful? I'd love to hear from you! Get in touch and say hi. 


What you’ve been making


More posts in the series

ISSUE 69 - Reducing volume - The Rushcutter dress

REDUCING VOLUME THE RUSHCUTTER.jpg
HEADING - V1.jpg

Hello,

I have wanted to make Rushcutter for a long time but hesitate because of my narrow hips. In US sizes I am a 4 - 6, in UK sizes a 10 hips 35" / 88.9 cm. How could I lessen the fullness below the waist especially at the front? Too much fullness below doesn't convey the look of the design.

Thank you,

Mary


- Bend, United States


Hi Mary,

I am so pleased you would like to give the Rushcutter pattern a go!

To get started, take the FRONT [1], BACK [2] and SIDE PANEL [3] pieces. Remember to trace a copy of the pattern if you would like to return to the original. You will also need to alter the SIDE POCKET [6] as this attaches to the SIDE PANEL [3].

REDUCE VOLUME

Artboard 1.jpg

STEP 1
Mark the hip position on the pattern pieces with a horizontal line (perpendicular to the grainline). This doesn't need to be exact. You can find this point by holding the pattern up to your body and marking it. Start with the SIDE PANEL [3] as that will be the easiest to position on your body. Use this hip line to mark onto the FRONT [1] and BACK [2] pieces.

Consider how much volume you would like to remove from each panel piece. As you said in your question, you may choose to remove more volume from the front than the back. As you can see on the pattern pieces, there is more volume at the hem of the front piece.

When you know how much you would like to remove at the hem point on each seam, mark the amount on the hem. Join this point to the original stitch line. Join with a gentle curve so that you don't end up with a point in your seam. As you can see, this is above the hip line. The pattern has a lot of ease at the waist, so you can afford to lose some fullness above the hip line, and allows for a nice smooth transition from the original stitch line to the new stitch line.

Artboard 1 copy.jpg

STEP 2
You could just smooth out the lines (more on that below), add seam allowance back on and cut off the excess paper, but I'd suggest using the slash and spread technique so that you don't lose your notches. This is also a handy technique that may help you in the future, if reducing volume is a common alteration for you.

For the example, I have made the alteration to the SIDE PANEL [3], as that's the one we'll need for altering the pocket. The method will be the same for the FRONT [1] and BACK [2].

a Cut up the lines marked in STEP 1, until you reach the stitch line. Stop 1-2mm from the stitch line.

b Cut into the seam allowance towards the points you stopped cutting. Stop 1-2mm from the end of the cut line. This will create a small hinge of paper.

Artboard 3.jpg

STEP 3
a Reduce the volume in the lower section of the piece by rotating the cut sections to overlap the main part of the pattern. Have a play with how much you would like to remove. I'd suggest not going beyond a straight shape (you don't want the piece to become tapered). If you would like to remove exactly the amount you marked in STEP 1, swing the side pieces until the stitch line meets the cut line underneath. Once you are happy with the shape of the new piece, tape in place.

b You can mark in new smooth lines on the pattern piece, or trace onto a new piece of paper - whichever you prefer. If tracing, remember to transfer all notches and pattern markings. Where the hinge of paper is, mark the line as a nice smooth and gradual curve.

Repeat process for the FRONT [1] and BACK [2]. Check that the notches line up by walking the patterns together (more on that here).

ALTER POCKET

Artboard 2.jpg

STEP 4
a Place the SIDE POCKET [6] on the SIDE PANEL [3]. The pocket is 5mm (1/4in) wider at either end on the original pattern - this gives it some shape at the top of the pocket. Mark two points 5mm (1/4in) from the stitch line at the top of the pocket (not the folded section - that is the hem).

b Draw in the new stitch line on the SIDE POCKET [6] by tracing the stitch line from the pattern underneath and joining to the points marked in part a.

c Add seam allowance to the new pocket seams (1.2cm / 1/2in). Transfer notches from the pattern underneath to the new SIDE POCKET [6].

Artboard 2 copy.jpg

STEP 5
a Fold down the top hem allowance on the SIDE POCKET [6], as if it has been sewn.

b With the hem allowance still folded back, cut along the new pocket edge on each side. This will create the shaping required on the top hem allowance.

c Unfold hem and mark notches at the fold line

And that's it!

Happy sewing,

Emily


resources mentioned in this issue

  • Checking patterns - curved seams - can be found here.


P.S. Would you like to know what the Q & A series is all about? This page tells you a little bit more about the motive behind the series. Past issues from the Q & A series can be found here.

Don't have a question, but found this newsletter helpful? I'd love to hear from you! Get in touch and say hi. 


What you’ve been making


More posts in the series

ISSUE 68 - New things for In the Folds - Part 2

We received a lot of lovely emails in response to our last email about our new offering (that will be coming soon) and a couple of questions. I thought I'd put those questions and answers together in today's email and then get back to regular content next week.

THE Q & A SERIES

FUTURE OF THE Q&A SERIES EMAILS

Hi!
I don't have a specific question, I just want to tell you that your Ask-A-Question e-mails have been a delight and a joy. Since I started working I don't have so much time for... me!

Just reading your e-mails and looking at your beautiful curated photos with clean lines (and perfectly placed contrasting bias bound insides of the garment) makes me happy :)

Thank you so much and I hope you'll keep this e-mails even with your new business scheme of paid content.


Ana
- Osijek, Croatia


Hi Ana,

Thank you for the lovely email. I am so pleased to hear you are able to get some "me time" by sitting down to read these emails each week.

The Q&A series emails will definitely continue, even with the shift of our business model. It has always been important to me to provide free and accessible content and I have found this email series to be the best way to do that. Writing these emails (and receiving your lovely responses) is, and will continue to be, a highlight of my week.

I know that many of you don't have the time or resources to consider signing up to our new content offering, and that is okay. We will continue to serve you with our weekly email content and you can sit down to enjoy it, whenever you can squeeze it in. We still want you to be here to come along for the ride, in whatever capacity suits you.


THE Q & A SERIES

PATTERNS AS STAND-ALONE PRODUCTS

So excited for you for you plans for the subscription, but can I put in a little plea for those of us that just want to buy the patterns to be able to do so?

I really love your patterns but I'm not really in the market for a regular subscription and am skilled enough to mostly just be able to work things out on an ad hoc basis. I often think the market for intermediate level sewing is a little underserved, everything is focused on beginners. I do understand why, there are a lot more beginners than intermediate sewers, and they need more help, but it's frustrating nonetheless.

I wish you all the best with this, but I hope there will be an option for me to support you in future!


Franca
- Edinburgh, UK


Hi Franca,

Sorry I didn't mention this in the email - I probably should have as I think this will be a common question. Patterns will definitely still be available as stand alone products. New patterns will be released in the subscription, but will then be available for purchase individually at a later date. I haven't got the final details on how it will work just yet, but please know I want as many people as possible to sew my patterns and learn from my resources, so that means having them available inside and outside of the subscription model.

Happy sewing,

Emily


P.S. Don't have a question, but found this newsletter helpful? I'd love to hear from you! Get in touch and say hi.

For more issues of the Q & A series, you can check out the archive here.


More posts in the series

ISSUE 68 - New things for In the Folds

Well this is not really a question, I just love your patterns and wish there were more!

Lola
- Buenos Aires, Argentina


Hi Lola,

Thank you for your lovely message, and although it's not really a question, I thought it would be a good opportunity to let you know what we've been working on behind the scenes here at In the Folds.

You may have noticed that it’s been a (long) while since we released a new pattern. That is because we are changing the structure of our business model. This has been a long time in the works and not something I had planned to do, but over time it just became something that made sense for us.⁠

In October 2019, I started this email newsletter series. I wanted to share my knowledge with others and connect more deeply with the online sewing community. I was tired of communicating with likes and quick comments on Instagram. I wanted to form a deeper connection with those using my patterns. ⁠

I just went back and re-read the first email in the series. It reads (in part):⁠

‘Over the last few years of running In the Folds, I have struggled with the idea of sending an email newsletter. At a time when we are constantly bombarded with information from all different directions, I kept wondering what I could create that would be truly valuable to the community that I serve.⁠

I wanted to create something that you will look forward to receiving, something that will encourage you to sit down with a cup of tea and take it all in, not another piece of content that will interrupt your day, but something that will inspire and encourage you on your handmade journey.⁠

The format I settled on is the Q & A series, an opportunity to share the questions I often receive in my inbox, with all of you. I realised that my answer to one person's question is a chance for us all to learn something new and an opportunity to continue the conversation about the many different parts of the process of making our own clothes.⁠

It is my hope that this series will take us to interesting and unexpected places…’⁠

Once I got started, I was surprised by the influx of questions - from the broad, to the very specific. With the ability to Google anything at our very fingertips, I was surprised to see how much uncertainty there was and how many questions had gone unanswered. I have made it my mission to answer as many questions as possible, freely and openly, but it did plant a seed of an idea. What if we started creating content that really focussed on skill building from the ground up? What if we built the answers into the content we were creating, so you could stop wondering and get sewing. What if we focussed on learning more skills, instead of just making more clothes? ⁠

So that’s what we have been working on... I guess the series did take us to a very unexpected place like I had hoped! ⁠

Once we launch, we will be providing subscribers with content each month that will empower you to become a more confident maker. This will come in the form of a new pattern, a pattern hack kit, a fit kit or new pattern pieces to supplement an existing pattern. We’re not about encouraging you to make a completely new garment each month, but to focus on learning new skills on an ongoing basis. It is about building your skills, confidence and your wardrobe one piece at a time. ⁠

We also hope this move will help our business become healthier. I hope that it gives us a structure to adhere to in terms of pattern releases and roll-out, but also helps us to connect more deeply with the people we are serving. We plan to send out surveys and do polls within the community so the things we are making and the content we are creating, is actually what you need - in the same way I started the Q&A series. It will allow us to be flexible and nimble.

⁠I have spent so much time over the last few years creating content for free - as it has always been important to me that my work is accessible for as many as people as possible - but I have realised that a business cannot survive without a good balance between free and paid content. I need to work on balancing things out and that is what I hope this new offering will allow us to do. To keep producing high end free content, as well as offer an option for those who would like to learn more from us.

You may have read in our last email that we will be starting to work on expanding our size range. Unfortunately the first issues of our subscription will be released in our current size range (up to a 139cm / 55in hip). This is for a couple of reasons:⁠

I started work on this new offering over a year ago (I am a snail when it comes to producing new things) and at that time I didn’t yet have plans to expand the size range. ⁠

Although I am really excited to expand our size range and have a clear goal in mind of what size expansion means to In the Folds, we need the income from the subscription to invest in expanding our size range. I want to put the same thought, love and care into the new size range that I put into the original size range. To make this happen I will be investing in working with experts, a new patternmaker and potentially investing in upskilling - depending on the route we decide to go to create the new patterns. ⁠

I apologise if this is disappointing to hear. I know it will exclude some of you. Please just know that it is front and centre of our minds as we move forward.

We are so excited to show you what we have been working on and we hope that you'll come along with us on this new chapter!

Happy sewing,

Emily


P.S. Don't have a question, but found this newsletter helpful? I'd love to hear from you! Get in touch and say hi.

For more issues of the Q & A series, you can check out the archive here.


More posts in the series

ISSUE 67 - Extending the In the Folds size offering

Hi Emily!

I’m just so excited to have found you! I love your designs and the simplicity with fantastic, rich details your patterns offer. I didn’t know there was a movement in the direction of our clothing being cared for and intended to be worn for years. I just love that and support it 100%.

Now, to the ask...I want to ask you to please, please consider expanding your size offerings. I am outside of your largest size, but feel like I am close enough to it that I can extrapolate a couple sizes out for myself. All the seam lines will make it easier! I am about a size 5x/32-34 in the US and I don’t like to feel excluded from having the very designs/looks I search the Internet for. Maybe we are a bit chubbier over here in the US? We want to be awesome in your patterns, too! I belong to many curvy sewing groups and know you have a whole lot of large ladies that would love to purchase your patterns.

Maybe to help convince you, I’ll send a picture of my make of your awesome design adorning my beautiful outsized body!

Sincerely,
Phyllis


Hi Phyllis,

Thank you for your lovely email. I am pleased you found my website too and that the mission behind the brand resonates with your values.

Let me start out by aplogising. I am sorry that my current size offering excludes you from being able to use my patterns. This is not okay and is definitely something I am actively rectifying behind the scenes.

I would love to see a photo of you in one of my patterns, but it's definitely not required to convince me to expand my size chart. I already know it's the right thing for In the Folds to do and something that I am excited about working on. I hope to encourage as many makers as possible to make clothes they will wear, love and cherish, and to do that means we need to add to our size offerings. I am sorry that for the time being this means you having to go to the trouble of grading up one of my patterns yourself to make it work. This is a lot of work that you shouldn't have to do yourself.

I don't have a set timeline in place just yet, or the specifics of the new size chart, but I will announce this info in my newsletter as soon as I have a better idea of the plan.

In the meantime, while I get my act together, I'd strongly suggest checking out Muna and Broad patterns, if you haven't already. They have a gorgeous aesthetic and make patterns from a 41.5" - 71.5" hip (105cm - 182cm).

Thanks again for reaching out and letting me know what you'd like to see from In the Folds. I feel very lucky to be a part of this incredible community.

I can't wait for you (and many others) to be able to enjoy my patterns.

Happy sewing,

Emily


resources mentioned in this issue

  • Muna and Broad patterns can be found here.


P.S. Don't have a question, but found this newsletter helpful? I'd love to hear from you! Get in touch and say hi.

For more issues of the Q & A series, you can check out the archive here.


What you’ve been making


More posts in the series

ISSUE 66 - Seam allowances - A follow-up

HEADING - V1.jpg

Hello,

I read your
article about seam allowances and have a follow up question. Since there are so many new indie pattern designers there is the need to pay special attention to the main part of the garment seam allowance. They are all over the place! Some patterns stick to the standard 5/8'' and I have some that are as small as 1cm.

How do you determine that measurement and why such a drastic difference in so many companies?

Thanks!
Lorie


Hi Lorie,

Thank you for getting in touch and your follow-up to the post we wrote about seam allowances.

WHY YOU HAVE DIFFERENT SEAM ALLOWANCES

SEWING ISSUE 62.jpeg

1. The location of the seam. For example, larger seam allowances are normally required for the centre back and side seams of a garment. This provides strength as well as space for closures, such as zips.

Smaller seam allowances are required for curved seams such as armholes and necklines, as sewing a curve with a large seam allowance can lead to inaccuracies and the fabric puckering.

2. The other thing we consider when selecting seam allowances is the recommended fabric for a garment, and how we suggest sewists finish the seams in the particular pattern. For example, if you are making a silk chiffon top, it is best to use a narrow seam allowance, so you are not left with bulky seams that show through the fabric on the right side. A silk chiffon top is a delicate piece of clothing, that is not worn everyday and is normally hand washed, so it can afford to have smaller seam allowances. If you are making a pair of pants or a coat, you need seams that are stronger (particularly in places where tension is put on the seams - such as the crotch of pants) and therefore need a seam allowance that is wider than what you would use for a chiffon top.

IN THE FOLDS SEAM ALLOWANCES

IN THE FOLDS PATTERNS.jpeg

In saying that, we have specific seam allowances we use here at In the Folds so that there is consistency between our patterns. They are:

  • Main seams (shoulder seams, side seams etc.) - 1.2cm (1/2in)

  • Armholes and sleeve caps - 1.2cm (1/2in)

  • Necklines and armholes finished with facings / binding, pocket bag edges - 1cm (3/8in)

  • Centre back seam with a zip - 2cm (3/4in)

  • Hem allowance will range and will depend on the pattern

As you can see, when using one of our patterns, the majority of seams will be 1.2cm (1/2in) and when you get to finishing armholes and necklines, our seam allowances reduce to 1cm (3/8in).

DIFFERING SEAM ALLOWANCE BETWEEN DESIGNERS

IN THE FOLDS PATTERNS HOVE.jpeg

For the second part of your question, I'd say the range of differing seam allowances between designers comes down to factors such as the location of designers and personal preferences. What is preferred and taught can also change over time, so this may also lead to the differences. There is not consistency in fashion education between countries, so many patternmakers are likely just using the seam allowances they were taught. Other designers, who may not have studied fashion, may have chosen the seam allowances they like to use in their own projects.


I finished my fashion and textiles degree 10 years ago and recently started teaching first year patternmaking at the same university I went to. I was surprised to see that some of the preferred seam allowances had changed in that time. When I was taught, we used a range of seam allowances and their use depended on the seam. Now, we are teaching students to use 1.2cm (1/2in) for all seams, except for armholes / necklines that will be faced or bagged out, and then it reduces to 6mm (1/4in). Neither method is incorrect, it is just a different approach. This is the same when you compare seam allowances between companies. Some companies favour the more industrial seam allowances - such as Style Arc or Tessuti. Other companies will be more generous with their seam allowances as they may think it's more beginner friendly.

When I started In the Folds I planned to use 6mm (1/4in) seam allowance for necklines and armholes that would be faced / bound, like I had been taught at university. The pattern testers did not like this! So I decided to increase it to 1cm (3/8in) as I thought it would be less daunting for makers, and for those that want it to be 6mm (1/4in), they can always trim it back.

WHEN SEAM ALLOWANCE VARIES

IN THE FOLDS PATTERNS 3.jpeg

If you are worried about mixing up seam allowances between patterns, I'd suggest looking at the pattern or instructions to see if you can work out the way seam allowances have been added. Write it on a post-it and stick it to your machine while you sew the garment. This way you can just relax into it, without feeling like you need to check the seam allowance on every step. For example, if using one of our patterns, I'd suggest writing - 'Main seams 1.2cm (1/2in), bagged out areas 1cm (3/8in).' I'd also suggest only writing the measurement format you use - for example, I work in centimetres, so I would not write the inches measurement on my post-it. When you're done, you can stick it to the pattern so that you have it ready to go the next time you use the pattern.


I hope that helps!

Happy sewing,

Emily


resources mentioned in this issue

  • The Q&A series - Sewing seam allowance - can be found here.


P.S. Would you like to know what the Q & A series is all about? This page tells you a little bit more about the motive behind the series. Past issues from the Q & A series can be found here.

Don't have a question, but found this newsletter helpful? I'd love to hear from you! Get in touch and say hi. 


What you’ve been making


More posts in the series

ISSUE 65 - Fitting the Darlow pants

PINTEREST HEADERS TEMPLATE_LATEST.jpg
HEADING - V1.jpg

Hello there!

I bought the Darlow pants pattern a few months ago, because I love how the panels look. And I have really enjoyed making a toile. Your instructions are so good and I appreciate the thoughtfulness that went into the design and all the details.

For these reasons, I really want them to fit! However, I seem to be in between sizes G and H. Size G fits fairly well around my hips but I can’t quite get the waist to close, it’s just a bit too tight, where as size H is just a little too big around the waist, hips, crotch. I’ve made both sizes out of muslin. I’m not sure where to go from here. Would you have any advise? My sewing skills are a little beyond for beginner, but not much more!

Many thanks in advance for any feedback!

All the best from Toronto, Canada!

Florencia


Hi Florencia,

I am so pleased you are making the Darlow pants and have enjoyed working with the pattern so far!

You're right, the Darlow pants are not a regular pattern, so need to be altered in a slightly different way.

Artboard 1.jpg

STEP 1
If your hip measurement is one size larger than your waist, you can choose to only make alterations to the front leg piece - as illustrated. 

Take the FRONT LEG [5] pattern piece that corresponds with your hip measurement

Mark two lines that cut through the 'yoke' section of the FRONT LEG, being careful to avoid notches.

Artboard 1 copy 3.jpg

STEP 2
Use the 'cut and spread' technique* to alter the FRONT LEG [5] piece. To do this, cut in from the top of each line marked in STEP 1 and stop when you get to the seam allowance line. Cut in to the seam allowance from the other side of the line, leaving a small "hinge" that you can use to spread the pattern.  

*For more detail on the cut and spread technique, see this tutorial.

Artboard 1 copy 2.jpg

STEP 3
In this case of the example, we are adding 5cm (2in) total from the top edge of the FRONT LEG [5] which we refer to as the 'yoke' of the pants. This equates to 2.5cm (1in) added to each piece (as the piece is cut as a pair). The alteration will be distributed through 2 points (the two lines marked in STEP 1) - so 1.2cm (½in) will be added at each point. Tape some paper on one side of each cut line. Mark the amount you will be adding on the piece of paper and rotate the cut piece until the edge lines up with the piece marked. Tape or glue in place.

Re-draw the seam lines with a nice smooth curve.

Mark the amount you will be removing from each point, on one side of the cut line.

You will now need to use the waistband pieces from the pattern size that is one size larger than the leg pieces. Walk the waistband pieces into the top of the FRONT LEG [5] to relocate the notches.

If you would like more info on this particular technique, or any adjustments for the Darlow pants pattern, take a look at the Darlow pants Fit Kit.

Happy sewing,

Emily


resources mentioned in this issue

  • The Darlow pants pattern can be found here.

  • Adding volume to a pattern - tutorial can be found here.

  • Darlow pants Fit Kit can be found here.


P.S. Would you like to know what the Q & A series is all about? This page tells you a little bit more about the motive behind the series. Past issues from the Q & A series can be found here.

Don't have a question, but found this newsletter helpful? I'd love to hear from you! Get in touch and say hi. 


What you’ve been making

Darlow pants made by @threadstaylors

Darlow pants made by @threadstaylors

Flynn jacket made by @fabric_scraps

Flynn jacket made by @fabric_scraps


More posts in the series

ISSUE 64 - Finishing transparent fabrics

HEADING - V1.jpg

Hi there,

I’m making your Ruffle Sleeve top and have chosen a more transparent fabric. Instead of sewing it with the facing, is there a better method?

Thank you!

Juliet


Hi Juliet,

Thanks for your question! I think this is a problem a lot of people come across. It's great to start thinking about finishing options before you start cutting and sewing your fabric!

There are a few options you could use for the Ruffle sleeve top instead of a facing:

BINDING THE NECKLINE

NECKLINE BINDING.jpeg

You may like to finish it with blind binding - a binding that is stitched on the inside. Have a look at our how to sew binding tutorial on the blog. It is likely the fabric will appear darker in this area if you're using a transparent fabric, but it should look like a neat small line along the neckline, rather than being able to see the facing line through the top.

LINING THE TOP

Artboard 2.jpg

Another option is to cut two of the front and back pieces so that you can line the body pieces of the top. This would make it less transparent and give an even finish of transparency on the front and back. For the lining pieces - cut 2cm from the hem so that it is shorter than the outer layer of fabric. Remember with this option, the sleeve would still be transparent.

For sewing:

STEP 1
Sew the shoulders and side seams on both the outer and the lining pieces.

STEP 2
At the neckline, place the right sides together of the lining and the outer layer and pin - using the shoulder seams as a guide. Stitch with the neckline 1cm (⅜in) seam allowance. 

STEP 3
Grade the seam allowance - particularly focusing on the point at the centre front. Clip into the seam allowance around the curve of the back neck. 

STEP 4
Use your fingers to press the seam allowance towards the lining and understitch around the neckline (this will help the lining remain on the inside of the top). 

Turn the lining to the inside of the top and give it a good press. 

STEP 5
At the armholes, baste (sew using a long stitch) the two layers together so you can treat them as one when attaching to the sleeve. Attach the sleeve following the instructions from the pattern, remember to treat the outer (long pieces) as the right side when attaching the sleeve.

STEP 6
Finish the hem of the outer top and lining separately. The lining will sit 2cm (¾in) shorter than the outer layer.

I hope this has given you some food for thought and you are now ready to get started on your Ruffle sleeve top.

Happy sewing!

Alys


resources mentioned in this issue

  • The Ruffle sleeve top pattern - can be found here.

  • How to sew binding - tutorial can be found here.


P.S. Would you like to know what the Q & A series is all about? This page tells you a little bit more about the motive behind the series. Past issues from the Q & A series can be found here.

Don't have a question, but found this newsletter helpful? I'd love to hear from you! Get in touch and say hi. 


What you’ve been making


More posts in the series